Advanced: различия между версиями
Alina (обсуждение | вклад) |
Alina (обсуждение | вклад) |
||
| (не показано 8 промежуточных версий этого же участника) | |||
| Строка 1: | Строка 1: | ||
| − | == Videos | + | = <span id = 'videos'> Videos </span> = |
Here you can add a video in mp4\mov\m4v\mkv\flv\wmv\avi formats to display them as an additional stream in the conference. | Here you can add a video in mp4\mov\m4v\mkv\flv\wmv\avi formats to display them as an additional stream in the conference. | ||
| Строка 17: | Строка 17: | ||
[[Файл:Videos 3.jpg|800px|безрамки|центр|Videos 3]] | [[Файл:Videos 3.jpg|800px|безрамки|центр|Videos 3]] | ||
| − | == Constructor | + | = <span id = 'constructor'> Constructor </span> = |
This page is available when activation of the layout designer license. The layout designer allows you to create a unique layout with specified properties (roles), which can determine the location of the lecturer, the previous lecturer, scrolling location, displaying a blank screen or auto-select position - the settings with a default value. | This page is available when activation of the layout designer license. The layout designer allows you to create a unique layout with specified properties (roles), which can determine the location of the lecturer, the previous lecturer, scrolling location, displaying a blank screen or auto-select position - the settings with a default value. | ||
| Строка 25: | Строка 25: | ||
# "Layout templates" is the block that contains the set of default layouts (8 pieces) which are available for editing in the "Layout settings" block; | # "Layout templates" is the block that contains the set of default layouts (8 pieces) which are available for editing in the "Layout settings" block; | ||
| − | # | + | # "Created layouts" is the block displays layouts previously created in the designer. Layout data is also available for editing in the "Layout settings" block; |
# "Layout settings" is the block in which layouts are created or edited; | # "Layout settings" is the block in which layouts are created or edited; | ||
# "Controls elements" is the block in which you can change the number of layout positions, layer number, clear the layout from positions and save the created layout. | # "Controls elements" is the block in which you can change the number of layout positions, layer number, clear the layout from positions and save the created layout. | ||
| Строка 31: | Строка 31: | ||
'''Creating a new layout''' | '''Creating a new layout''' | ||
| − | To create a new layout you must determine the number of layout layers and the size of each layer. Each layout can have up to three layers and the size of each layer depends on the number of positions: from 1 to 12*12 positions. | + | To create a new layout you must determine the number of layout layers and the size of each layer. Each layout can have up to three layers and the size of each layer depends on the number of positions: from 1 to 12*12 positions. |
| + | Positions in the layout are the panel for displaying a participant in the layout. Positions are added by clicking on the layer grid and can be stretched across several cells of the layout grid by dragging the position down while holding the cursor on the lower right edge of the position. Positions can be moved around the layout by hovering the mouse cursor and holding down the left button on the position. All positions are numbered in order; this order will remain when these positions are occupied by participants connected to the conference provided that the positions are defined with the auto-selection role. After creating a position it becomes possible to change the number of the created position or the role of the position in the "Edit position" window by left-clicking on the created position. | ||
| + | |||
| + | Roles and positions: | ||
| + | |||
| + | # lecturer is the position role for displaying a voice-active conference participant or a participant designated as a lecturer by a conference administrator (displayed in bright turquoise in the layout designer); | ||
| + | # previous lecturer is the position role for displaying a participant who was a lecturer before the current lecturer of the conference (displayed in orange in the layout designer); | ||
| + | # auto-selection is the default position role allows a connected participant not assigned to other positions to occupy positions (displayed in light gray in the layout designer); | ||
| + | # blank screen is the layout position that always remains unoccupied by conference participants (displayed in dark gray in the layout designer); | ||
| + | # scrolling is the role of the layout position for the rotation of participants who do not have enough space on the layout; they will appear in this position according to the "Scrolling period" timeout defined in the conference settings (the position is colored blue in the layout designer). | ||
| + | |||
| + | The order of placing and displaying participants in layers: layer 0 is the bottom layer; layer 1 positions will be displayed on top of layer 0 positions; layer 2 positions will be displayed on top of layer 1 which are displayed on top of layer 0. This way you can create a layout in which the participants' images will be superimposed on each other in three layers. | ||
| + | [[Файл:Layout Designer 2.jpg|800px|безрамки|центр|Layout Designer 2]] | ||
| + | The created layout is saved after clicking on the "Save as new" button located in the "Controls elements" block. After saving the layout will appear in the “Created layouts” block, as well as on the "Conference management" page in the "Select layout" window in the "Custom layouts" block. | ||
| + | |||
| + | Note: | ||
| + | 1) Multi-layer layouts will not be available in the "Do not show your own video" conference mode. | ||
| + | 2) Roles assigned in the layout will only work if the location of the participants in the conference is not determined by the conference administrator. | ||
Текущая версия на 10:50, 13 марта 2025
Videos
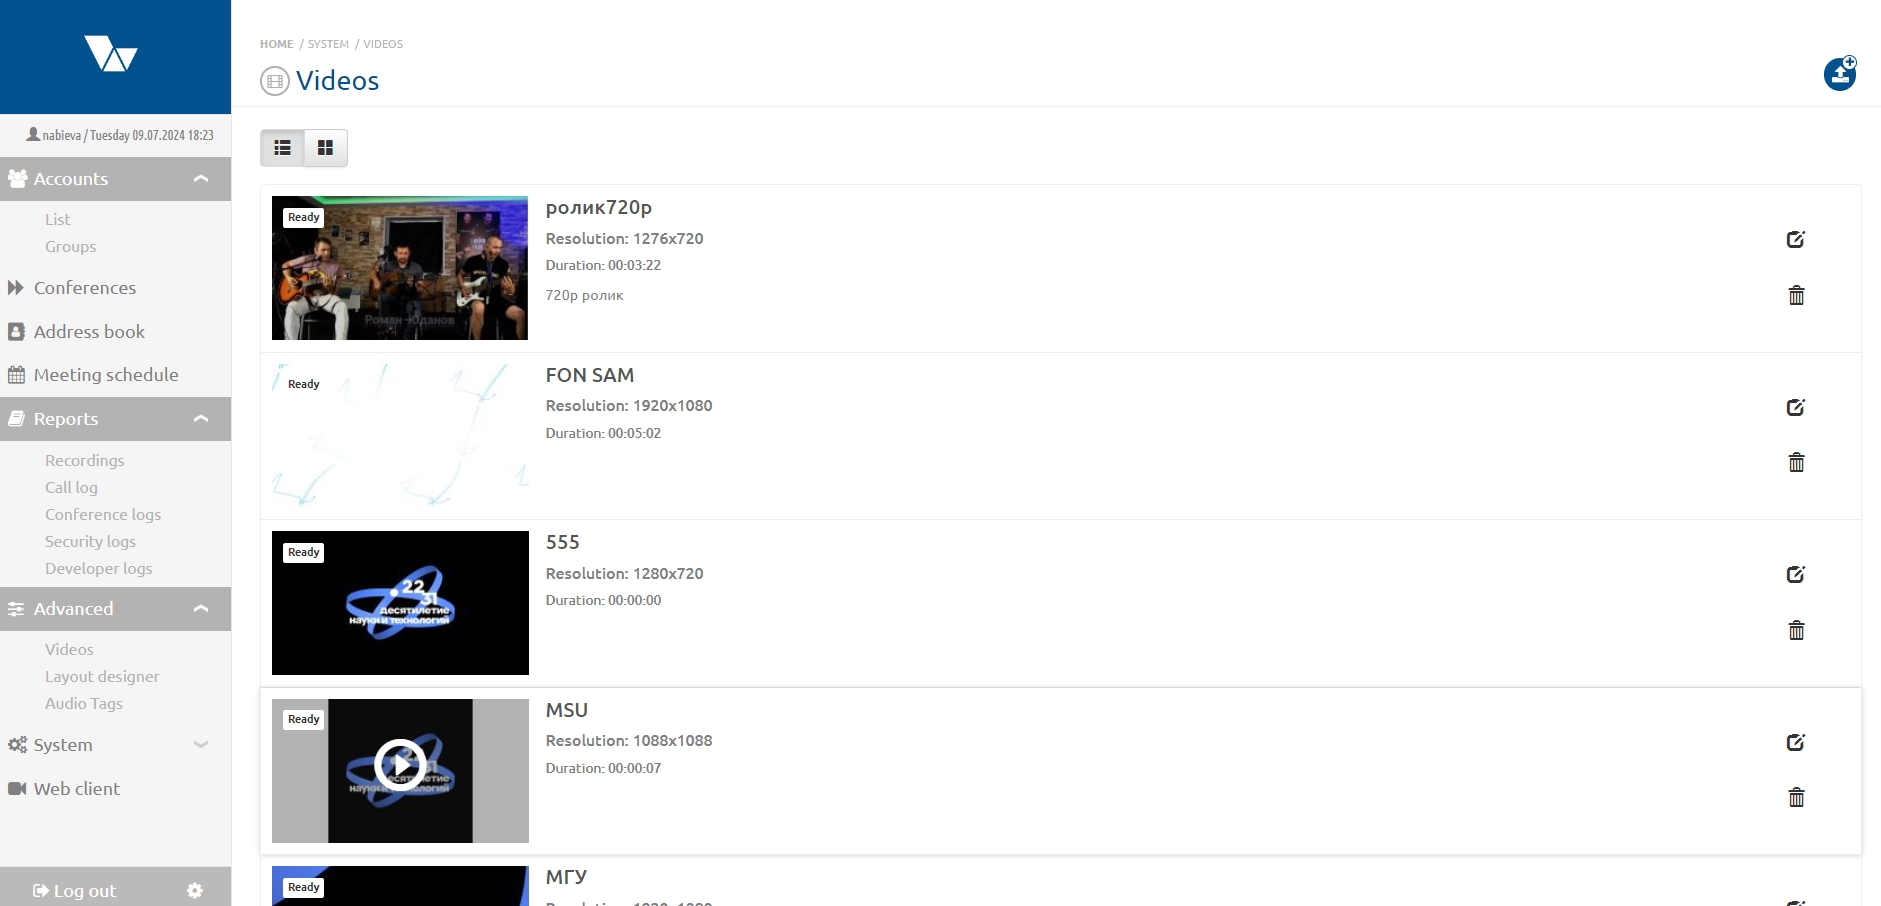
Here you can add a video in mp4\mov\m4v\mkv\flv\wmv\avi formats to display them as an additional stream in the conference.
The size of the uploaded video file should not exceed 512MB and the bitrate should not exceed 6Mbit/s. Videos of this size are loaded using the Firefox browser.
More information about the requirements, as well as about converting a video to the required format: Converting a video to the recommended format.
Videos adding
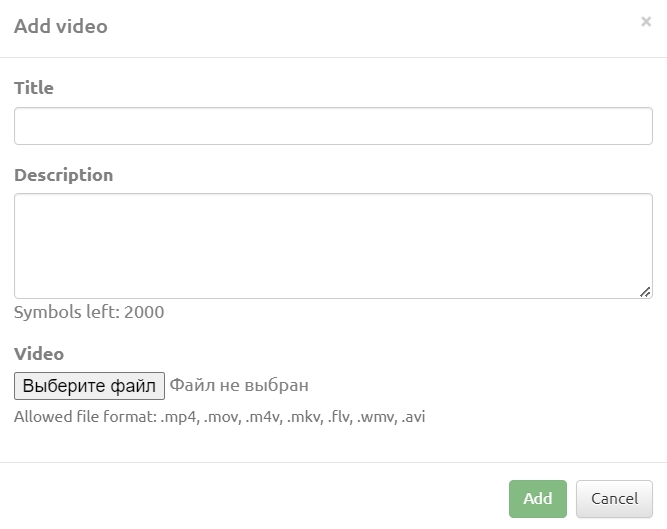
To add a video use the "Add video" button then fill in the "Title" and "Description" fields and click the "Select File" button. After selecting a video the "Add" button will become active; click on it.
Removing video or editing a video title
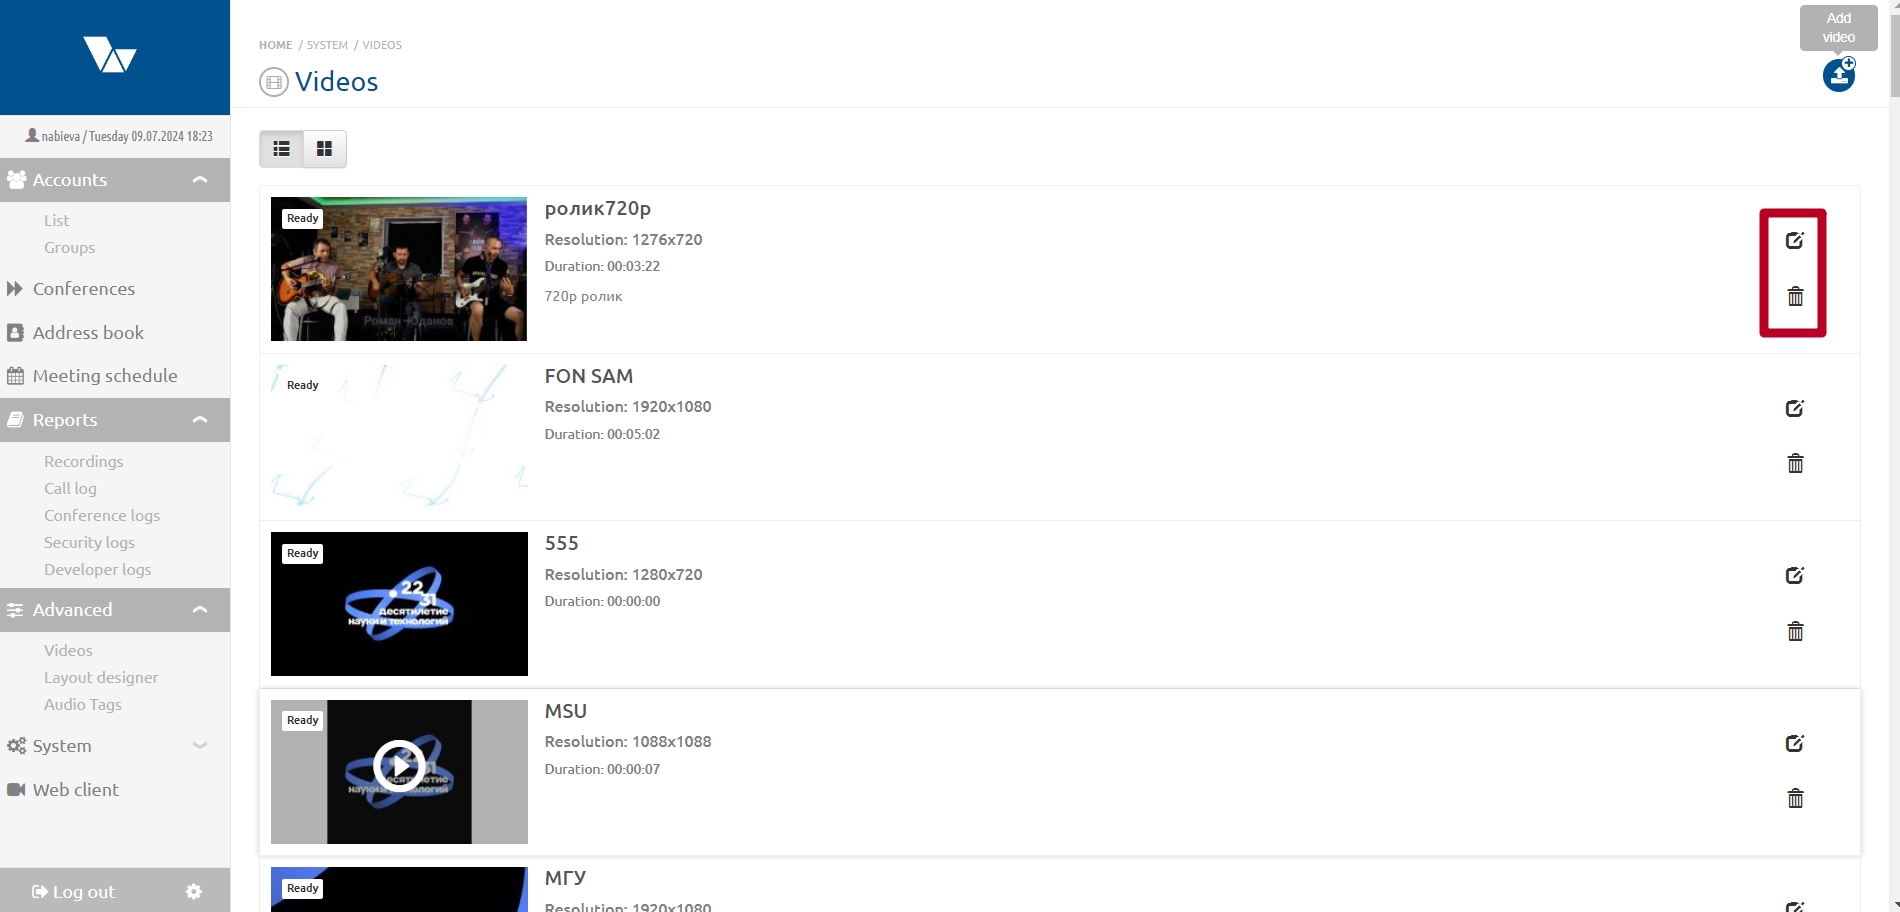
Editing the title or deleting a previously downloaded video is done using the buttons opposite to the video title.
Constructor
This page is available when activation of the layout designer license. The layout designer allows you to create a unique layout with specified properties (roles), which can determine the location of the lecturer, the previous lecturer, scrolling location, displaying a blank screen or auto-select position - the settings with a default value.
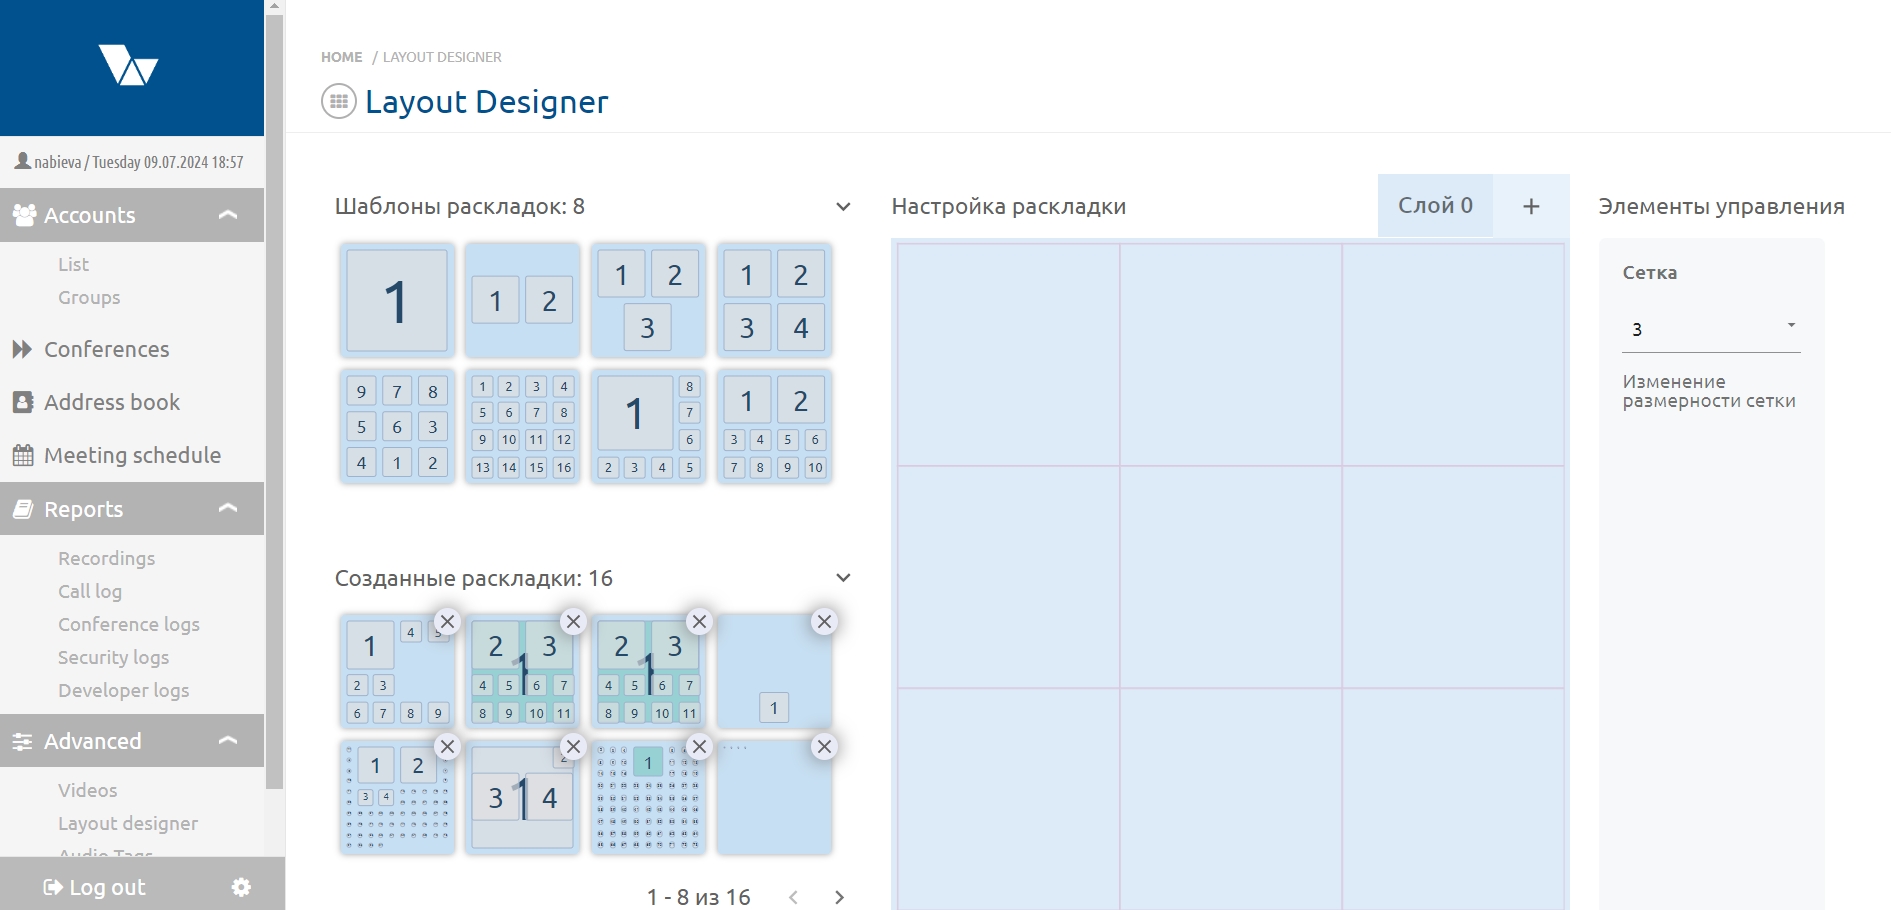
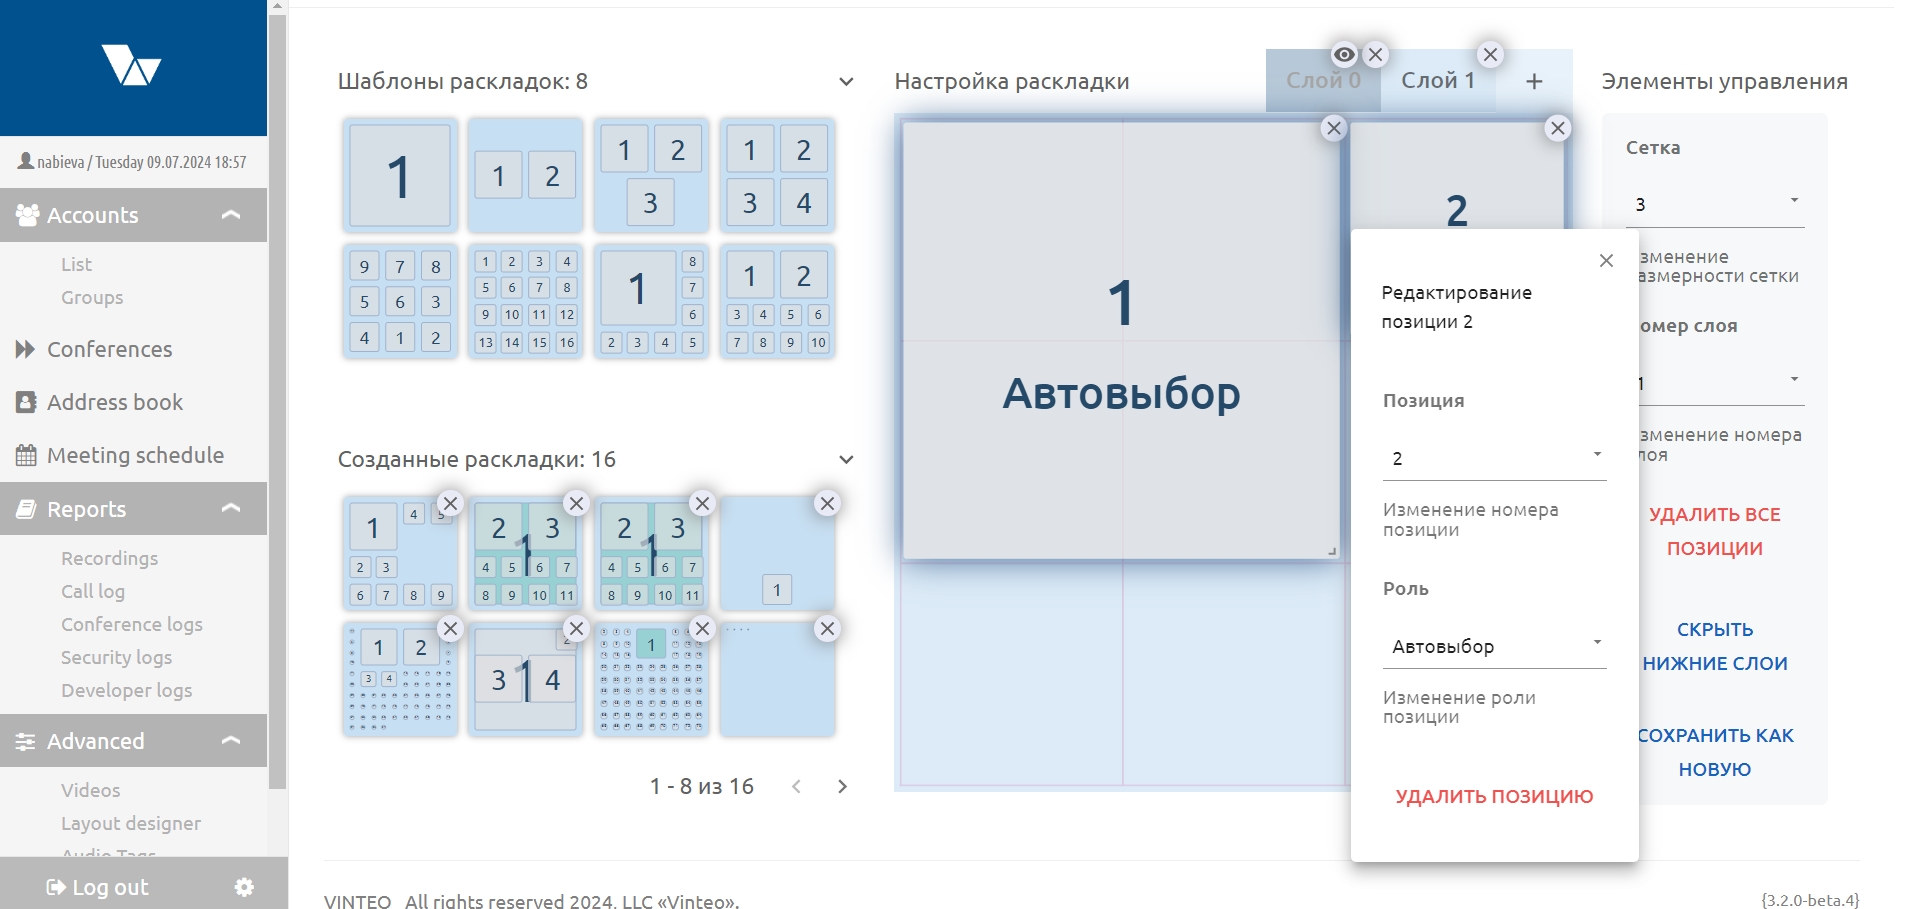
The page contains blocks:
- "Layout templates" is the block that contains the set of default layouts (8 pieces) which are available for editing in the "Layout settings" block;
- "Created layouts" is the block displays layouts previously created in the designer. Layout data is also available for editing in the "Layout settings" block;
- "Layout settings" is the block in which layouts are created or edited;
- "Controls elements" is the block in which you can change the number of layout positions, layer number, clear the layout from positions and save the created layout.
Creating a new layout
To create a new layout you must determine the number of layout layers and the size of each layer. Each layout can have up to three layers and the size of each layer depends on the number of positions: from 1 to 12*12 positions. Positions in the layout are the panel for displaying a participant in the layout. Positions are added by clicking on the layer grid and can be stretched across several cells of the layout grid by dragging the position down while holding the cursor on the lower right edge of the position. Positions can be moved around the layout by hovering the mouse cursor and holding down the left button on the position. All positions are numbered in order; this order will remain when these positions are occupied by participants connected to the conference provided that the positions are defined with the auto-selection role. After creating a position it becomes possible to change the number of the created position or the role of the position in the "Edit position" window by left-clicking on the created position.
Roles and positions:
- lecturer is the position role for displaying a voice-active conference participant or a participant designated as a lecturer by a conference administrator (displayed in bright turquoise in the layout designer);
- previous lecturer is the position role for displaying a participant who was a lecturer before the current lecturer of the conference (displayed in orange in the layout designer);
- auto-selection is the default position role allows a connected participant not assigned to other positions to occupy positions (displayed in light gray in the layout designer);
- blank screen is the layout position that always remains unoccupied by conference participants (displayed in dark gray in the layout designer);
- scrolling is the role of the layout position for the rotation of participants who do not have enough space on the layout; they will appear in this position according to the "Scrolling period" timeout defined in the conference settings (the position is colored blue in the layout designer).
The order of placing and displaying participants in layers: layer 0 is the bottom layer; layer 1 positions will be displayed on top of layer 0 positions; layer 2 positions will be displayed on top of layer 1 which are displayed on top of layer 0. This way you can create a layout in which the participants' images will be superimposed on each other in three layers.
The created layout is saved after clicking on the "Save as new" button located in the "Controls elements" block. After saving the layout will appear in the “Created layouts” block, as well as on the "Conference management" page in the "Select layout" window in the "Custom layouts" block.
Note:
1) Multi-layer layouts will not be available in the "Do not show your own video" conference mode.
2) Roles assigned in the layout will only work if the location of the participants in the conference is not determined by the conference administrator.
