"System settings" menu: различия между версиями
Alina (обсуждение | вклад) |
Alina (обсуждение | вклад) |
||
| Строка 59: | Строка 59: | ||
# move focus to the page; the "Test" interface field will be highlighted; | # move focus to the page; the "Test" interface field will be highlighted; | ||
# Press the "OK" control button (19). | # Press the "OK" control button (19). | ||
| + | [[Файл:System settings 4.jpg|800px|безрамки|центр|System settings 4]] | ||
Версия 15:08, 3 сентября 2024
Содержание
Network
Configurations with one network interface and with two network interfaces are possible.
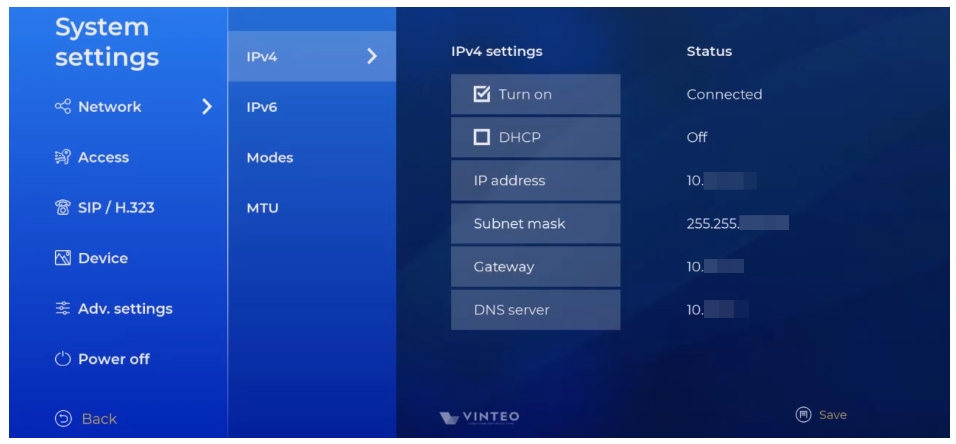
IPv4
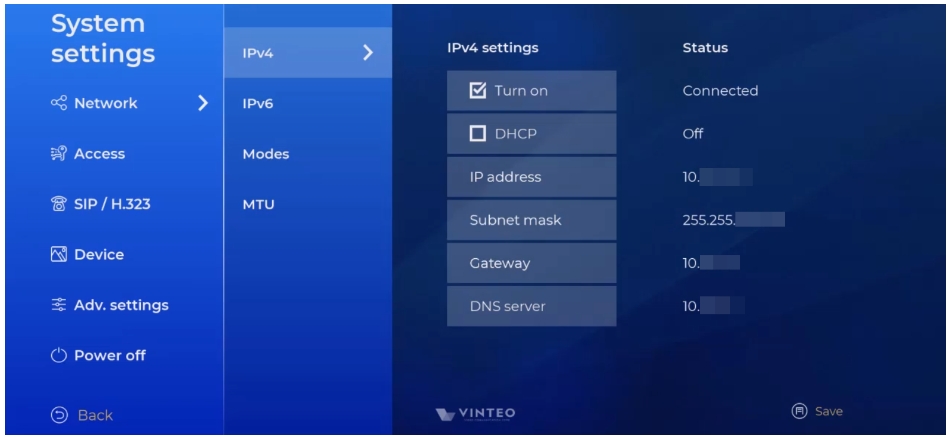
IPv4 settings “Turn on” checkbox activates the IPv4 protocol (if it disabled the protocol is unavailable) with access to the settings:
- DHCP is the checkbox for enabling or disabling the dynamic host configuration protocol. If the checkbox is enabled the network device automatically receives an IP address and other parameters from the DHCP server; manual settings are not available. If the checkbox is disabled IPv4 protocol settings are available:
- "IP address": the page with the input module [Appendix A] will open;
- "Subnet mask": the page with the input module [Appendix A] will open;
- "Gateway": the page with the input module [Appendix A] will open;
- "DNS server": the page with the input module [Appendix A] will open;
IPv6
The setup steps are similar to the IPv4 setup description.
Speed
Network interface throughput is the maximum amount of data received or transmitted in a given unit of time.
Duplex
Communication way using network interface:
- Duplex is the simultaneous two-way transmission of information.
- Half-duplex is the transmission over one communication channel in both directions but with time division (at any given moment, transmission is carried out in only one direction).
Accesses
SSH access (checkbox)
Checkbox to enable or disable SSH access. When you go through the Quick Setup Wizard SSH access is disabled by default.
Web access (checkbox)
Checkbox to enable or disable access to the web interface. When you go through the Quick Setup Wizard; web access is enabled by default.
PIN for remote control (checkbox)
Page with PIN settings for accessing the "System settings" menu. When going through the Quick Setup Wizard it is disabled by default.
If a PIN code is set; access to the "System settings" menu is only possible after entering the PIN code.
To enter the "System settings" menu after setting a PIN code:
- the entered characters are hidden by asterisks (*);
- symbols entered from the remote control (keyboard) are not displayed on the on-screen keyboard;
- if the PIN code is entered incorrectly an error message is displayed.
Password for web
Page with settings for password access to the web interface.
SIP/H.323
SIP
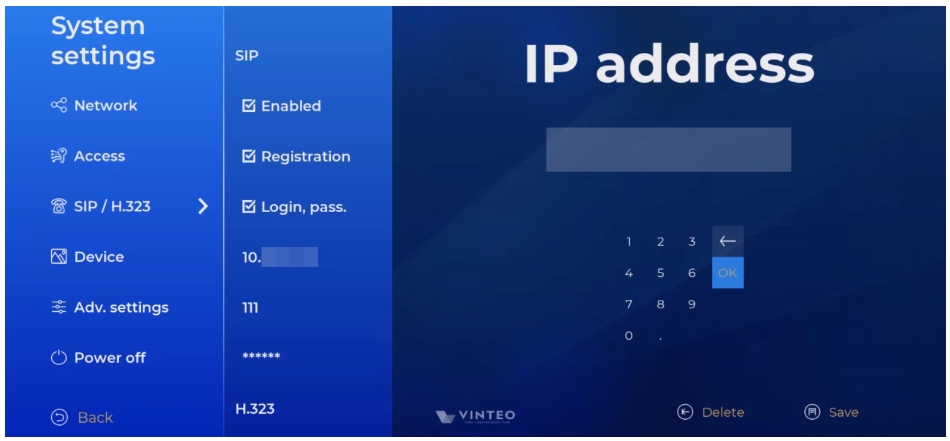
SIP settings
The "Enabled" checkbox activates the protocol (if the checkbox is unchecked SIP calls are not available): registration is the checkbox to enable or disable the option.
If the checkbox is enabled registration and settings are available:
- login, password is the checkbox to enable or disable the function of using login and password during registration. If the checkbox is enabled authorization is used during registration;
- registration server: the page with the input module [Appendix A] will open;
- registration login: the page with the input module [Appendix A] will open;
- registration password: the page with the input module [Appendix A] will open.
H.323
H.323 settings
The steps are similar to the description of SIP settings.
Devices
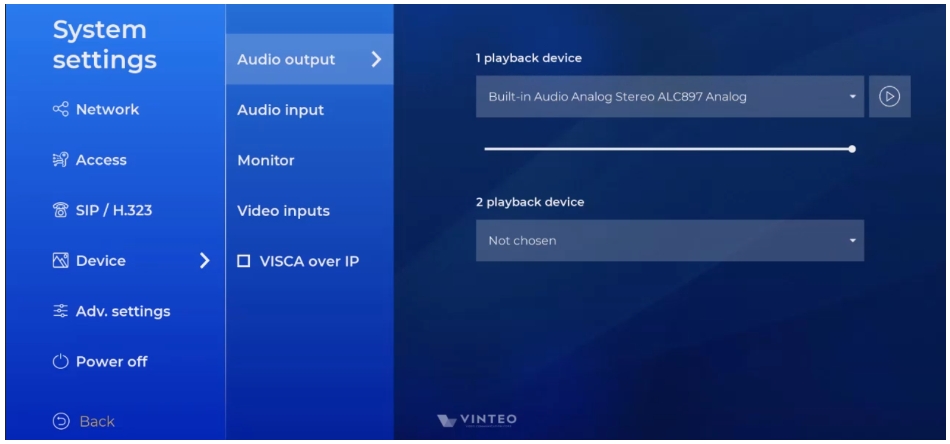
Audio output
Speaker settings page:
Playback device is the list of available devices.The line displays the active device that can be replaced:
- move focus to the page; the "Test" interface field will be highlighted;
- press the control buttons “↑ Up” (4) and “↓ Down” (7) to select the device;
- exit the page using the “Back” control button (8); the selected device will be saved.
Test is the interface field launches a sound file to check the speaker's operation:
- move focus to the page; the "Test" interface field will be highlighted;
- Press the "OK" control button (19).


