Vinteo Server Installation Manual
English / Vinteo Server Installation Manual
This document is an installation manual for the VINTEO VCS Server software. This manual may not reflect some modifications of the software. If you notice or suspect any errors or misprints in the manual, please notify VINTEO. This manual may only be used to support the functionality of products installed under contract with VINTEO. The manual may be transferred on the basis of a contract under which the products are (have been or will be) installed, or the explicit consent of VINTEO. to the use of this manual. If you should happen to receive this manual in any other way, please notify VINTEO by the address below. All examples contained in the manual (including sample reports and screen forms) have been compiled on the basis of the test database of VINTEO. Any coincidence of names, company names and other information with real data is random. All trademarks and registered trademarks used are the property of their respective owners and are used solely to identify the software or companies. All property rights remain with VINTEO in accordance with the applicable law.
Software preparation
Computer requirements for the preparation of the installation flash disk
- Processor with a clock frequency of 1 GHz; - 512 MB RAM - Colour monitor with screen resolution 800x600 - Keyboard; - Mouse manipulator.
Operating system
Windows XP, Vista, 7, 8.1, 10
Support software
Rufus
VINTEO VCS SERVER image
https://download.vinteo.com/VinteoServer/
Software setup
Rufus software doesn't require installation, but in Windows 7 and higher it's required to be run as administrator.
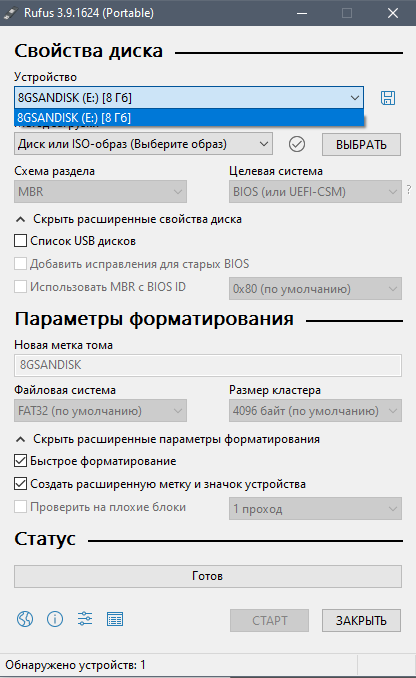
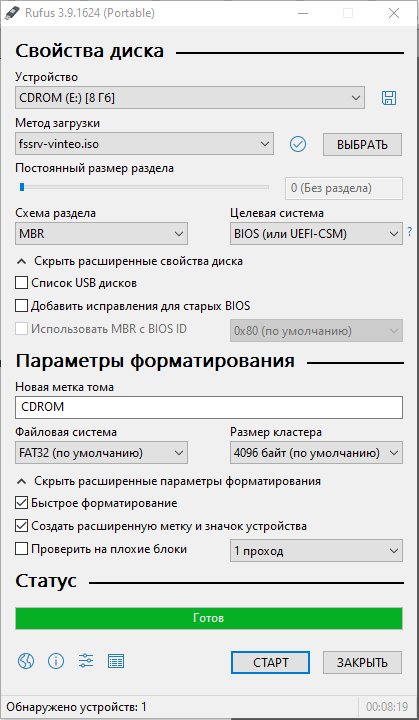
Step 1. Start Rufus, select USB drive you need. Note that the minimum size of a bootable USB disk is 8 GB
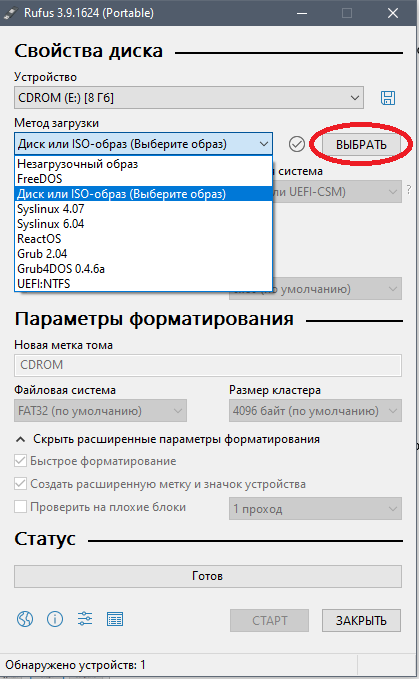
Step 2. In "Download method" dropdown list select "Disk or ISO (Choose image)" image installation disk and press "Select" button where you point to *.iso file you have just downloaded
Step 3: Choose a partition layout, destination and file system
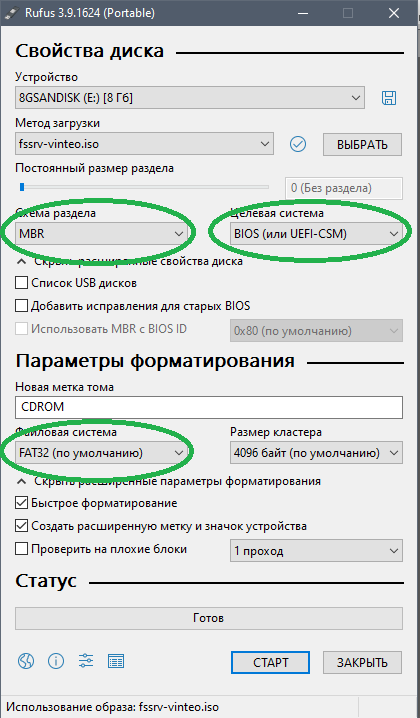 Make sure that "Partition scheme", "Target system" and "File system" are set to "MBR", "BIOS(or UEFI-CSM)" and "FAT32" respectively. The other menu items do not need to be changed.
Step 4: Start creating bootable USB-Flash
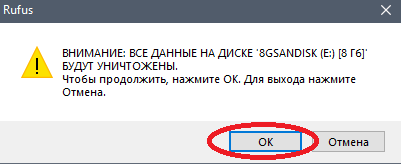
Press "Start" and "OK" button.
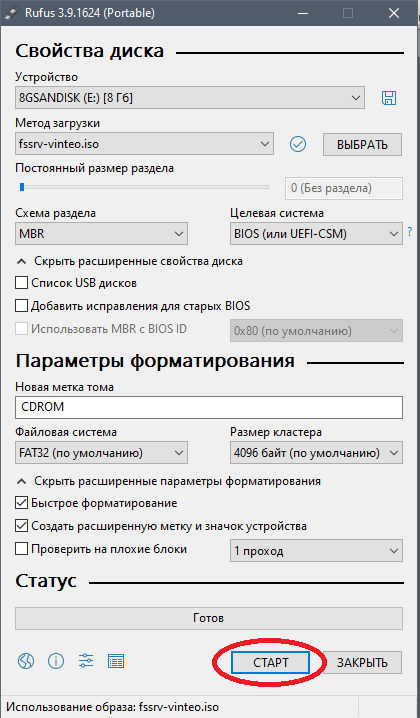
Step 5: Confirming the deletion of all data on the USB flash
Step 6. Finish preparing a bootable USB-Flash
After a successful write, Rufus will notify you with a green bar saying "Ready" at the bottom of the program window. You can close the program and remove the USB-Flash card.
Preparing the Hardware Platform for Startup
Once the flash drive has been prepared you need to insert it into one of the USB ports on the hardware platform and select it as a boot port.
Warning: The port you are using must support USB 2.0, installation from a 3.0 port may not work correctly.
The boot device (disk) is selected through the BIOS of your hardware platform or by pressing F8 or F12 (depending on the manufacturer) at the beginning of the boot process.