"Whiteboard" functionality: различия между версиями
Alina (обсуждение | вклад) |
Alina (обсуждение | вклад) |
||
| Строка 21: | Строка 21: | ||
The top of the "White board" contains tools for collaboration. It is also possible to work with "hot keys". | The top of the "White board" contains tools for collaboration. It is also possible to work with "hot keys". | ||
[[Файл:White board 6.jpg|800px|безрамки|центр|White board 6]] | [[Файл:White board 6.jpg|800px|безрамки|центр|White board 6]] | ||
| + | 1. a button that allows you to lock the selected tool if you need to continue working with it; Before selecting the required tool you must press this button; "Hot key" - Q; | ||
| + | |||
| + | 2. a button that allows you to move the canvas; "Hot key" - H; | ||
| + | |||
| + | 3. Area selection button; "Hot keys" - V or 1; | ||
| + | |||
| + | 4, 5, 6 - buttons that allow you to draw geometric figures; "Hot keys" for a rectangle - R or 2; for a rhombus - D or 3; for a circle - O or 4; | ||
| + | |||
| + | 7. button for the arrow image; "Hot keys" - A or 5; | ||
| + | |||
| + | 8. button for drawing a line, underlining; "Hot keys" - L or 6; | ||
| + | |||
| + | 9. button with drawing function; "Hot keys" - P or 7; | ||
| + | |||
| + | 10. button for entering text; you need to set the cursor by double-clicking the left mouse button; "Hot keys" - T or 8; | ||
| + | |||
| + | 11. button for adding an image; "Hot key" - 9; | ||
| + | |||
| + | 12. button for deleting added graphic elements; "Hot keys" - E or 0. | ||
Текущая версия на 15:22, 22 октября 2024
Purpose of functionality
The "Whiteboard" functionality is designed for joint work of conference participants. On it they can work with files and make changes during the discussion. The functionality is also suitable for training and webinars.
Activation of functionality
To activate this functionality you need to:
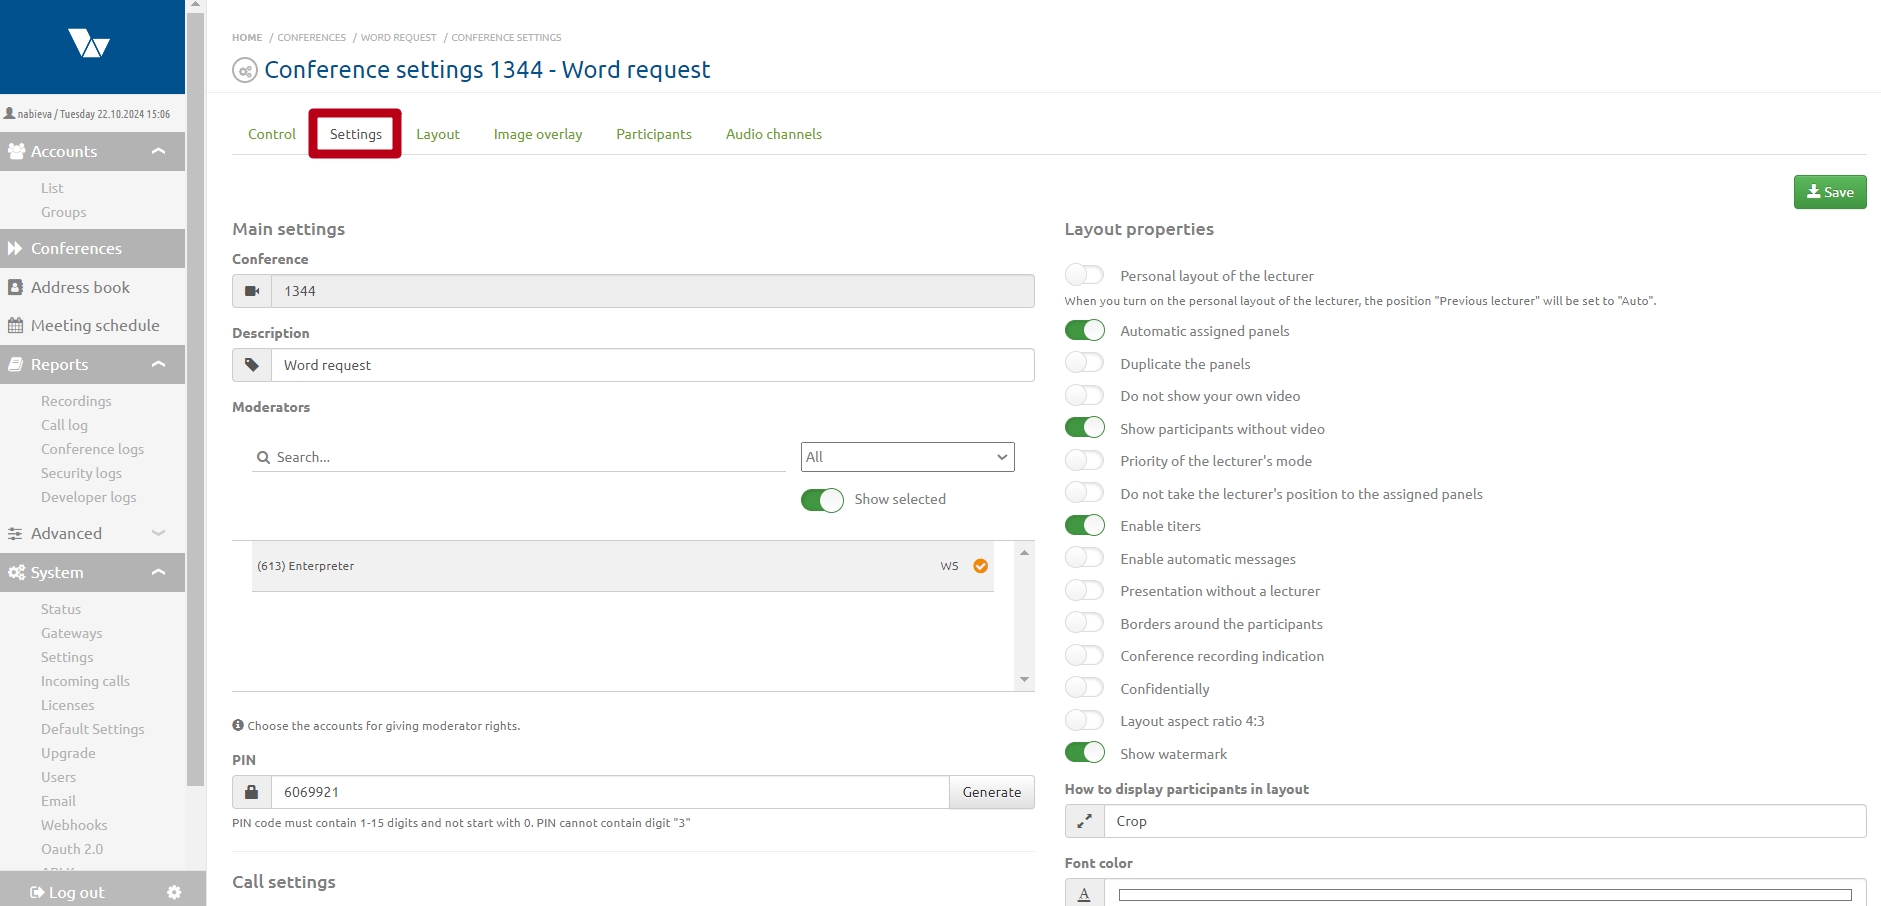
1. go to conference settings;
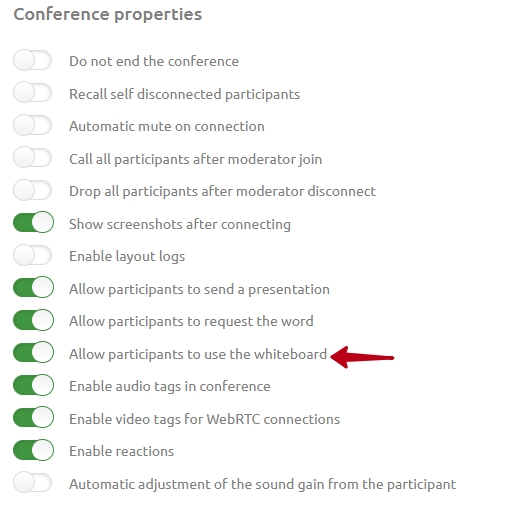
2. Activate the "Allow participants to use the whiteboard" switch in the "Conference properties" block;
Work with functional
Please note to use the functionality Vinteo Desktop must be version 3.19.0 or later.
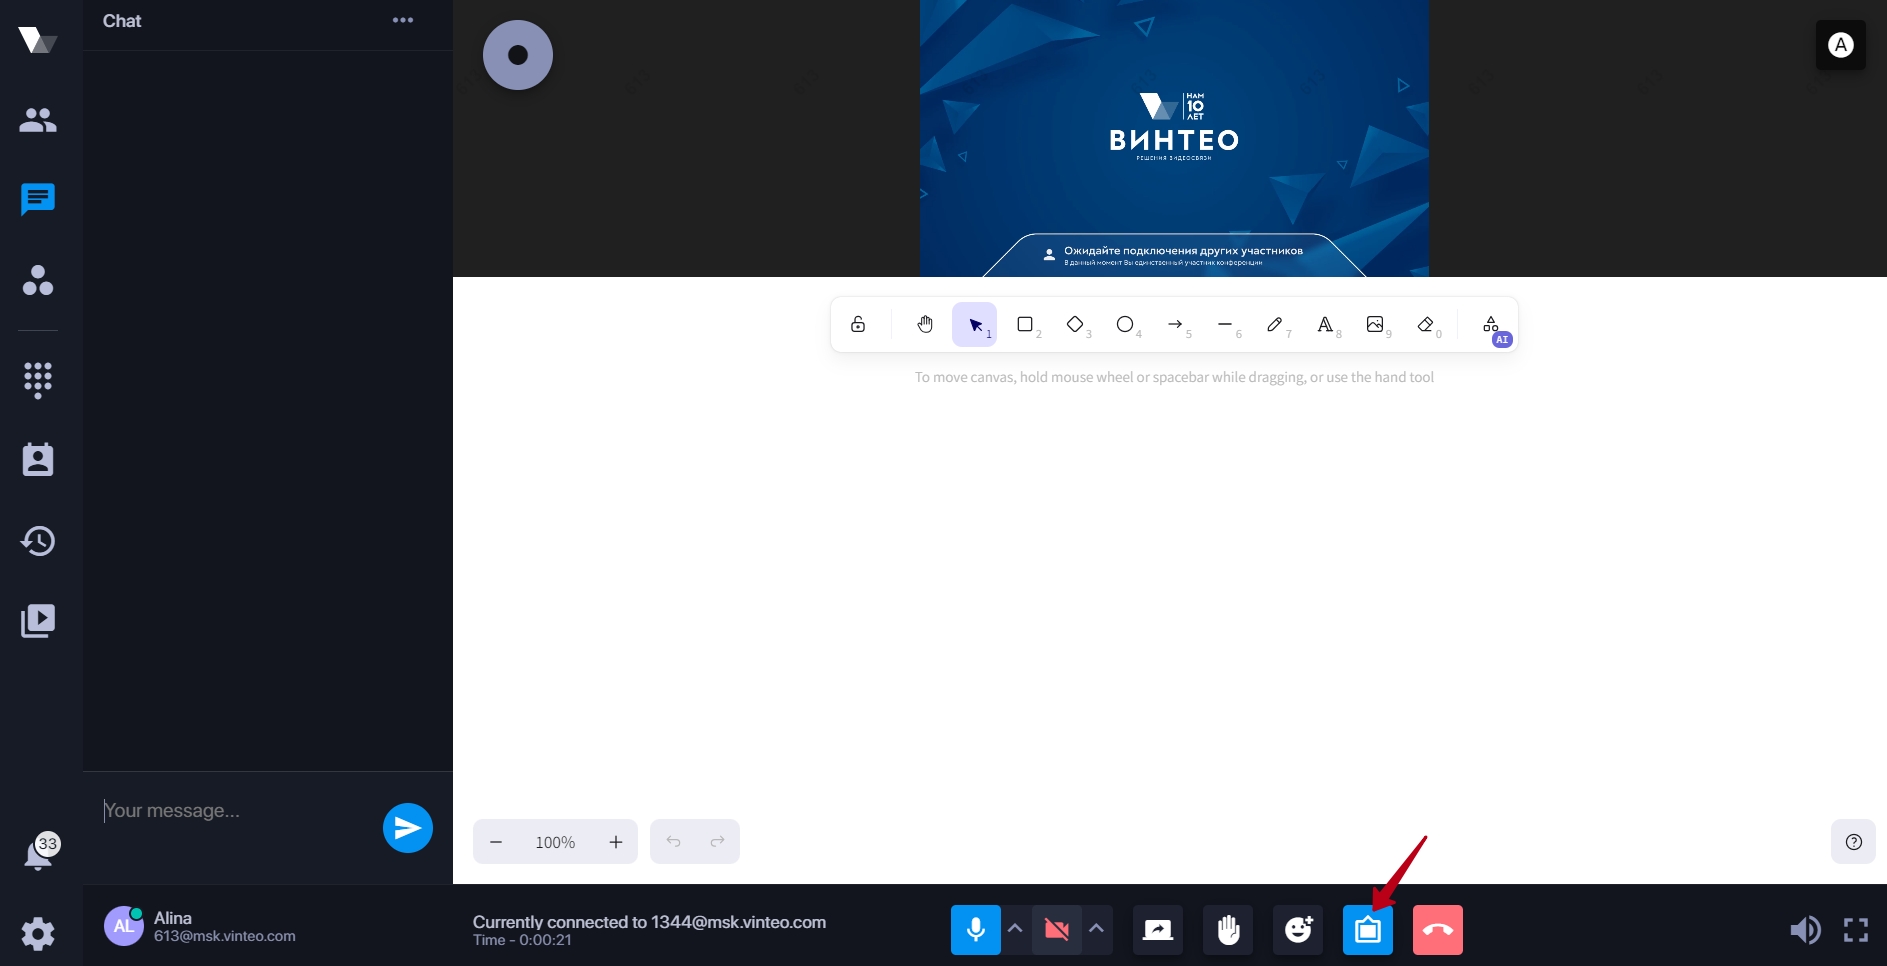
To display the "Whiteboard" you need to press the button on the call control panel on the desktop. The button has an indicator.
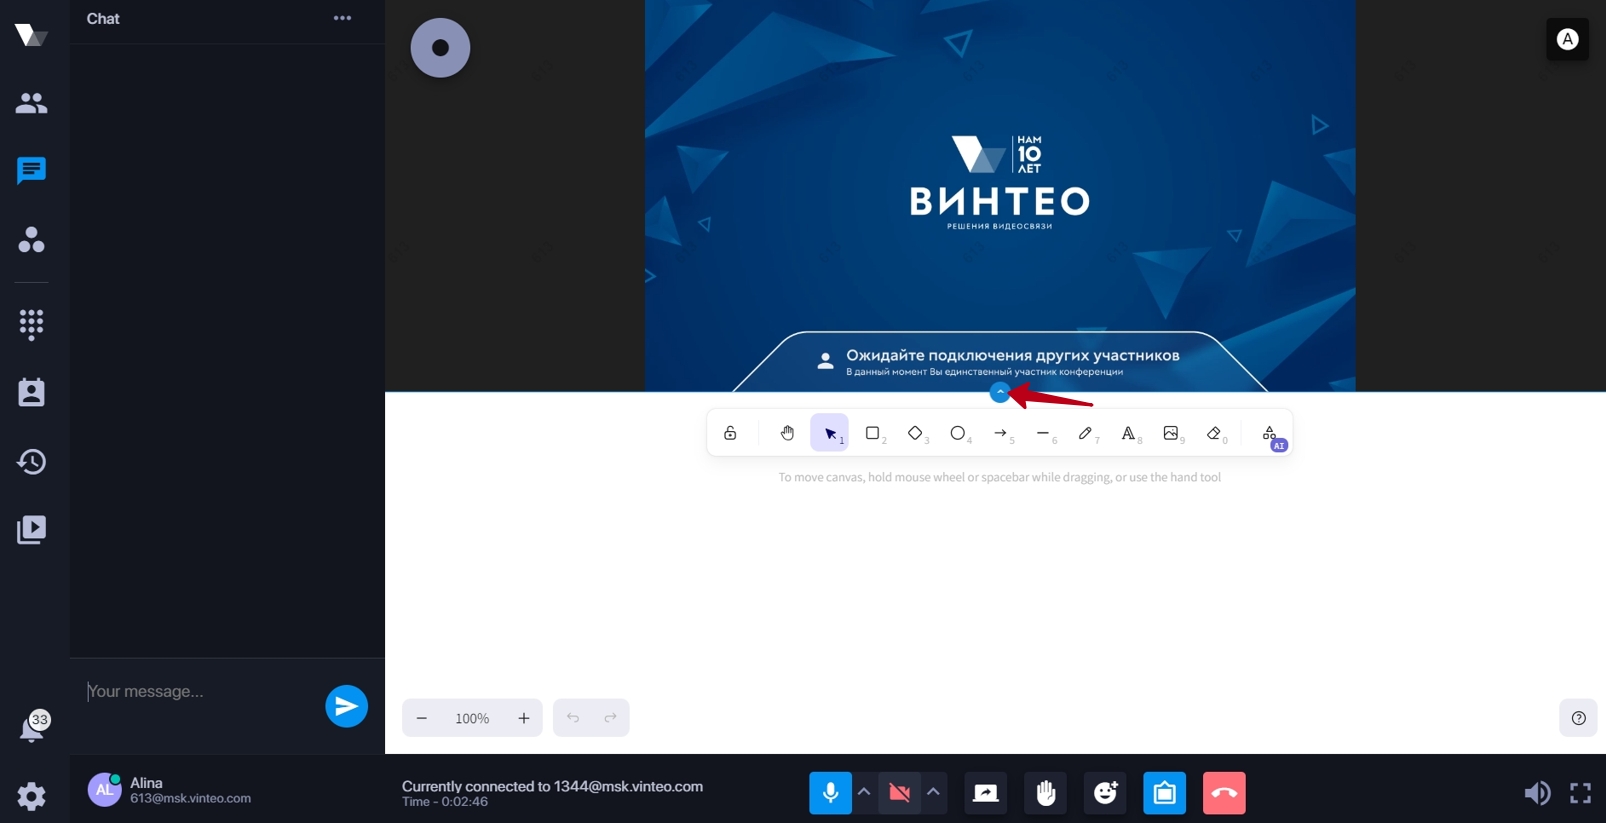
You can enlarge the canvas area by dragging the blue handle up.
The top of the "White board" contains tools for collaboration. It is also possible to work with "hot keys".
1. a button that allows you to lock the selected tool if you need to continue working with it; Before selecting the required tool you must press this button; "Hot key" - Q;
2. a button that allows you to move the canvas; "Hot key" - H;
3. Area selection button; "Hot keys" - V or 1;
4, 5, 6 - buttons that allow you to draw geometric figures; "Hot keys" for a rectangle - R or 2; for a rhombus - D or 3; for a circle - O or 4;
7. button for the arrow image; "Hot keys" - A or 5;
8. button for drawing a line, underlining; "Hot keys" - L or 6;
9. button with drawing function; "Hot keys" - P or 7;
10. button for entering text; you need to set the cursor by double-clicking the left mouse button; "Hot keys" - T or 8;
11. button for adding an image; "Hot key" - 9;
12. button for deleting added graphic elements; "Hot keys" - E or 0.


