Settings web page: различия между версиями
Alina (обсуждение | вклад) |
Alina (обсуждение | вклад) |
||
| Строка 77: | Строка 77: | ||
=== <span id = 'spectators'>"Spectators" functionality </span>=== | === <span id = 'spectators'>"Spectators" functionality </span>=== | ||
| − | Conference spectators are participants who connect using a browser or Vinteo Desktop '''''without additional load on the server''''' and are not displayed in the conference layout but they see the conference and | + | Conference spectators are participants who connect using a browser or Vinteo Desktop '''''without additional load on the server''''' and are not displayed in the conference layout but they see the conference and can see presentations. |
In the web interface the spectators string has an indication with the image of the eye and is colored light blue. | In the web interface the spectators string has an indication with the image of the eye and is colored light blue. | ||
Версия 10:36, 1 октября 2024
English / Web interface for configuration and management / Conference management and settings / Settings web page
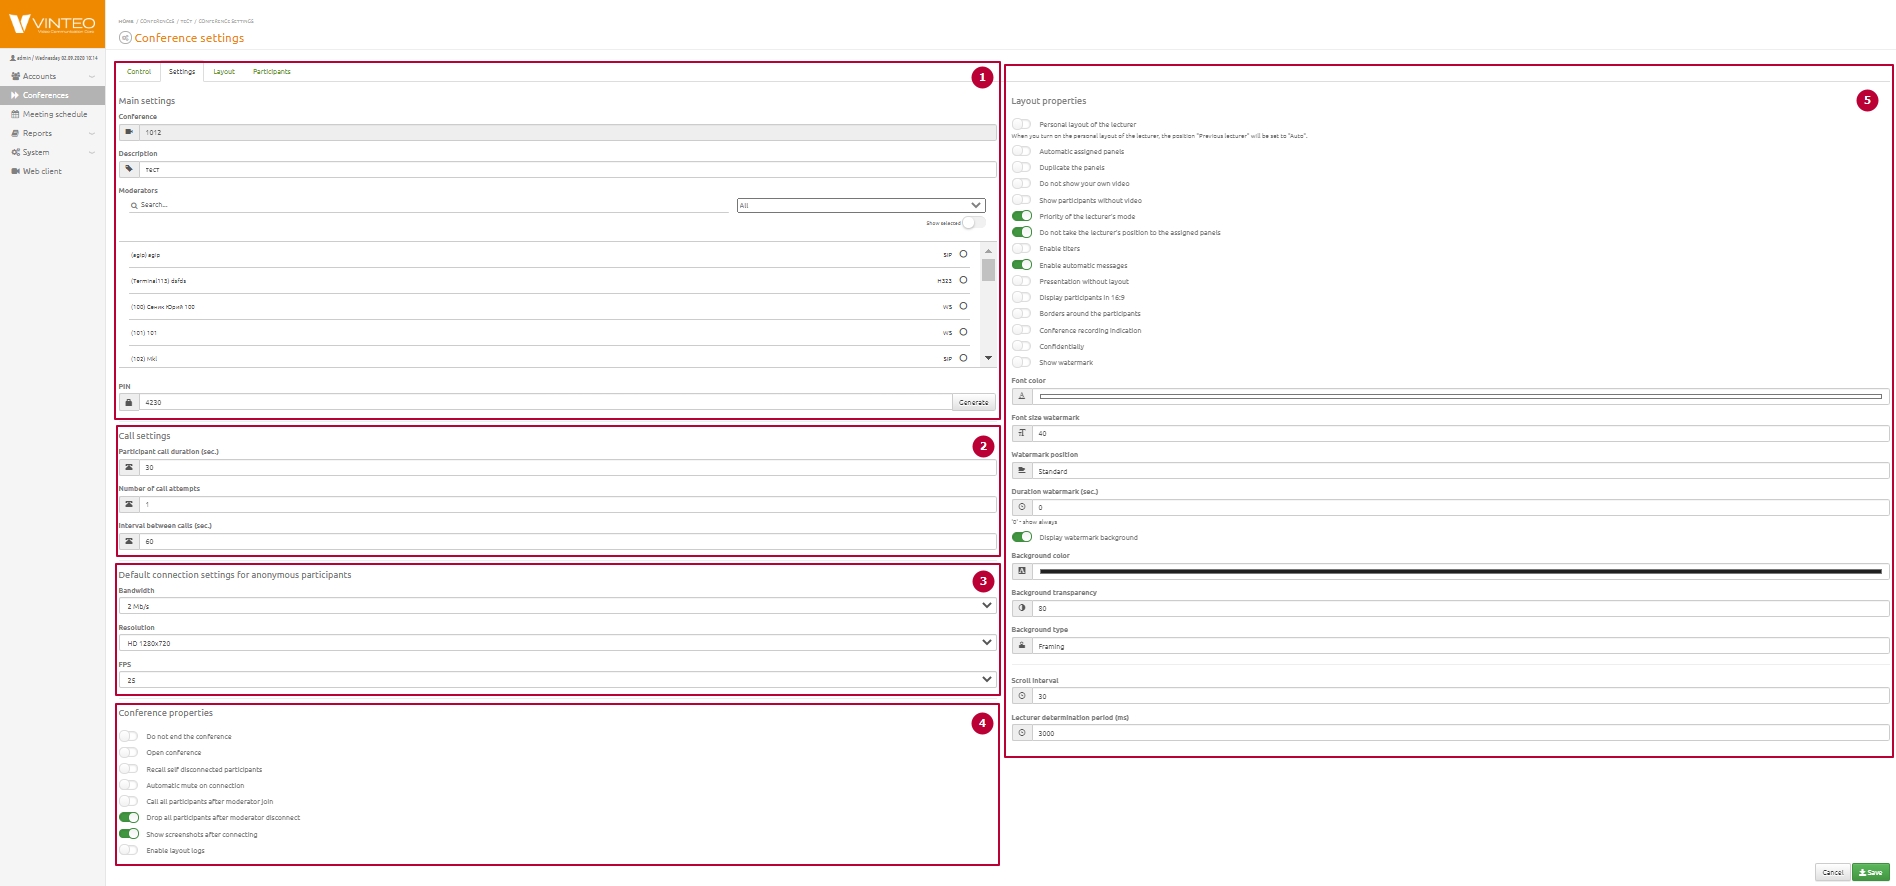
This configuration page is divided into seven groups of settings.
Содержание
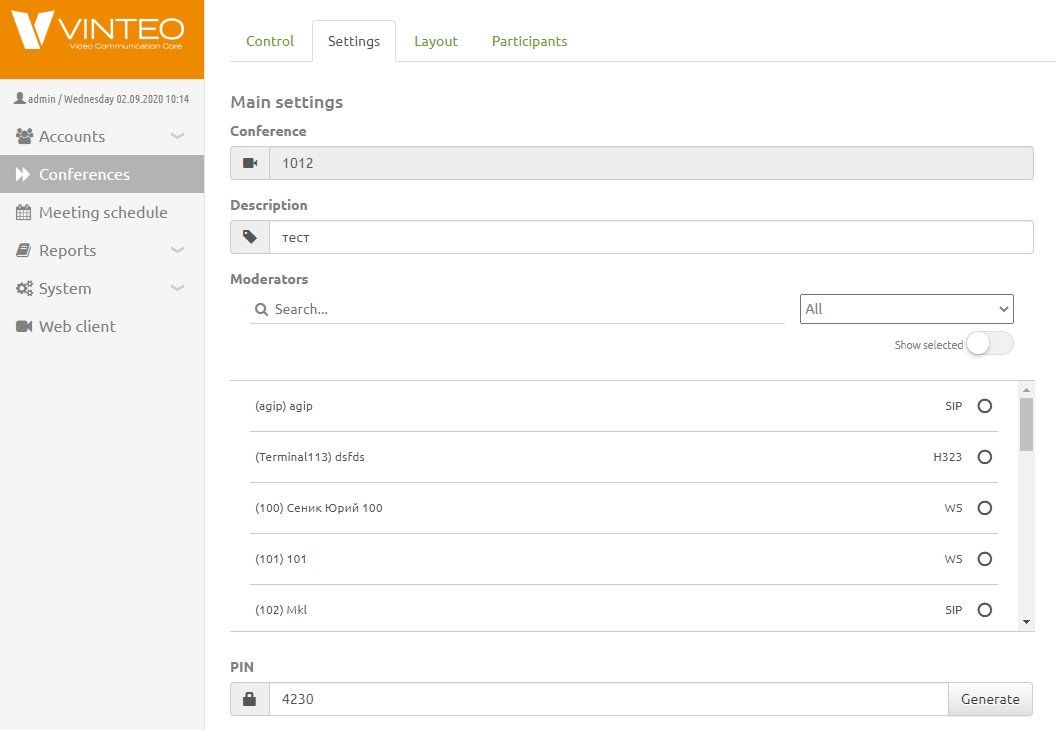
Main settings
- "Conference" is the field for displaying the conference number.
- "Description" is the field you can specify a description of the conference.
- "Moderators" is the field that allows you to appoint moderators of a conference from a participants list.
- "PIN" is the field that sets the conference PIN code for anonymous callers. The PIN code can contain from 1 to 15 digits. 0 and 3 cannot be used. If you leave the PIN empty the conference room will be closed to all participants except those added by the administrator or moderator.
Call settings
- "Participant call duration" is the field that allows you to specify the time interval in seconds. During this interval the server will call participants
- "Number of call attempts" is the field that allows you to set the number of times to call a participant if the participant is busy or does not answer.
- "Interval between calls" is the field that allows you to specify an interval between call attempts.
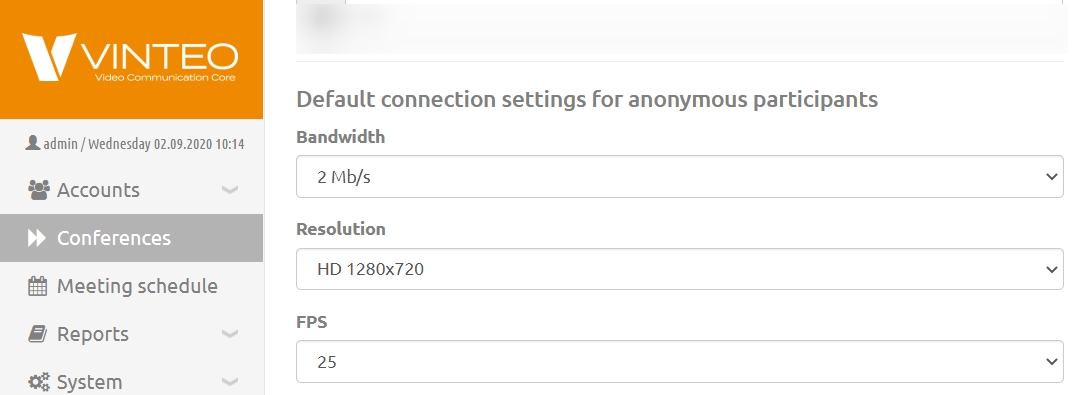
Default connection settings for anonymous participants
These settings are applied to accounts who were non-invited to an open conference but who connected on their own.
- "Bandwidth" is the field that allows you to specify a maximum speed for accounts.
- "Resolution" is the field that allows you to specify a maximum resolution for accounts.
- "FPS" is the field that allows you to specify a maximum frame rate for accounts.
Connection settings
In the "Maximum number of participants" field you can specify the maximum allowed number of active participants (connections) to avoid system overload.
- "Enable notification when connecting" is the switch that notifies the participant about the start of the broadcast and his connection to the conference; can be used in the case when a participant finds himself in the purgatorium before the start of the broadcast or when he is the only participant in the conference;
- “Allow anonymous connections to the conference” is the setting that allows you to connect to the conference without entering a PIN code;
- The "Open conference" switch allows anonymous users to dial into the conference without entering a PIN.
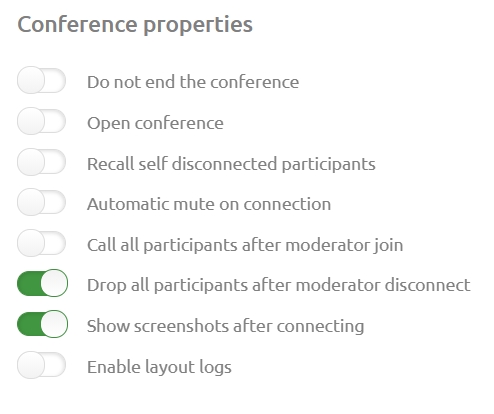
Conference properties
- "Do not end the conference" is the setting that allows you to not switch off a conference;
- Recall self disconnected participants is the setting that allows if necessary to independently call those conference participants who were disconnected after the connection with these participants was broken;
- Automatic mute on connection is the switch that allows you to turn off a microphone on a server for all called participants. Switch on a microphone for participants may only be administrator/moderator of a conference;
- Call all participants after moderator join is the switch that allows you to call all participants automatically when a moderator enters the conference. If a moderator does not connect to a conference a server refuses a connection rest participant;
- Drop all participants after moderator disconnect is the switch that allows you to end a conference automatically. If a moderator goes from a conference and in a conference does not attend any moderator a server turns off rest participants. The server will automatically disconnect all participants if there is not at least one moderator in the conference;
- Show screenshots after connecting is the switch that allows the system to screenshot an image from a participant when the participant enters a conference.
- "Enable layout logs" switch allows you to log the location of participants on the layout;
- The "Allow participants to send a presentation" switch restricts the unauthorized launch of a presentation by conference participants and also does not allow the presentation complete. When you set this setting it will apply to all participants in the conference. When adding new participants to the conference as well as when connecting anonymous participants to the conference the settings will also apply to them;
- "Allow participants to request the word" is the switch the activation of which allows conference participants to request the word; when connecting to the server via Vinteo Desktop it must be at least version 3.17.2;
- "Allow participants to use the whiteboard" is the setting that allows you to use the whiteboard functionality in the conference;
- "Presentation FPS" is the drop-down list setting with which you can set limits on the number of frames of a presentation.
At the bottom of the page there is the setting for optimizing the selection of client resolutions which allows you to reduce the load on the network and reduce the consumption of video conferencing resources.
The setting has 3 modes: when it is on (default), it using minimum and it off.
When it enabled the setting controls the resolution going from the client to the server.
Minimum optimization should be set when there are enough resources but it is necessary to reduce the load on the server and network without reducing the quality of image transmission. This mode is also preferable if there is a frequent change of lecturer; in the participant dialogue mode.
If the "Off" mode is selected then participants will be connected with the resolution they set in the settings.
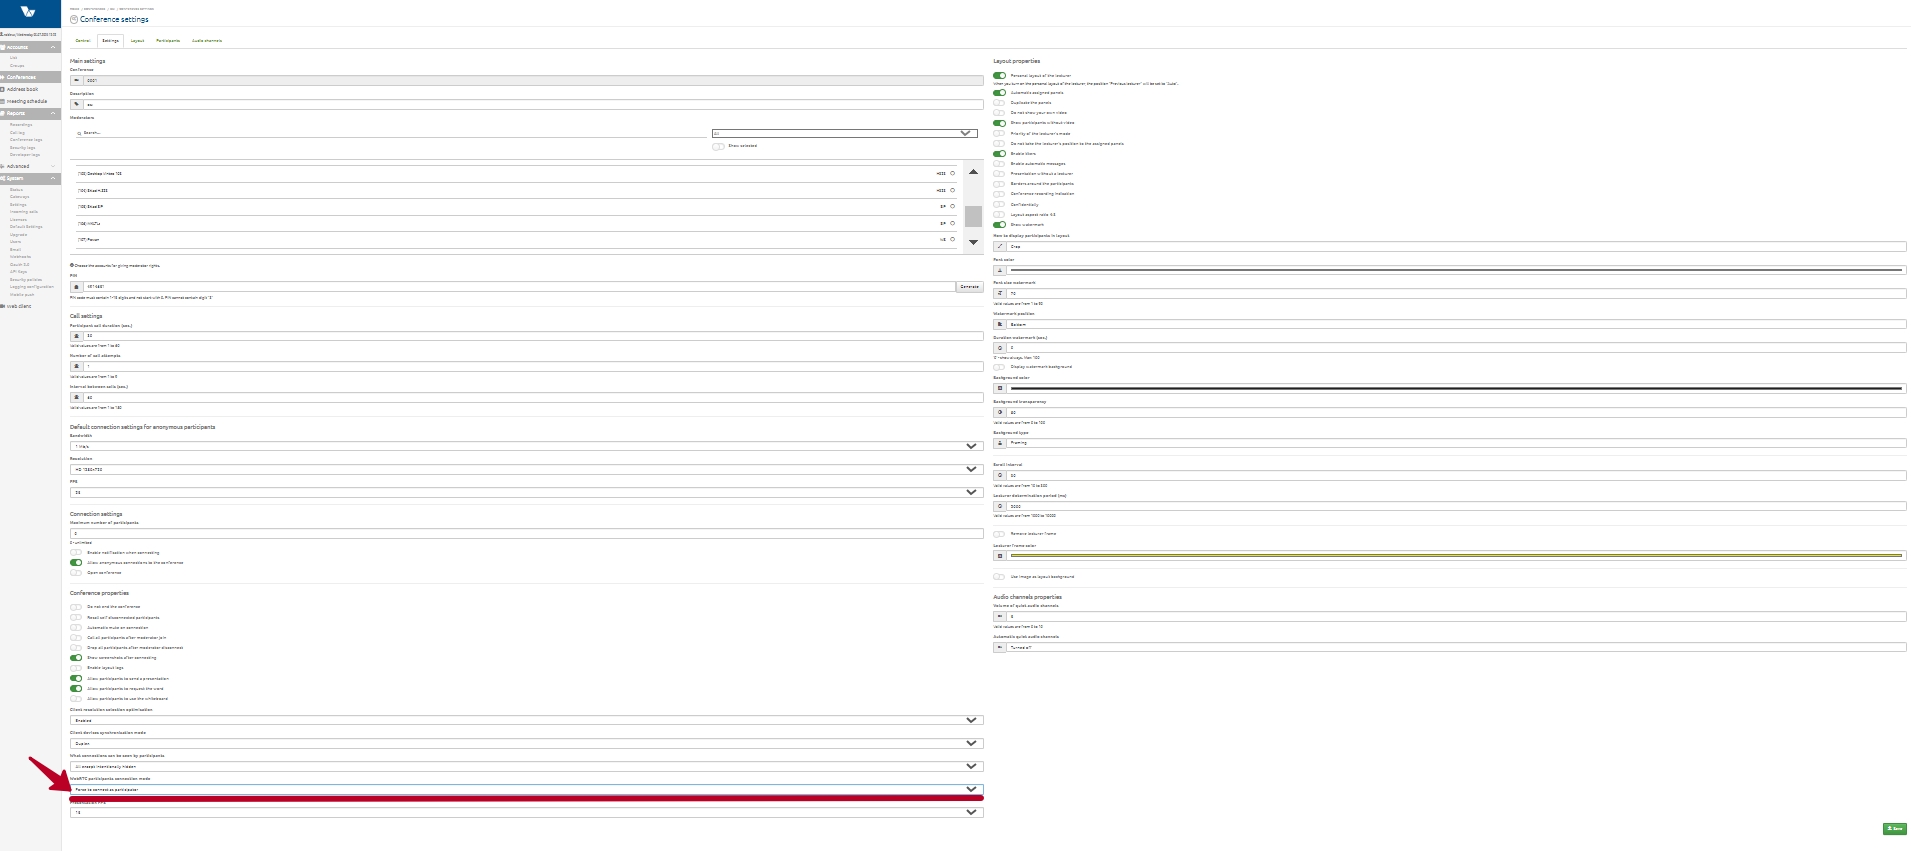
Setting up "WebRTC participants connection mode" and the functionality of "Spectators" are described in a separate article.
Setting "What connections can be seen by participants"
This setting affects the display of participants in Vinteo Desktop.
The "None at all" option is set by default which means that no participants will be displayed on the "Participants" tab in Vinteo Desktop. Typically you select the display method “All, like moderator” so all participants are displayed or the “All except intentionally hidden” option is set.
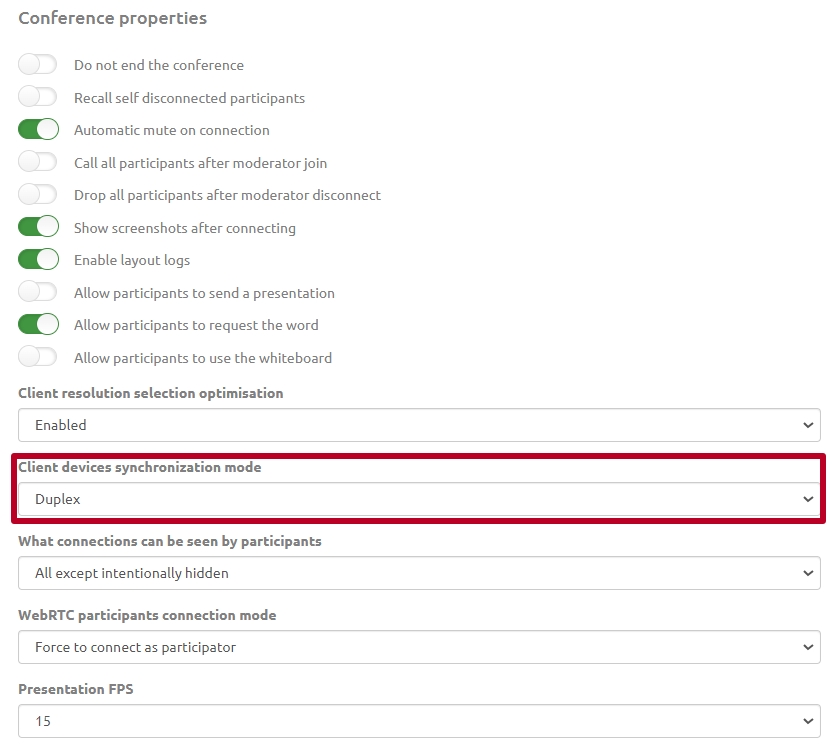
Client devices synchronization mode
This functionality is designed to synchronize the operation states of cameras and microphones of participants in the client part and on the server which provides additional opportunities for managing the participants’ peripherals.
It is located in the conference settings at the bottom of the "Conference properties" block. You must select the "Duplex" mode for the functionality to become active and click the save button at the bottom of the page.
"Spectators" functionality
Conference spectators are participants who connect using a browser or Vinteo Desktop without additional load on the server and are not displayed in the conference layout but they see the conference and can see presentations.
In the web interface the spectators string has an indication with the image of the eye and is colored light blue.
This functionality will help implement various conference scenarios as well as reduce the load on the server and network traffic.
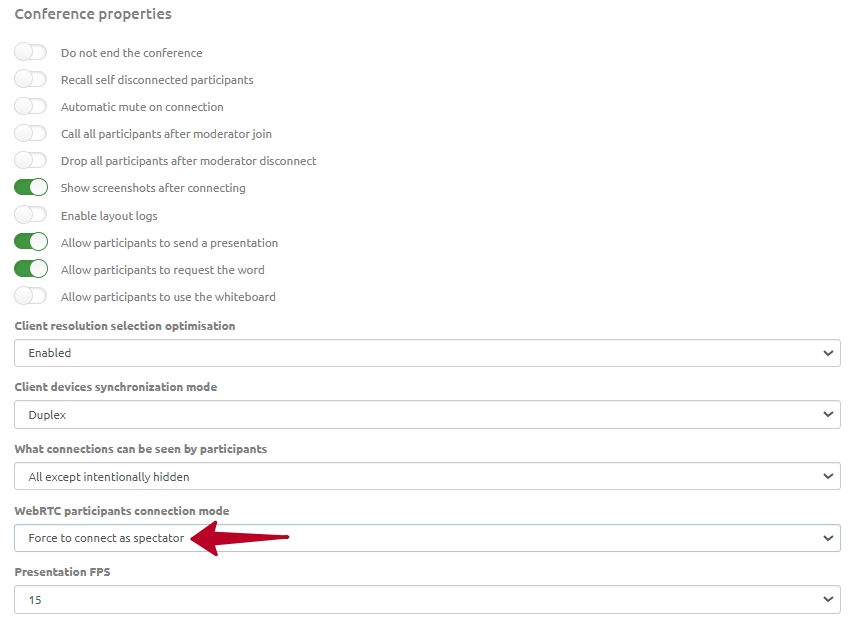
The "Spectators" functionality is located in the conference settings at the bottom of the "Conference properties" block.
The "WebRTC participant connection mode" setting has the drop-down list with three settings options:
- "Force to connect as participant";
- "At the client discretion";
- "Force to connect as spectator."
"Force to connect as participant"
Selecting this setting allows you to connect as a participant regardless of the state of the participant's peripherals. He will have access to all the functionality of the participant.
"At the client discretion"
If the person who connects has their camera and microphone turned off the system will identify that participant as a spectator. If at least one device is turned on: a camera or microphone the system will make the viewer a participant. The system will also transform the spectators into a participant if he starts the presentation. This setting is suitable for broadcasting as well as if there is a need to save resources.
"Force to connect as spectator"
In any state of the periphery the participant connects as a spectator. This is indicated by the image of an eye in the participant's signature. They will not be able to become participants on their own.
This option is suitable for holding training conferences, webinars and similar events.
The first person to join the conference will be assigned the participant role regardless of the settings.
A video can act as a participant if you connect it first to the conference. This allows you to connect others as spectators.
Management interface for administrator
The administrator/moderator can manage spectators; they can convert them to participants and back.
The spectator will become a participant if you select "Make participant" option in the participant’s context menu. Similarly you can make a participant a spectator.
The same can be done by selecting a spectator or participant and in the upper right part at the top, click the “Make participant” button.
You can also activate the "Inverse action" switch and click the "Make spectators" button with an eye image.
We recommend setting the "Force to connect as participant" option as this will not affect other settings, however, if you select this setting the administrator can make any participant a spectator.
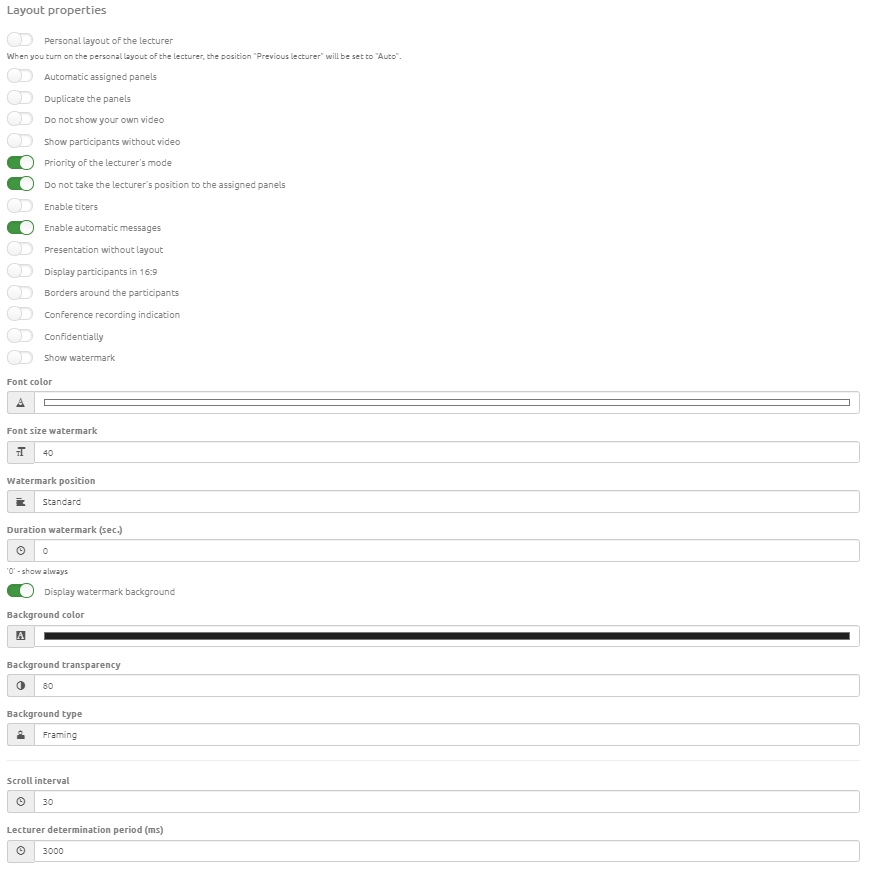
Layout properties
- "Personal layout of the lecturer" is the switch allows you to set an individual layout with a fixed position for one or more participants defined by the system as a lecturer. The layout with the static position of the lecturer is relevant during negotiations when several participants speak alternately;
Note

When you select Personal Lecturer Layout Mode, the Previous Lecturer position will be set to Auto.
- Automatic assigned panels is the mode that allows participants to occupy panels assigned to other participants if they connect earlier than those participants assigned on that panels.
- Duplicate the panels is the mode that allows you to duplicate a participant who is defined as a lecturer in a panel of common layout.
- Do not show your own video is the mode that allows you to exclude an image of a participant video in common layout. An individual layout will create for each participant.
Note

The set Do not show your own video mode automatically disables the Automatic assigned panels and Duplicate the panels modes.

Layered layouts will not be available.
- Show participants without video is the switch that allows you to display participants without any video stream in common layout.
- " Priority of the lecturer's mode" is the switch that allows you to specify layout 1 as priority layout and canceles personal layout. If this switch is active all participants in lecturer mode will see a lecturer in full screen.
- "Lecturer mode priority" is the setting that defines the One layout as a priority and overrides the personal layout. If the setting is active then in the lecturer mode all participants except the lecturer will see the lecturer in full screen mode the lecturer will see the layout;
- "Do not take the lecturer's to the assigned panels" is the setting that cancels duplication of a participant assigned to any panel on the layout to the panel assigned to the lecturer if the participant was identified by voice or forcefully assigned as a lecturer; this setting does not apply if he was involved "Lecturer" mode on the conference management page which launches the video selector mode;
- "Enable titers" is the switch that allows you to add graphics animated signatures for participants who become lecturers.
Note

Appearance logic of titers on participants screen

Titer will appearance on participants who a server recognizes as a lecturer. It can be a participant assigned by an administrator or active speaking participant if a recognizing a lecturer happens in automatic mode.
- "Enable automatic messages" is the switch that allows displaying messages about connecting or disconnecting participants over participants' images in a conference:
- when participants connect or disconnect;
- when starting and stopping conference recording;
- when connecting or disconnecting a presentation source;
- when starting and stopping the conference webcast.
- "Presentation without layout" is the switch that allows to transfer content in the form of a mosaic with a combination of the image of the common layout and presentation. This setting is needed for displaying presentation mode in record and translation to participants who cannot receive an additional presentation video stream or they have no possibility to receive a content in additional stream;
- "Borders around the participants" is the setting that allow to highlight each participant except the active one with a black frame;
- "Confidentially" is the indication appears on the screen warning the participant about the confidentiality of the conference;
- "Conference recording indication" is the setting needed when recording is activated: a thin red frame appears around the perimeter of the window for the participants in the displayed image from the conference;
- "Show watermark" is the switch that allows to display participants' signatures that are located in a conference layout;
- Way of displaying participants in layout is the setting that allows you to select a method for scaling the image of participants in which the image will fit, crop or stretch;
- "Font color" is the feature that allows you to set a watermark’s text. Default is white;
- "Font size watermark" is the feature that allows you to set a watermark font size. Default is 40.
- "Watermark position" is the feature that has two positions: first is the "Standard" has an indent from the lower frames of the participants and second is the "Bottom" which clips on bottom frames.
- "Duration watermark (sec.)" is a display interval of a participants’ signatures when lecturer, layout or layout participants position change. Default is 0 and this means that signatures display permanently.
- "Display watermark background" is the switch that allows to display a participants’ watermark background who is positioned in a conference layout. Default is disable.
- "Background color" is the feature that changes a watermark background color. Default is black.
- "Background transparency" is the feature that changes a transparency watermark background. Default is 80.
- "Background type" is the feature that has two types: the first is the Framing depends on watermark text size and the second is Full width.
- "Scroll interval" is the feature that allows to set an interval of a rotation of participants that do not position in a panel. Values set in seconds. Default is 30 sec.
- "Lecturer determination period (ms)" is the feature that allows to set an interval in which a participant must speak louder than other participants then a system determines him as a lecturer. Default is 3000 ms.
- "Remove lecturer frame" is the the setting that allows you to cancel the highlighting of a lecturer with the frame;
- "Lecturer frame color" is the setting that allows you to independently set the color of the lecturer frame;
- "Use image as layout background" is the toggle that allows you to add a background image to the layout. The required image format is jpg or png. It is not recommended to use images with a resolution greater than 3840 x 2160 otherwise the background may not appear on the layout.
Audio channel properties
In this block you can adjust the volume of quiet audio channels if the "Quiet channel" checkbox is selected in the "Conferences" section of the participant’s properties.
If you turn on the "Automatic quiet audio channels" switch the silent channel settings will be applied to the entire conference. The sound level can be adjusted: the minimum volume level of audio channels is 0; the maximum is 10. We recommend setting the volume level to 5. Also in the "Automatic quiet audio channels" field you can select the option of applying this setting: to a specific language group of participants, to the translator's audio channel or to disable this functionality.
