Home page of the main interface: различия между версиями
Alina (обсуждение | вклад) |
Alina (обсуждение | вклад) |
||
| Строка 105: | Строка 105: | ||
2. change the camera position using the control buttons: | 2. change the camera position using the control buttons: | ||
| + | |||
* camera direction – "Up" (4); “Right” (5); “Left” (6); "Down" (7); | * camera direction – "Up" (4); “Right” (5); “Left” (6); "Down" (7); | ||
* camera zoom – “Zoom in"” (17), “Move away” (18). | * camera zoom – “Zoom in"” (17), “Move away” (18). | ||
Текущая версия на 14:18, 2 сентября 2024
Содержание
Terminal information
Terminal Name
It is used to identify the terminal. When making an outgoing call, it is its Caller ID. Terminal name is set in the “System name” item of the "Main settings" menu.
Day of week, date, time
It is recommended to check it against the current date and time. You can set it in the “Date/time” item of the "Main settings".
SIP/H.323 registration
The status of SIP and H.323 registration is displayed. The registration is configured in the “SIP/H323” item of the "System settings" menu.
IP address
The current IP address is displayed. If there is no network connection, the message "no connection" is displayed. The network interface is configured in the “Network” item of the "System settings".
Outgoing call
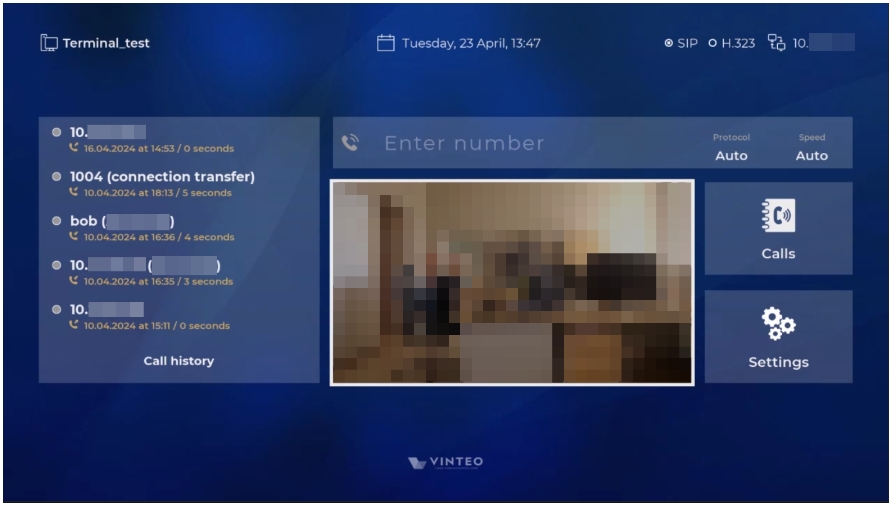
The “Enter number” field
Enter an account number or conference number of the server in this field (e.g.: 10.0.0.1, 1000@10.0.0.100, 1000@test.com). You can enter the number without focusing on the line.
Use the “Call” button (11) to make an outgoing call to the entered number. Focus on the line is not required. To enter letters, press the "Number" buttons (12) repeatedly to cycle through the letters.
Characters are deleted by pressing the Backspace (10).
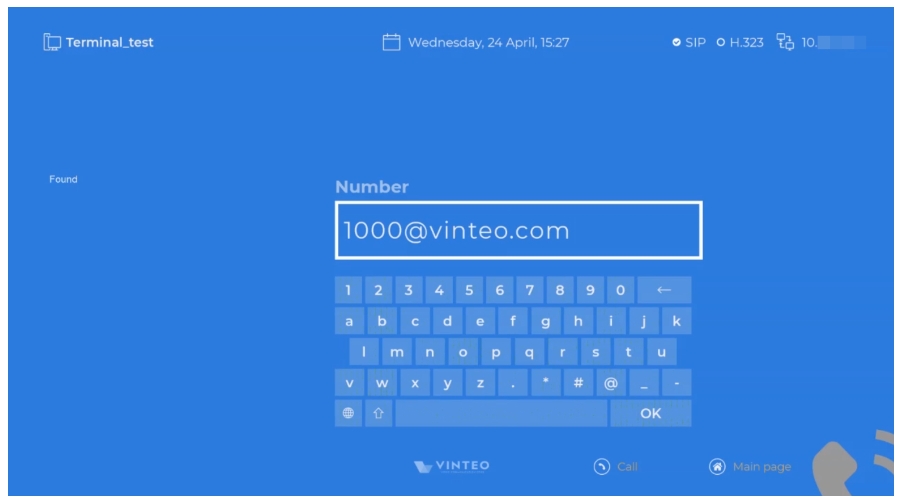
The "Enter number" field has two modes:
- input mode, which is set by default. The field is framed white after focusing on it. It is only possible to type and delete characters one by one;
- edit mode is set by pressing the OK button (19) in the line.
In edit mode, the module window with keypad and speed dial from the address book (the “Found” widget on the left). Move focus with navigation buttons (4, 5, 6, 7), use “OK” (19) to select a character. Exit is by the "Return" (8) button on a remote control or the "Ok" button on the keypad.
Protocol
You can select the outgoing call protocol in a drop-down list. The default is "Auto".
To select it do the following:
- move the focus to the "Protocol" option;
- press "OK" (19) to open the list;
- move the focus to the required line;
- confirm with "OK" (19);
- exit without saving is for the "Return" button (8).
Speed
The “Speed” option allows to select the outgoing call bitrate in a drop-down list.
The default is "Auto".
To switch the bitrate:
- move the focus to the "Speed" option;
- open the list with the “OK” button (19);
- select the required line;
- confirm with the “OK” button (19).
To exit without saving press "Return" (8).
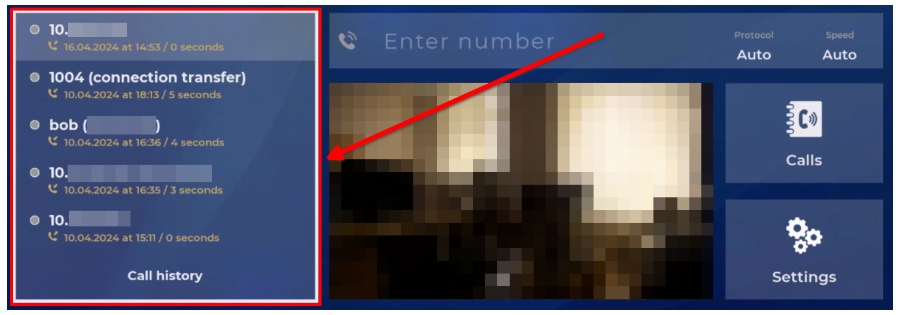
Call history
Recent calls
The list consists of the five most recent calls (incoming, outcoming, missed). To make a call, move the focus to any line and press "Call" (11).
Pressing “OK” (19) will move the focus to the number entry field to change it. The "Outgoing call" module will display a call number and a protocol if you make a call from a history.
All call history
A link to the “History” item in the "Calls" menu.
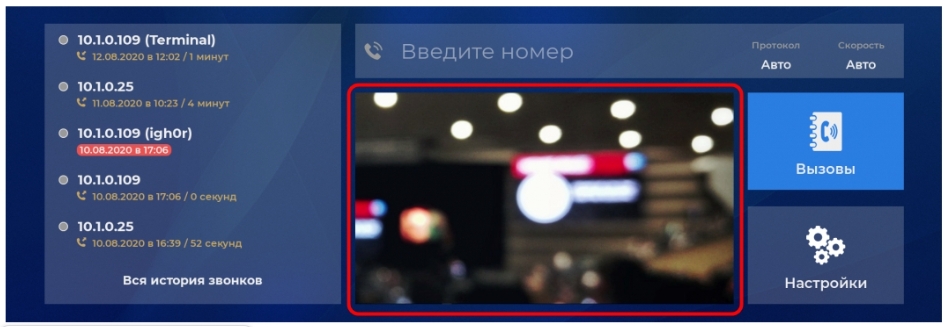
Camera
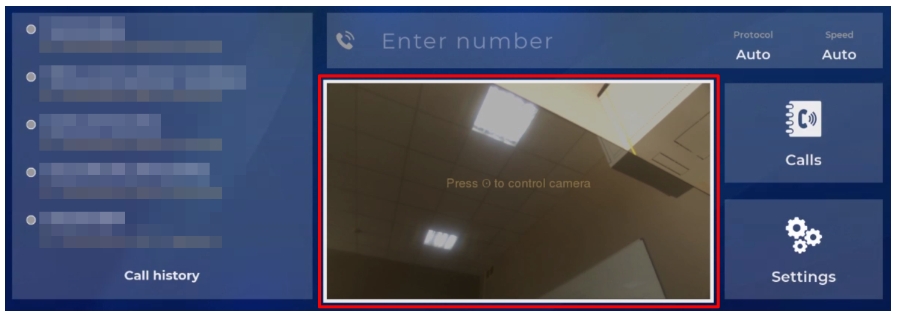
Field for outputting video signal from a connected camera or other capture device.
Camera window
When moving focus to the camera window:
- there is a white frame around the camera window;
- in the camera window there is the inscription: “Press ☉ for the camera control”.
Entering camera control mode:
- control button is OK (19).
Exit control mode (the camera position which was changed will be saved):
- control button is “Back” (8);
- control button is OK (19).
Presets
Six presets for loading and saving camera position.
When moving focus to any preset:
- the selected preset is highlighted in color;
- there is the inscription in the camera window: “Press ☉ for changing the preset”.
Entering camera control mode to load and change the selected preset:
- OK control button (19) – the camera position will change after loading the selected preset.
Exit control mode (the camera position which was changed will be saved):
- “Back” control button (8) – without changing the current preset;
- “ОК” control button (19) – with changing the current preset.
Camera and preset control mode (PTZ camera only)
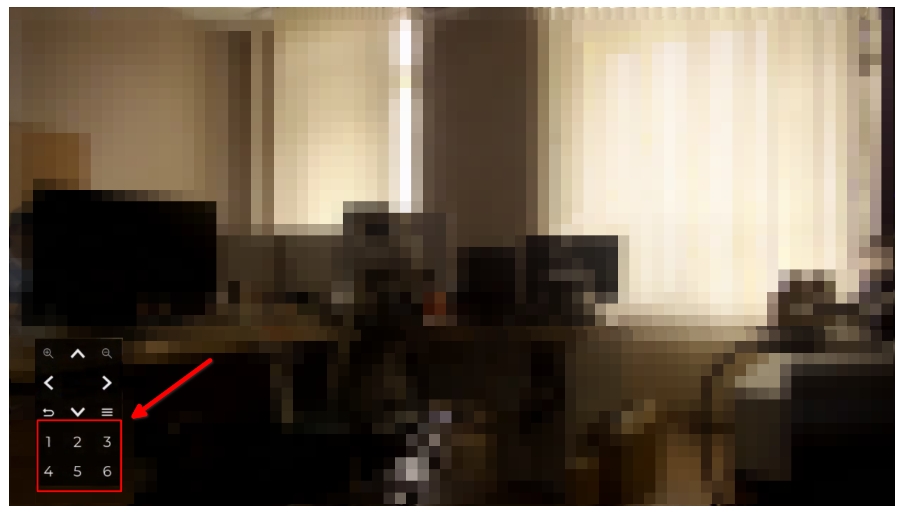
For the camera and presets control: 1. press the “OK” control button on the main page of the interface (19) in the camera window [Рисунок 11]. The diagram of the control panel buttons is displayed in the lower left corner of the screen and an image from the capture device is shown in the background. [Рисунок 12];
2. change the camera position using the control buttons:
- camera direction – "Up" (4); “Right” (5); “Left” (6); "Down" (7);
- camera zoom – “Zoom in"” (17), “Move away” (18).
- loading or saving a preset – “Numbers” (12) from 1 to 6 inclusively:
- short press – the loading a previously saved preset;
- long press – the saving the current camera position to a preset; The message “Preset saved” is displayed.
