Vinteo Server Installation Manual: различия между версиями
Alina (обсуждение | вклад) |
Alina (обсуждение | вклад) |
||
| (не показаны 43 промежуточные версии 2 участников) | |||
| Строка 1: | Строка 1: | ||
| − | + | [[ English ]] / Vinteo Server Installation Manual | |
| − | |||
| − | |||
| − | |||
| − | |||
| − | + | This document is an installation manual for the VINTEO VCS Server software. This manual may not reflect some modifications of the software. If you notice or suspect any errors or misprints in the manual, please notify VINTEO. This manual may only be used to support the functionality of products installed under contract with VINTEO. The manual may be transferred on the basis of a contract under which the products are (have been or will be) installed, or the explicit consent of VINTEO. to the use of this manual. If you should happen to receive this manual in any other way, please notify VINTEO by the address below. All examples contained in the manual (including sample reports and screen forms) have been compiled on the basis of the test database of VINTEO. Any coincidence of names, company names and other information with real data is random. All trademarks and registered trademarks used are the property of their respective owners and are used solely to identify the software or companies. All property rights remain with VINTEO in accordance with the applicable law. | |
| − | |||
| − | + | == Software preparation == | |
| − | |||
| − | |||
| − | |||
| − | === | ||
| − | |||
| − | |||
| − | |||
| − | |||
| − | |||
| − | |||
| − | |||
| − | |||
| − | |||
| − | |||
| − | |||
| − | |||
| − | |||
| − | |||
| − | |||
| − | |||
| − | |||
| − | |||
| − | |||
| − | |||
| − | |||
| − | |||
| − | |||
| − | |||
| − | |||
| − | |||
| − | |||
| − | |||
| − | |||
| − | |||
| − | |||
| − | + | '''Computer requirements for the preparation of the installation flash disk''' | |
| − | |||
| − | |||
| − | To change the | + | - Processor with a clock frequency of 1 GHz; |
| + | - 512 MB RAM | ||
| + | - Colour monitor with screen resolution 800x600 | ||
| + | - Keyboard; | ||
| + | - Mouse manipulator. | ||
| + | |||
| + | '''Operating system''' | ||
| + | |||
| + | Windows XP, Vista, 7, 8.1, 10 | ||
| + | |||
| + | '''Support software'''<br> | ||
| + | [https://rufus.ie/ru/ Rufus] | ||
| + | |||
| + | '''VINTEO VCS SERVER image'''<br> | ||
| + | https://download.vinteo.com/VinteoServer/ | ||
| + | |||
| + | == Software setup == | ||
| + | |||
| + | Rufus software doesn't require installation, but in Windows 7 and higher it's required to be run as administrator. | ||
| + | |||
| + | '''Step 1. Start Rufus, select USB drive you need. Note that the minimum size of a bootable USB disk is 8 GB''' | ||
| + | [[Файл:Шаг 1.png|Шаг 1]] | ||
| + | |||
| + | '''Step 2. In "Download method" dropdown list select "Disk or ISO (Choose image)" image installation disk and press "Select" button where you point to *.iso file you have just downloaded''' | ||
| + | [[Файл:Шаг 2.png|Шаг 2]] | ||
| + | |||
| + | '''Step 3: Choose a partition layout, destination and file system''' | ||
| + | [[Файл:Шаг 3.png|Шаг 3]] | ||
| + | |||
| + | Make sure that "Partition scheme", "Target system" and "File system" are set to "MBR", "BIOS(or UEFI-CSM)" and "FAT32" respectively. The other menu items do not need to be changed. | ||
| + | |||
| + | |||
| + | '''Step 4: Start creating bootable USB-Flash''' | ||
| + | Press "Start" and "OK" button. | ||
| + | [[Файл:Шаг 4.png|Шаг 4]] | ||
| + | |||
| + | '''Step 5: Confirming the deletion of all data on the USB flash''' | ||
| + | |||
| + | [[Файл:Шаг 5.png|Шаг 5]] | ||
| + | |||
| + | '''Step 6. Finish preparing a bootable USB-Flash''' | ||
| + | After a successful write, Rufus will notify you with a green bar saying "Ready" at the bottom of the program window. You can close the program and remove the USB-Flash card. | ||
| + | [[Файл:Шаг 6.png|Шаг 6]] | ||
| + | |||
| + | '''Preparing the Hardware Platform for Startup''' | ||
| + | |||
| + | Once the flash drive has been prepared you need to insert it into one of the USB ports on the hardware platform and select it as a boot port. | ||
| + | |||
| + | Warning: The port you are using must support USB 2.0, installation from a 3.0 port may not work correctly. | ||
| + | |||
| + | The boot device (disk) is selected through the BIOS of your hardware platform or by pressing F8 or F12 (depending on the manufacturer) at the beginning of the boot process. | ||
| + | |||
| + | == Installation == | ||
| + | |||
| + | '''Boot the target system and perform the initial boot from the USB-Flash installation device.''' | ||
| + | |||
| + | Warning: When selecting the type of bootable drive (device) do not use UEFI option. | ||
| + | |||
| + | We do not recommend deploying a server on RAID. | ||
| + | |||
| + | '''If necessary disconnect all but one physical HDD/SSD before installing the server. After the installation was complete you can return the disconnected disks and configure replication. You can get the Instructions for setting up replication by writing to support at support@vinteo.ru''' | ||
| + | |||
| + | [[Файл:Приветствие установщика (2020 03 24 09 42 41 UTC).png|800px|навесьэкран|центр|экран приветствия установщика]] | ||
| + | |||
| + | |||
| + | After the installer has successfully booted, a welcome screen will appear with hardware platform requirements and information about the default settings for your network card. Click "Next". | ||
| + | [[Файл:Приветствие установщика 2 (2020 03 24 09 42 41 UTC).png|800px|навесьэкран|центр|Информационное окно]] | ||
| + | |||
| + | '''Accepting the license agreement''' | ||
| + | |||
| + | You are required to accept the license agreement. Press TAB before selecting the button, thus one of the buttons becomes active. Press "Accept license agreement". | ||
| + | |||
| + | [[Файл:Приветствие установщика 3.png|800px|навесьэкран|центр|окно лицензионного соглашения]] | ||
| + | |||
| + | '''Select the disc you wish to install.''' | ||
| + | |||
| + | The system prompts you to select the disc on which to install. | ||
| + | [[Файл:Приветствие установщика 4.png|800px|навесьэкран|центр|Выбор диска для установки]] | ||
| + | |||
| + | '''You will be warned that the data will be overwritten.''' | ||
| + | |||
| + | Next you are asked to accept that all data on the specified disk will be deleted and overwritten. Click "Yes". | ||
| + | [[Файл:Приветствие установщика 5.png|800px|навесьэкран|центр|Окно предупреждения о перезаписи данных на целевом диске]] | ||
| + | |||
| + | '''Process of data copying.''' | ||
| + | After you select a disc and accept the installation, the installer will copy the data from the image to the local hard disc. The progress of the copy will be shown on the screen. | ||
| + | [[Файл:Счётчик установки.png|800px|навесьэкран|центр|Окно счётчика установки]] | ||
| + | |||
| + | '''Finish copying the data.''' | ||
| + | |||
| + | After successful installation, a window will appear with information about the default settings for the network interfaces. Once read, remove the bootable USB-Flash from the USB port and press "Restart". The system will restart. | ||
| + | [[Файл:Копирование закончено.png|800px|навесьэкран|центр|Копирование окончено]] | ||
| + | |||
| + | '''Initialization of the "Vinteo" server starts.''' | ||
| + | |||
| + | This is how the system window looks like after restarting from HDD/SSD. | ||
| + | [[Файл:Старт системы 1.1.png|800px|навесьэкран|центр|Старт системы]] | ||
| + | |||
| + | Initializing server. | ||
| + | |||
| + | Wait until installation and initialization of the system is completed. | ||
| + | |||
| + | Warning. During this process the server will automatically restart twice. | ||
| + | |||
| + | [[Файл:Процесс установки 2 .png|800px|навесьэкран|центр||Первый перезапуск]] | ||
| + | [[Файл:Процесс установки 3.png|800px|навесьэкран|центр|Второй перезапуск]] | ||
| + | [[Файл:Процесс установки 5 ввод данных 1 .png|800px|навесьэкран|центр|Начало работы сервера, настройка сетевых интерфейсов]] | ||
| + | |||
| + | '''Server console''' | ||
| + | |||
| + | The default state of the system screen in its working state is a command line like this: | ||
| + | |||
| + | #>_ | ||
| + | |||
| + | '''Warning! After the # appears you must wait 3 minutes and then reboot the server. Failure to do so will require a server reinstallation.''' | ||
| + | |||
| + | [[Файл:Консоль_сервера.png|800px|навесьэкран|центр|Консоль_сервера]] | ||
| + | |||
| + | This is a normal state of correctly working VINTEO. There is no GUI (graphical interface) in "Vinteo". Here you can make initial configuration settings of the network interfaces for later access to the settings via the Web-interface. The video conferencing server is controlled through the Web-interface. | ||
| + | |||
| + | Console commands: | ||
| + | |||
| + | The list of available commands is displayed by "help" command. | ||
| + | |||
| + | By default, the Vinteo has an IP address of 10.0.0.10 with a mask of 255.255.255.0 on the network interface. To change the ip address, use the command - "set default interface", after entering which a dialog will appear: | ||
| + | |||
| + | #intname > (enter name - "eth0", press Enter) | ||
| + | #ipaddr > (enter desired address, press Enter) | ||
| + | #mask > (enter the mask in the format "ХХХ.ХХХ.ХХ.ХХХ" and press Enter) | ||
| + | #gw > (enter the ip address of the gateway, press Enter) | ||
| + | |||
| + | |||
| + | A screen will display a summary of the eth0 interface configuration and the current routing table. | ||
| + | |||
| + | '''Attention: IP address set in this way is not saved after server restart. It is mandatory to log in to the web management interface and configure the interface System -> Settings -> Network Interface Settings.''' | ||
| + | |||
| + | '''Initial login to the Web-based server management interface.''' | ||
| + | |||
| + | By default the system has a self-signed certificate installed, so when you connect via https to the server address (default or the one assigned in the console) the browser will display a security warning. Use your browser to connect to 10.0.0.10 or the one assigned in the console. | ||
| + | |||
| + | [[Файл:Web1 .png|800px|навесьэкран|центр|Стр.1]] | ||
| + | |||
| + | As there is no up-to-date ssl certificate loaded into the system, you should accept it by clicking on "Advanced" and "Go to 10.0.0.10(not secure)" in the Google Chrome browser, for example. | ||
| + | |||
| + | [[Файл:Web2.png|800px|навесьэкран|центр|Стр.2]] | ||
| + | |||
| + | '''The default administrator credentials''' | ||
| + | |||
| + | Next you will see the Vinteo login interface. | ||
| + | |||
| + | The default login is admin, the password is 123 | ||
| + | <span id = 'localization'>It is possible to select the interface language using the graphic switch. Localization is available in Russian, English, Dutch, French, Spanish, German and Vietnamese.</span> | ||
| + | |||
| + | [[Файл:Main page 2.jpg|800px|безрамки|центр|Main page]] | ||
| + | |||
| + | '''The installation was successful.''' | ||
| + | |||
| + | [[Changing_of_the_%27admin%27_user_password_on_the_server|Instructions]] to change the admin password. | ||
Текущая версия на 09:58, 3 декабря 2025
English / Vinteo Server Installation Manual
This document is an installation manual for the VINTEO VCS Server software. This manual may not reflect some modifications of the software. If you notice or suspect any errors or misprints in the manual, please notify VINTEO. This manual may only be used to support the functionality of products installed under contract with VINTEO. The manual may be transferred on the basis of a contract under which the products are (have been or will be) installed, or the explicit consent of VINTEO. to the use of this manual. If you should happen to receive this manual in any other way, please notify VINTEO by the address below. All examples contained in the manual (including sample reports and screen forms) have been compiled on the basis of the test database of VINTEO. Any coincidence of names, company names and other information with real data is random. All trademarks and registered trademarks used are the property of their respective owners and are used solely to identify the software or companies. All property rights remain with VINTEO in accordance with the applicable law.
Software preparation
Computer requirements for the preparation of the installation flash disk
- Processor with a clock frequency of 1 GHz; - 512 MB RAM - Colour monitor with screen resolution 800x600 - Keyboard; - Mouse manipulator.
Operating system
Windows XP, Vista, 7, 8.1, 10
Support software
Rufus
VINTEO VCS SERVER image
https://download.vinteo.com/VinteoServer/
Software setup
Rufus software doesn't require installation, but in Windows 7 and higher it's required to be run as administrator.
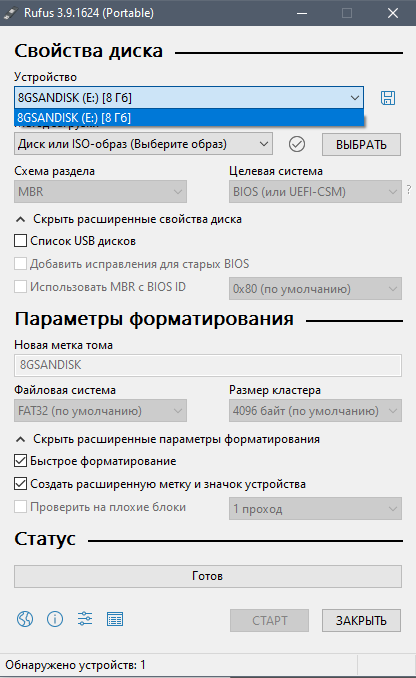
Step 1. Start Rufus, select USB drive you need. Note that the minimum size of a bootable USB disk is 8 GB
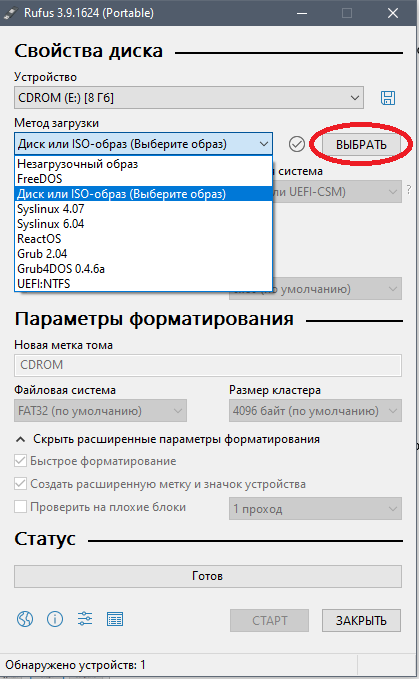
Step 2. In "Download method" dropdown list select "Disk or ISO (Choose image)" image installation disk and press "Select" button where you point to *.iso file you have just downloaded
Step 3: Choose a partition layout, destination and file system
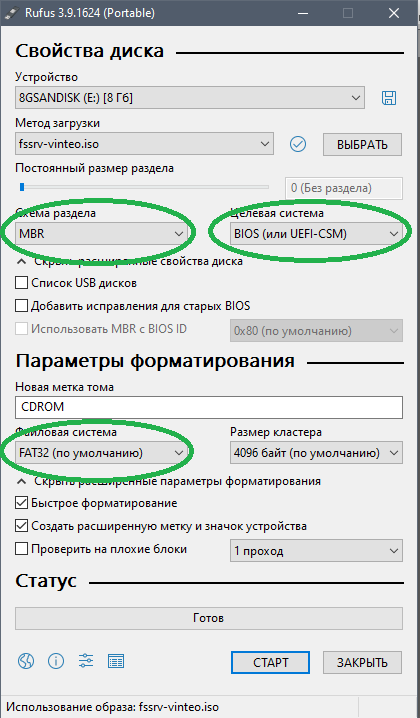
Make sure that "Partition scheme", "Target system" and "File system" are set to "MBR", "BIOS(or UEFI-CSM)" and "FAT32" respectively. The other menu items do not need to be changed.
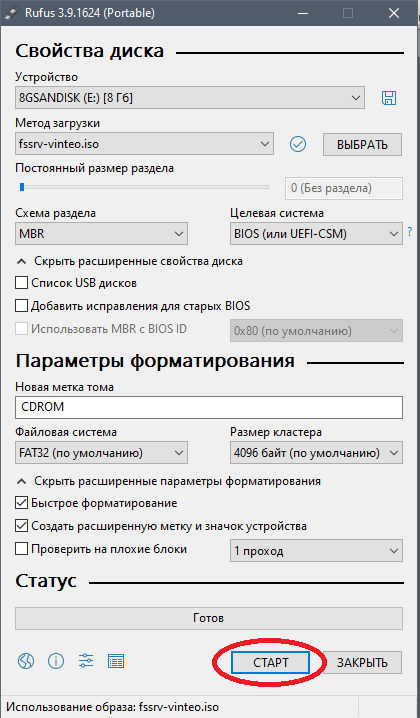
Step 4: Start creating bootable USB-Flash
Press "Start" and "OK" button.
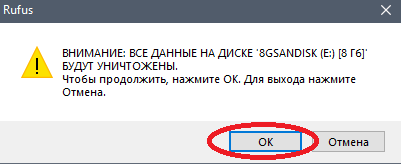
Step 5: Confirming the deletion of all data on the USB flash
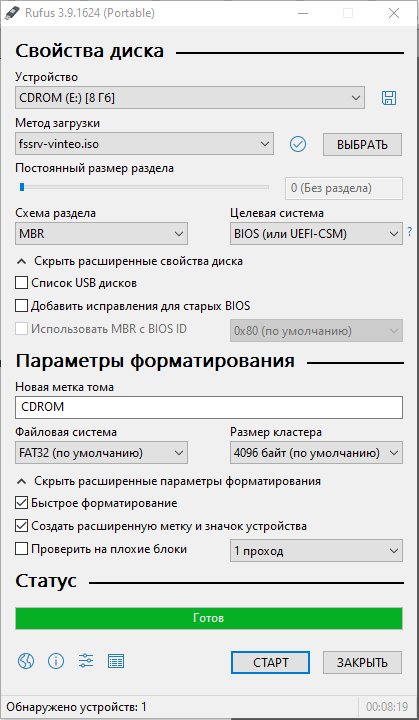
Step 6. Finish preparing a bootable USB-Flash
After a successful write, Rufus will notify you with a green bar saying "Ready" at the bottom of the program window. You can close the program and remove the USB-Flash card.
Preparing the Hardware Platform for Startup
Once the flash drive has been prepared you need to insert it into one of the USB ports on the hardware platform and select it as a boot port.
Warning: The port you are using must support USB 2.0, installation from a 3.0 port may not work correctly.
The boot device (disk) is selected through the BIOS of your hardware platform or by pressing F8 or F12 (depending on the manufacturer) at the beginning of the boot process.
Installation
Boot the target system and perform the initial boot from the USB-Flash installation device.
Warning: When selecting the type of bootable drive (device) do not use UEFI option.
We do not recommend deploying a server on RAID.
If necessary disconnect all but one physical HDD/SSD before installing the server. After the installation was complete you can return the disconnected disks and configure replication. You can get the Instructions for setting up replication by writing to support at support@vinteo.ru
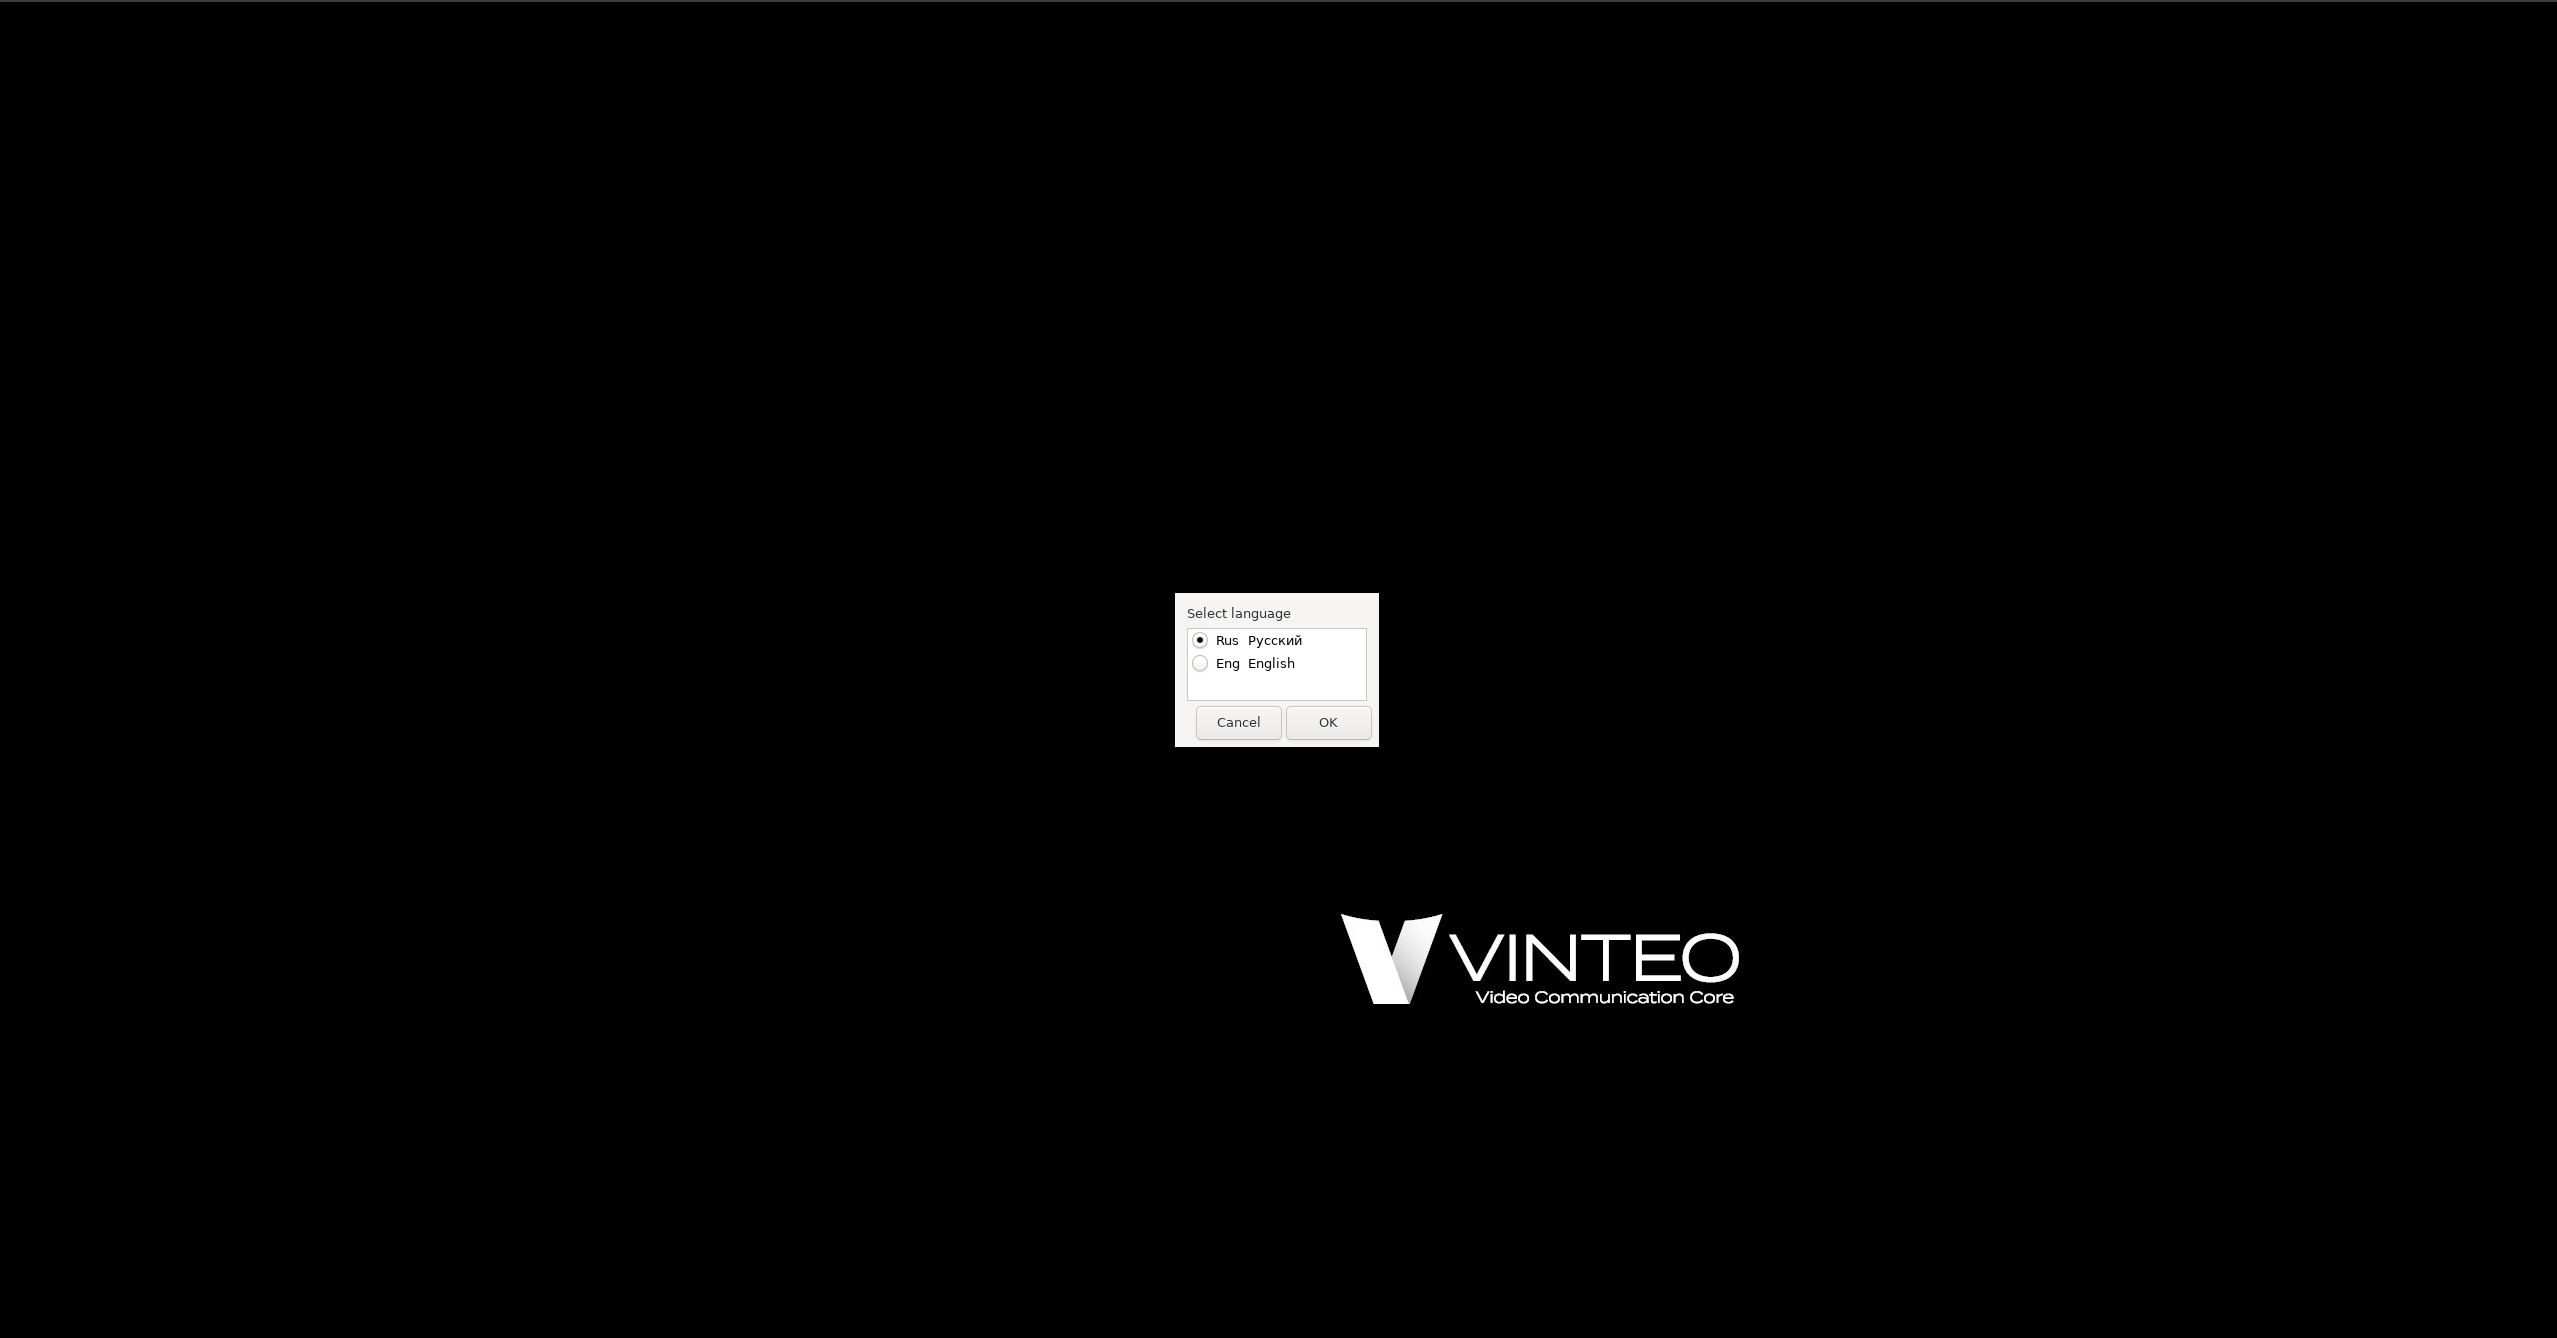
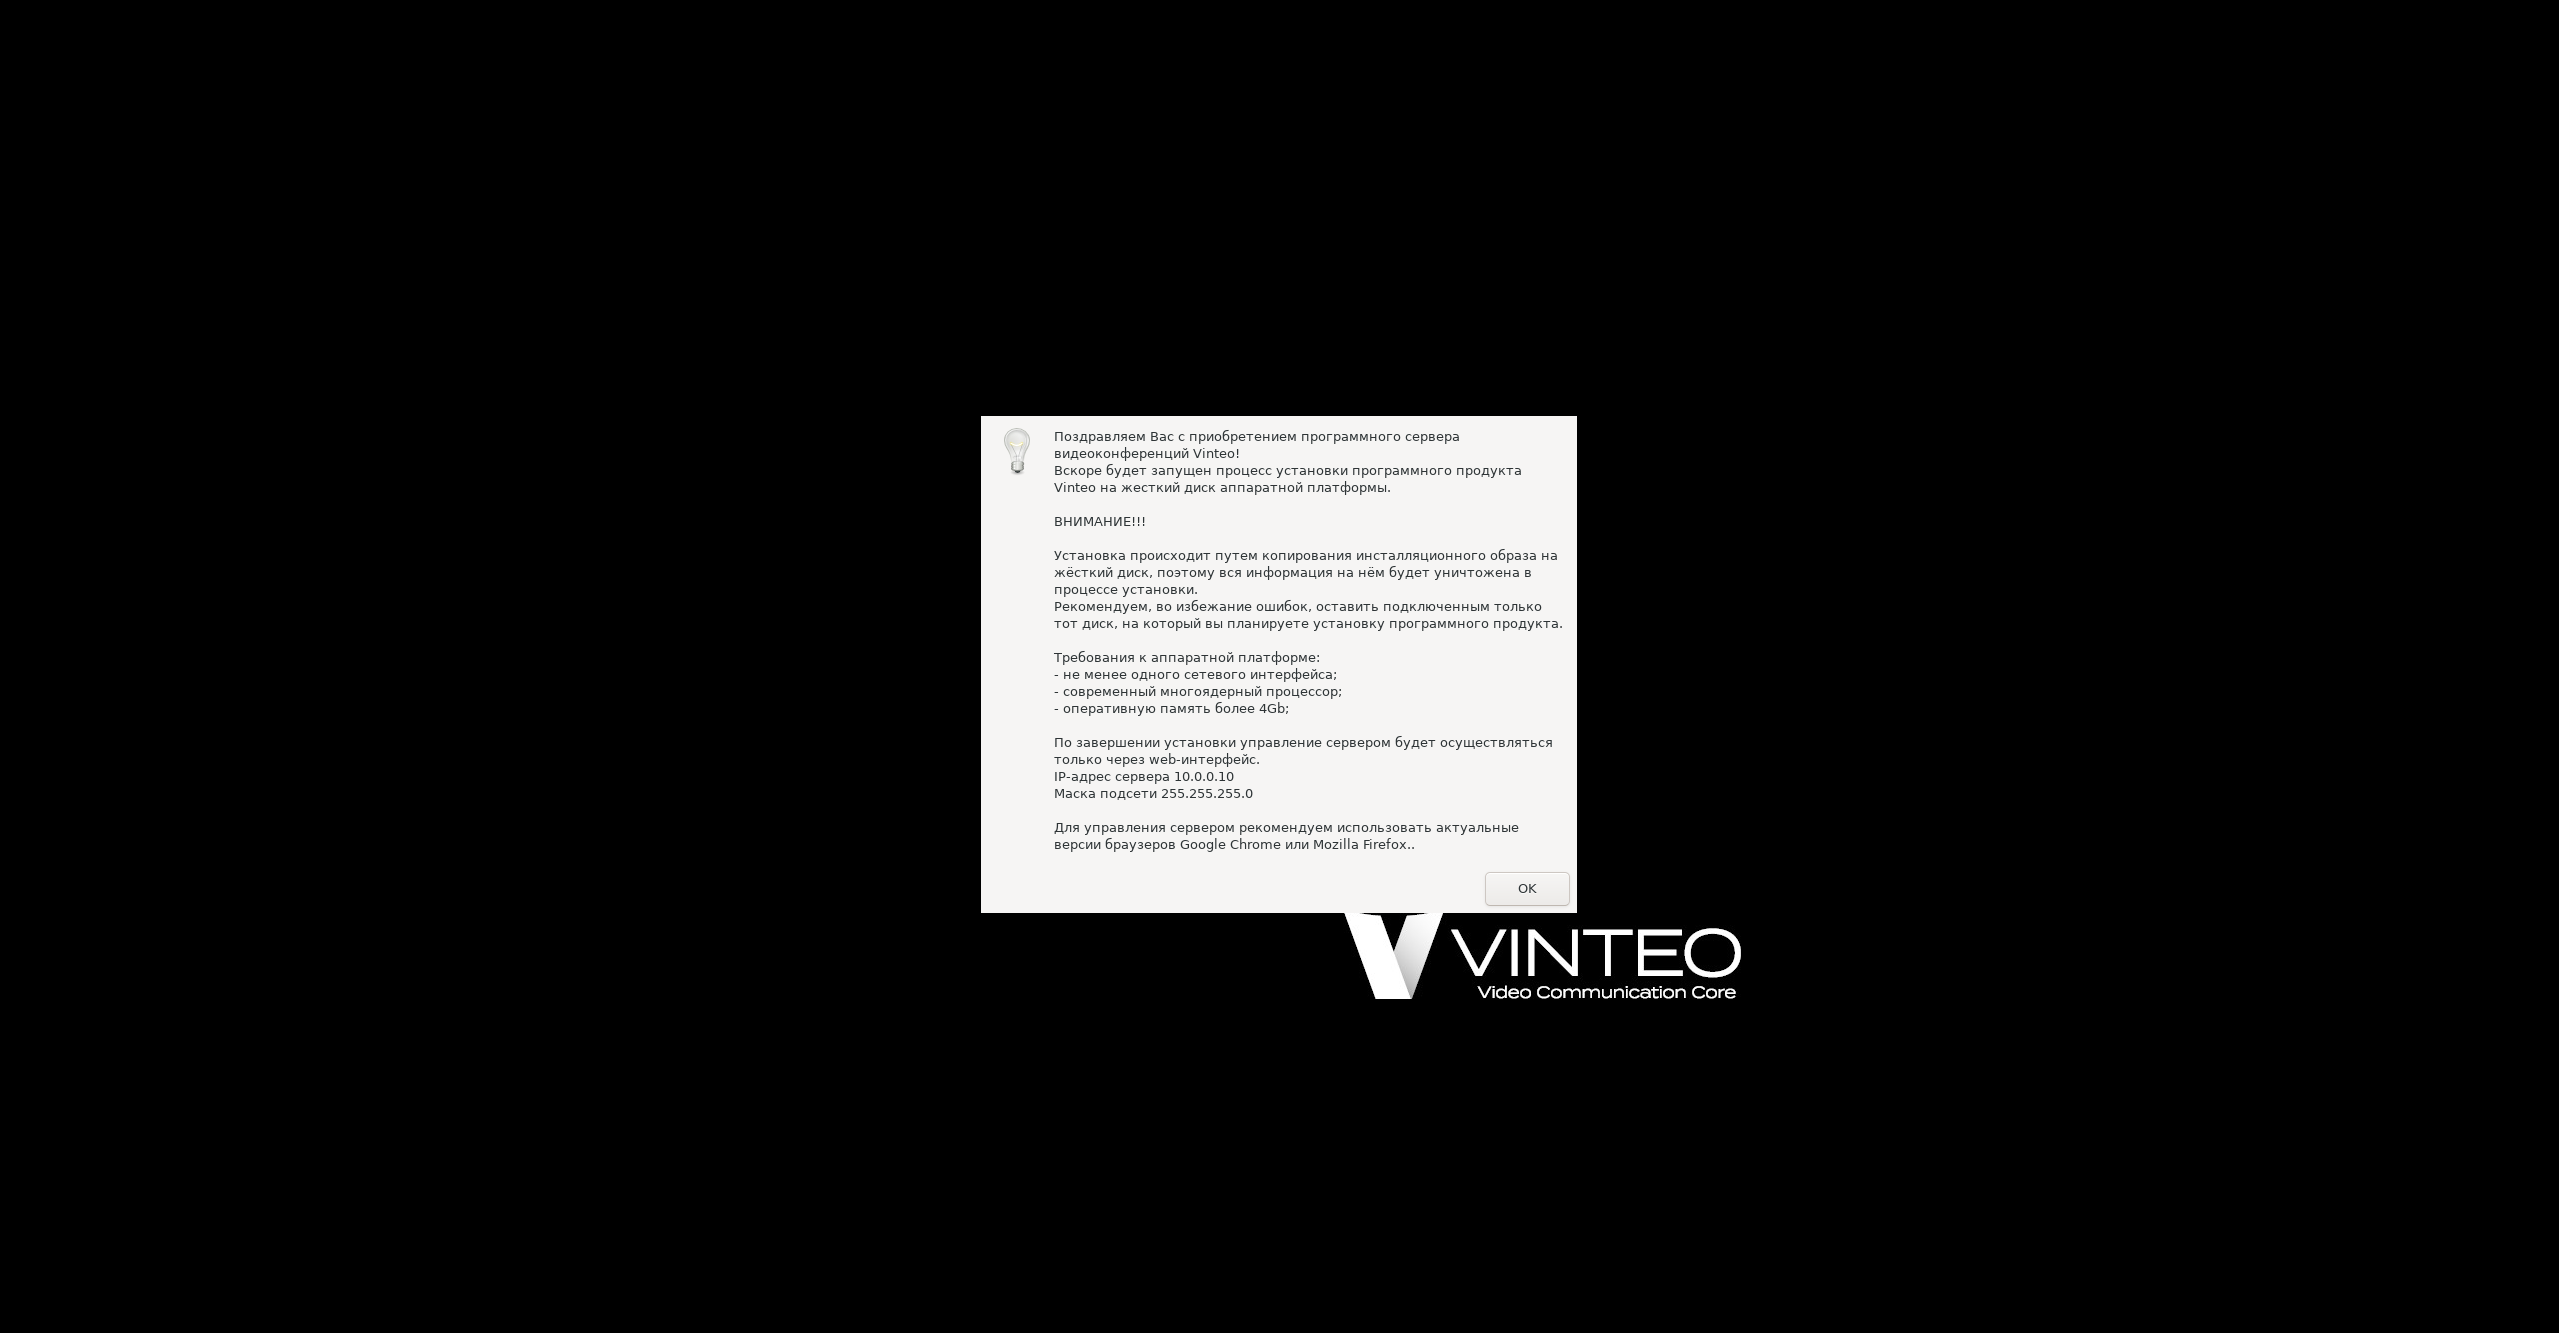
After the installer has successfully booted, a welcome screen will appear with hardware platform requirements and information about the default settings for your network card. Click "Next".
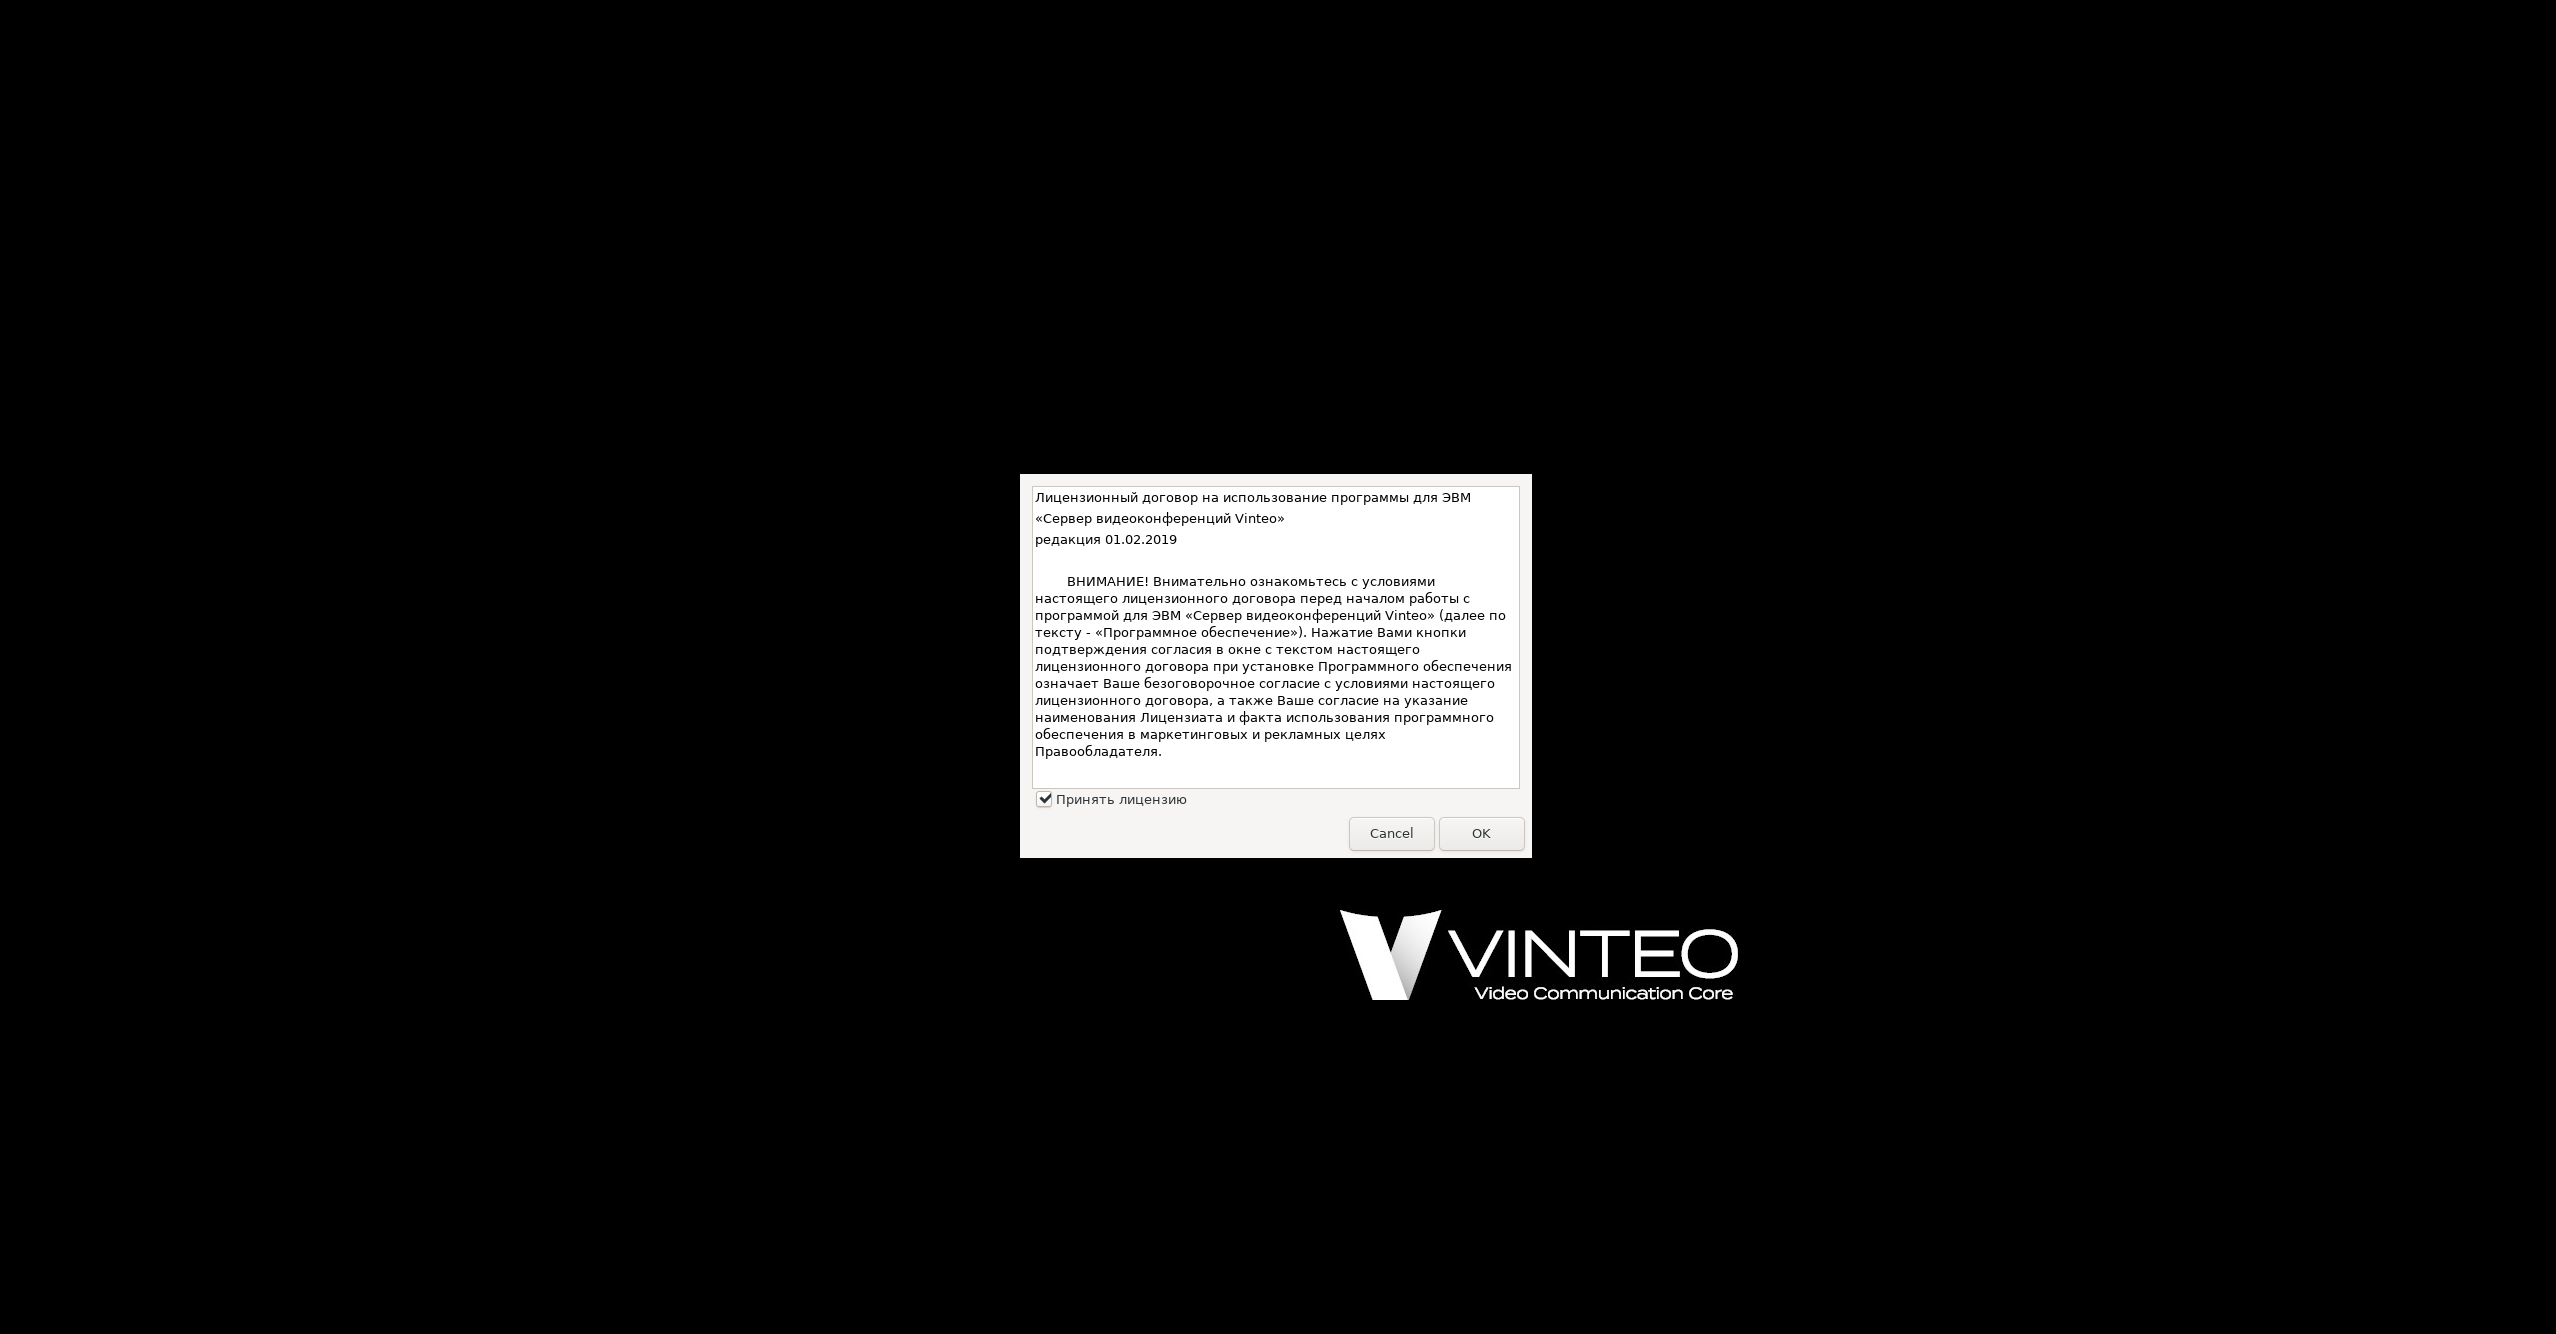
Accepting the license agreement
You are required to accept the license agreement. Press TAB before selecting the button, thus one of the buttons becomes active. Press "Accept license agreement".
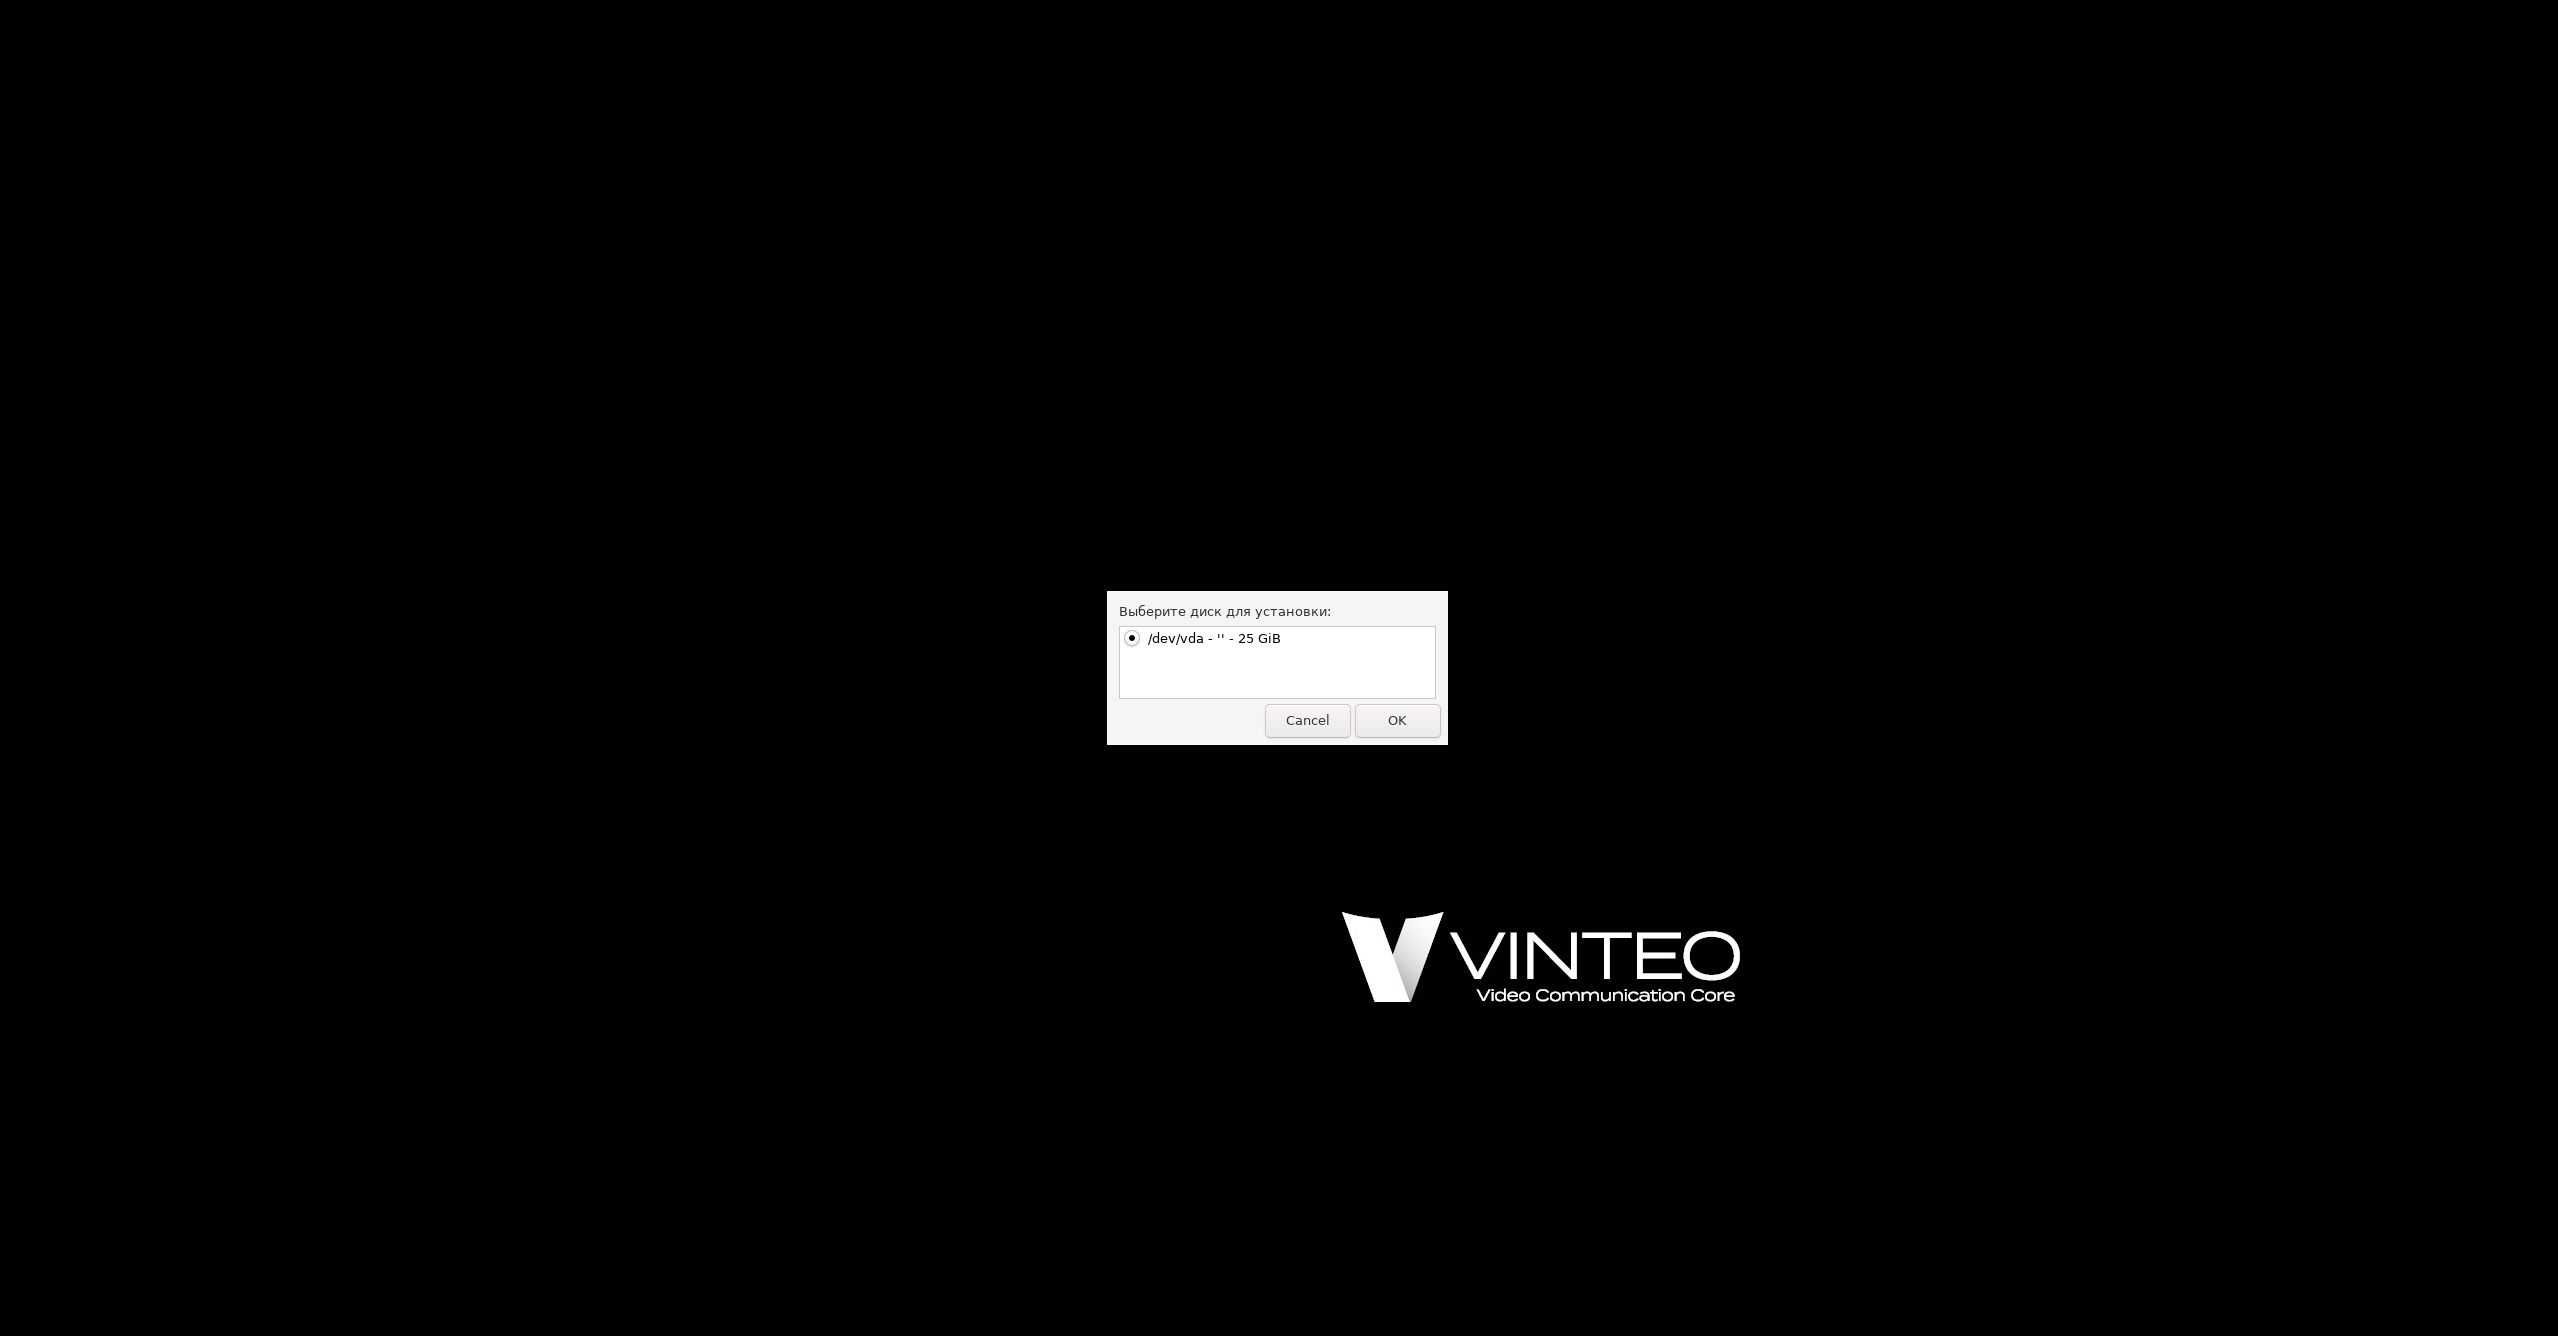
Select the disc you wish to install.
The system prompts you to select the disc on which to install.
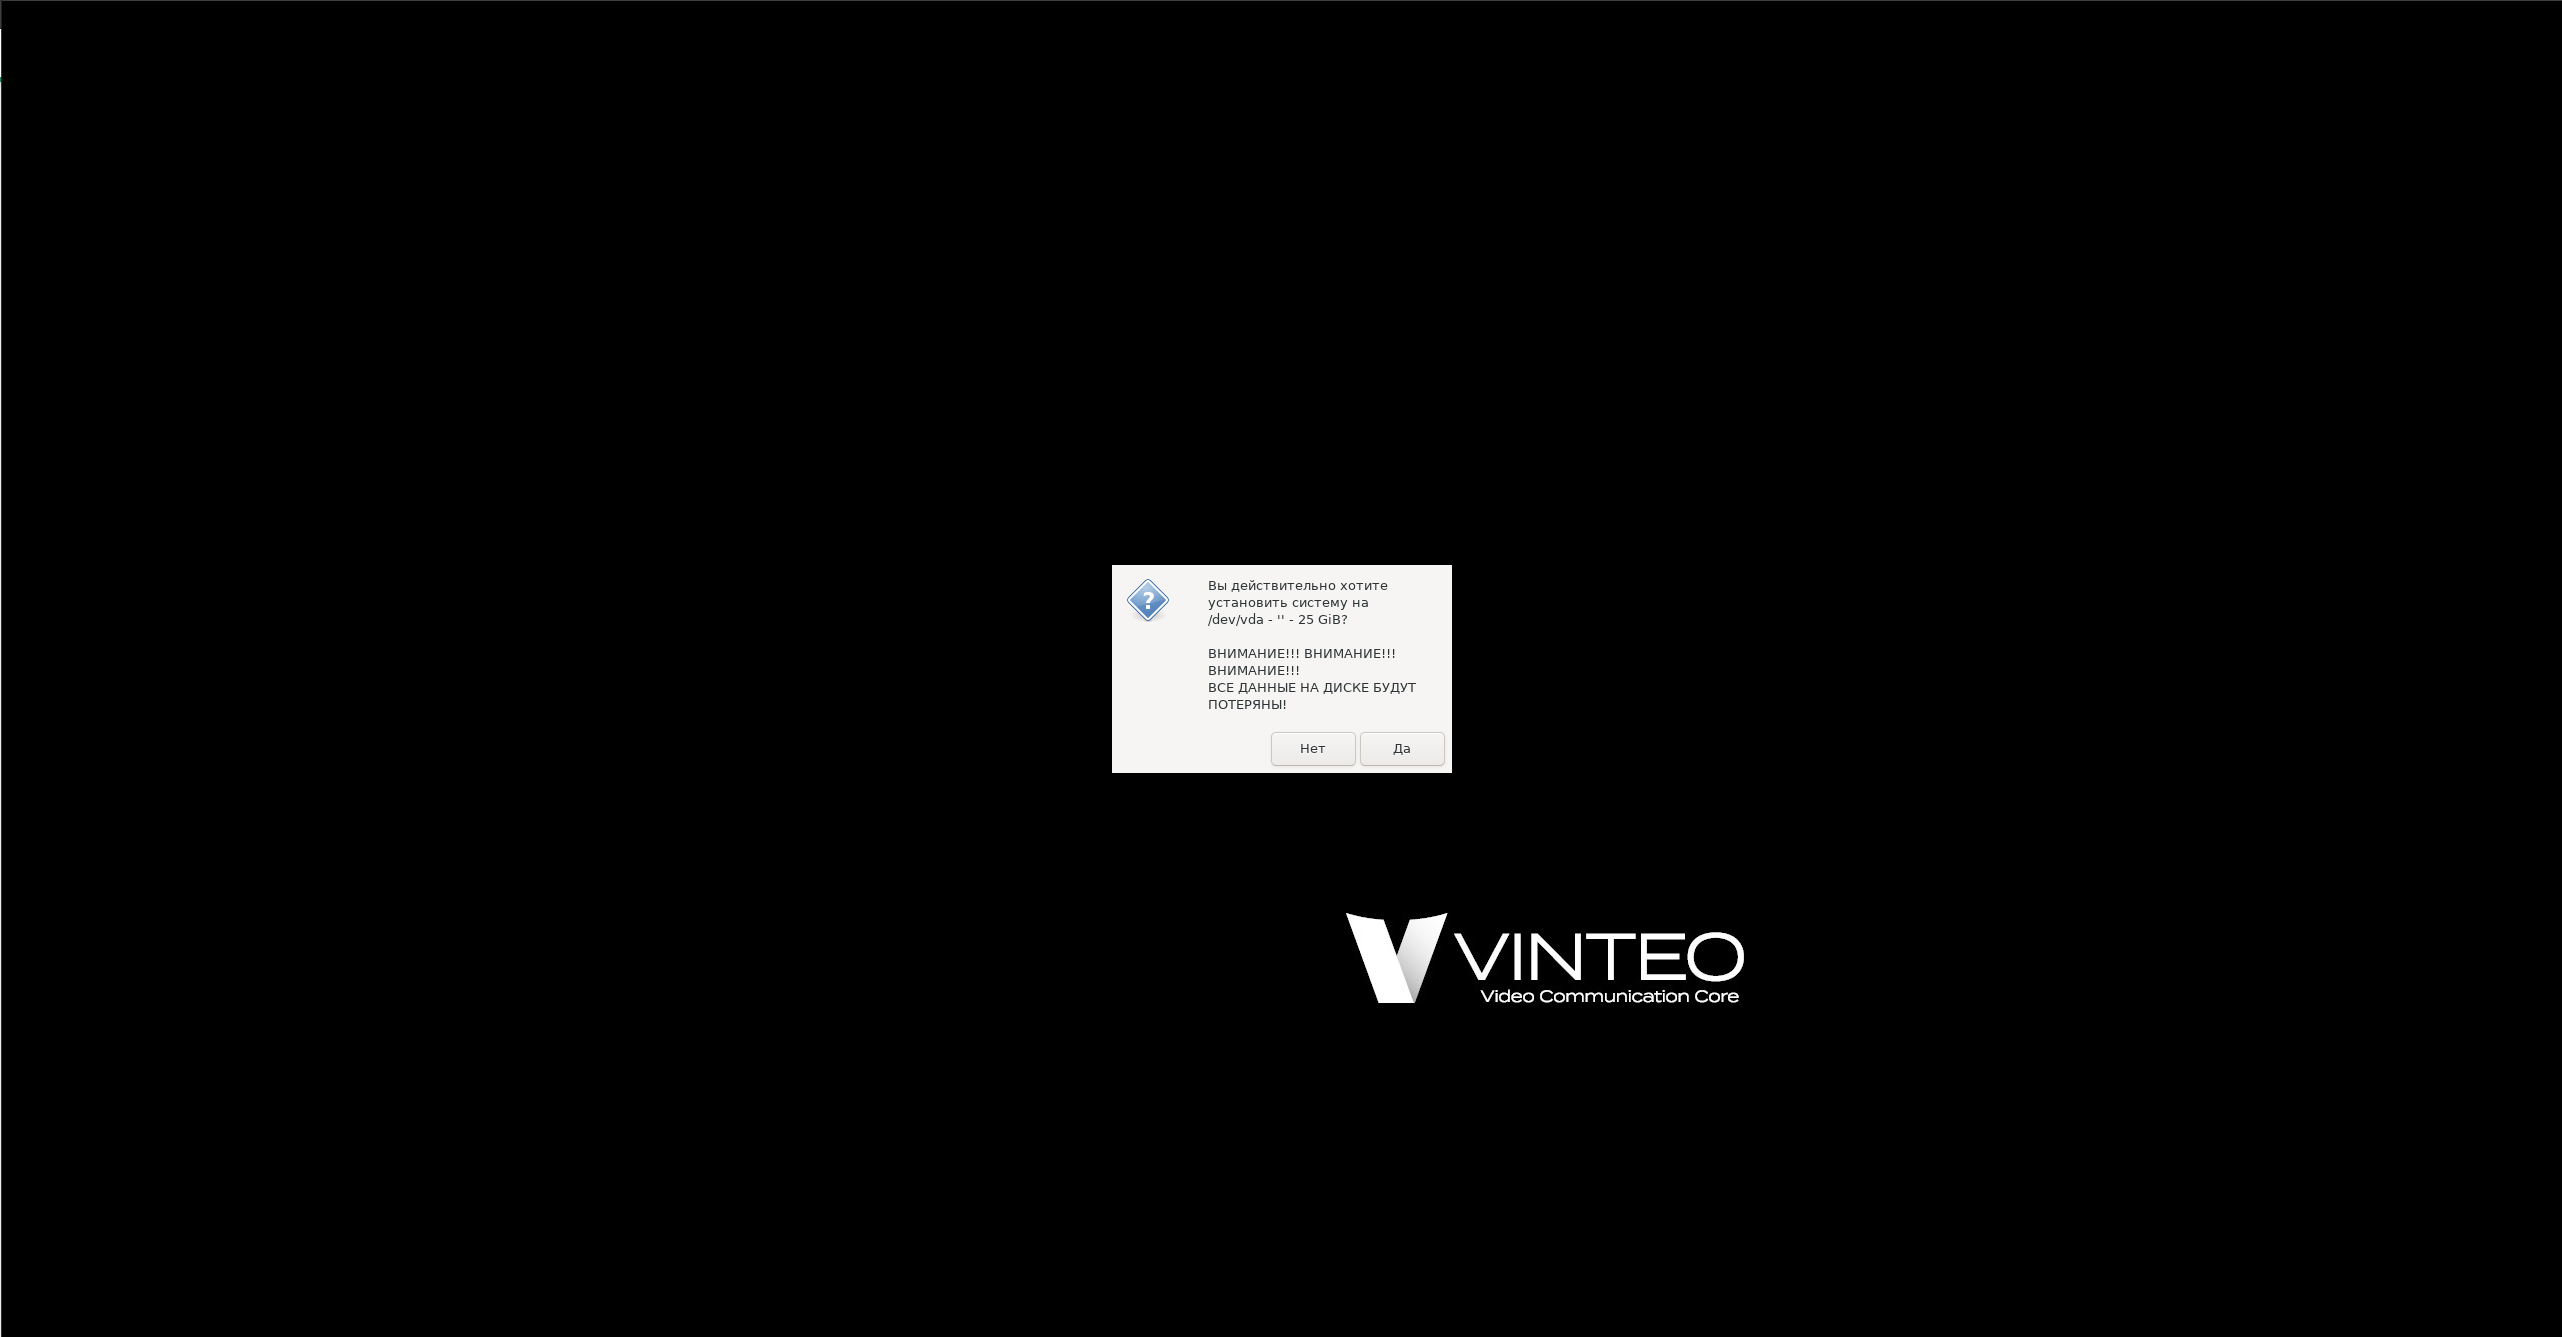
You will be warned that the data will be overwritten.
Next you are asked to accept that all data on the specified disk will be deleted and overwritten. Click "Yes".
Process of data copying. After you select a disc and accept the installation, the installer will copy the data from the image to the local hard disc. The progress of the copy will be shown on the screen.
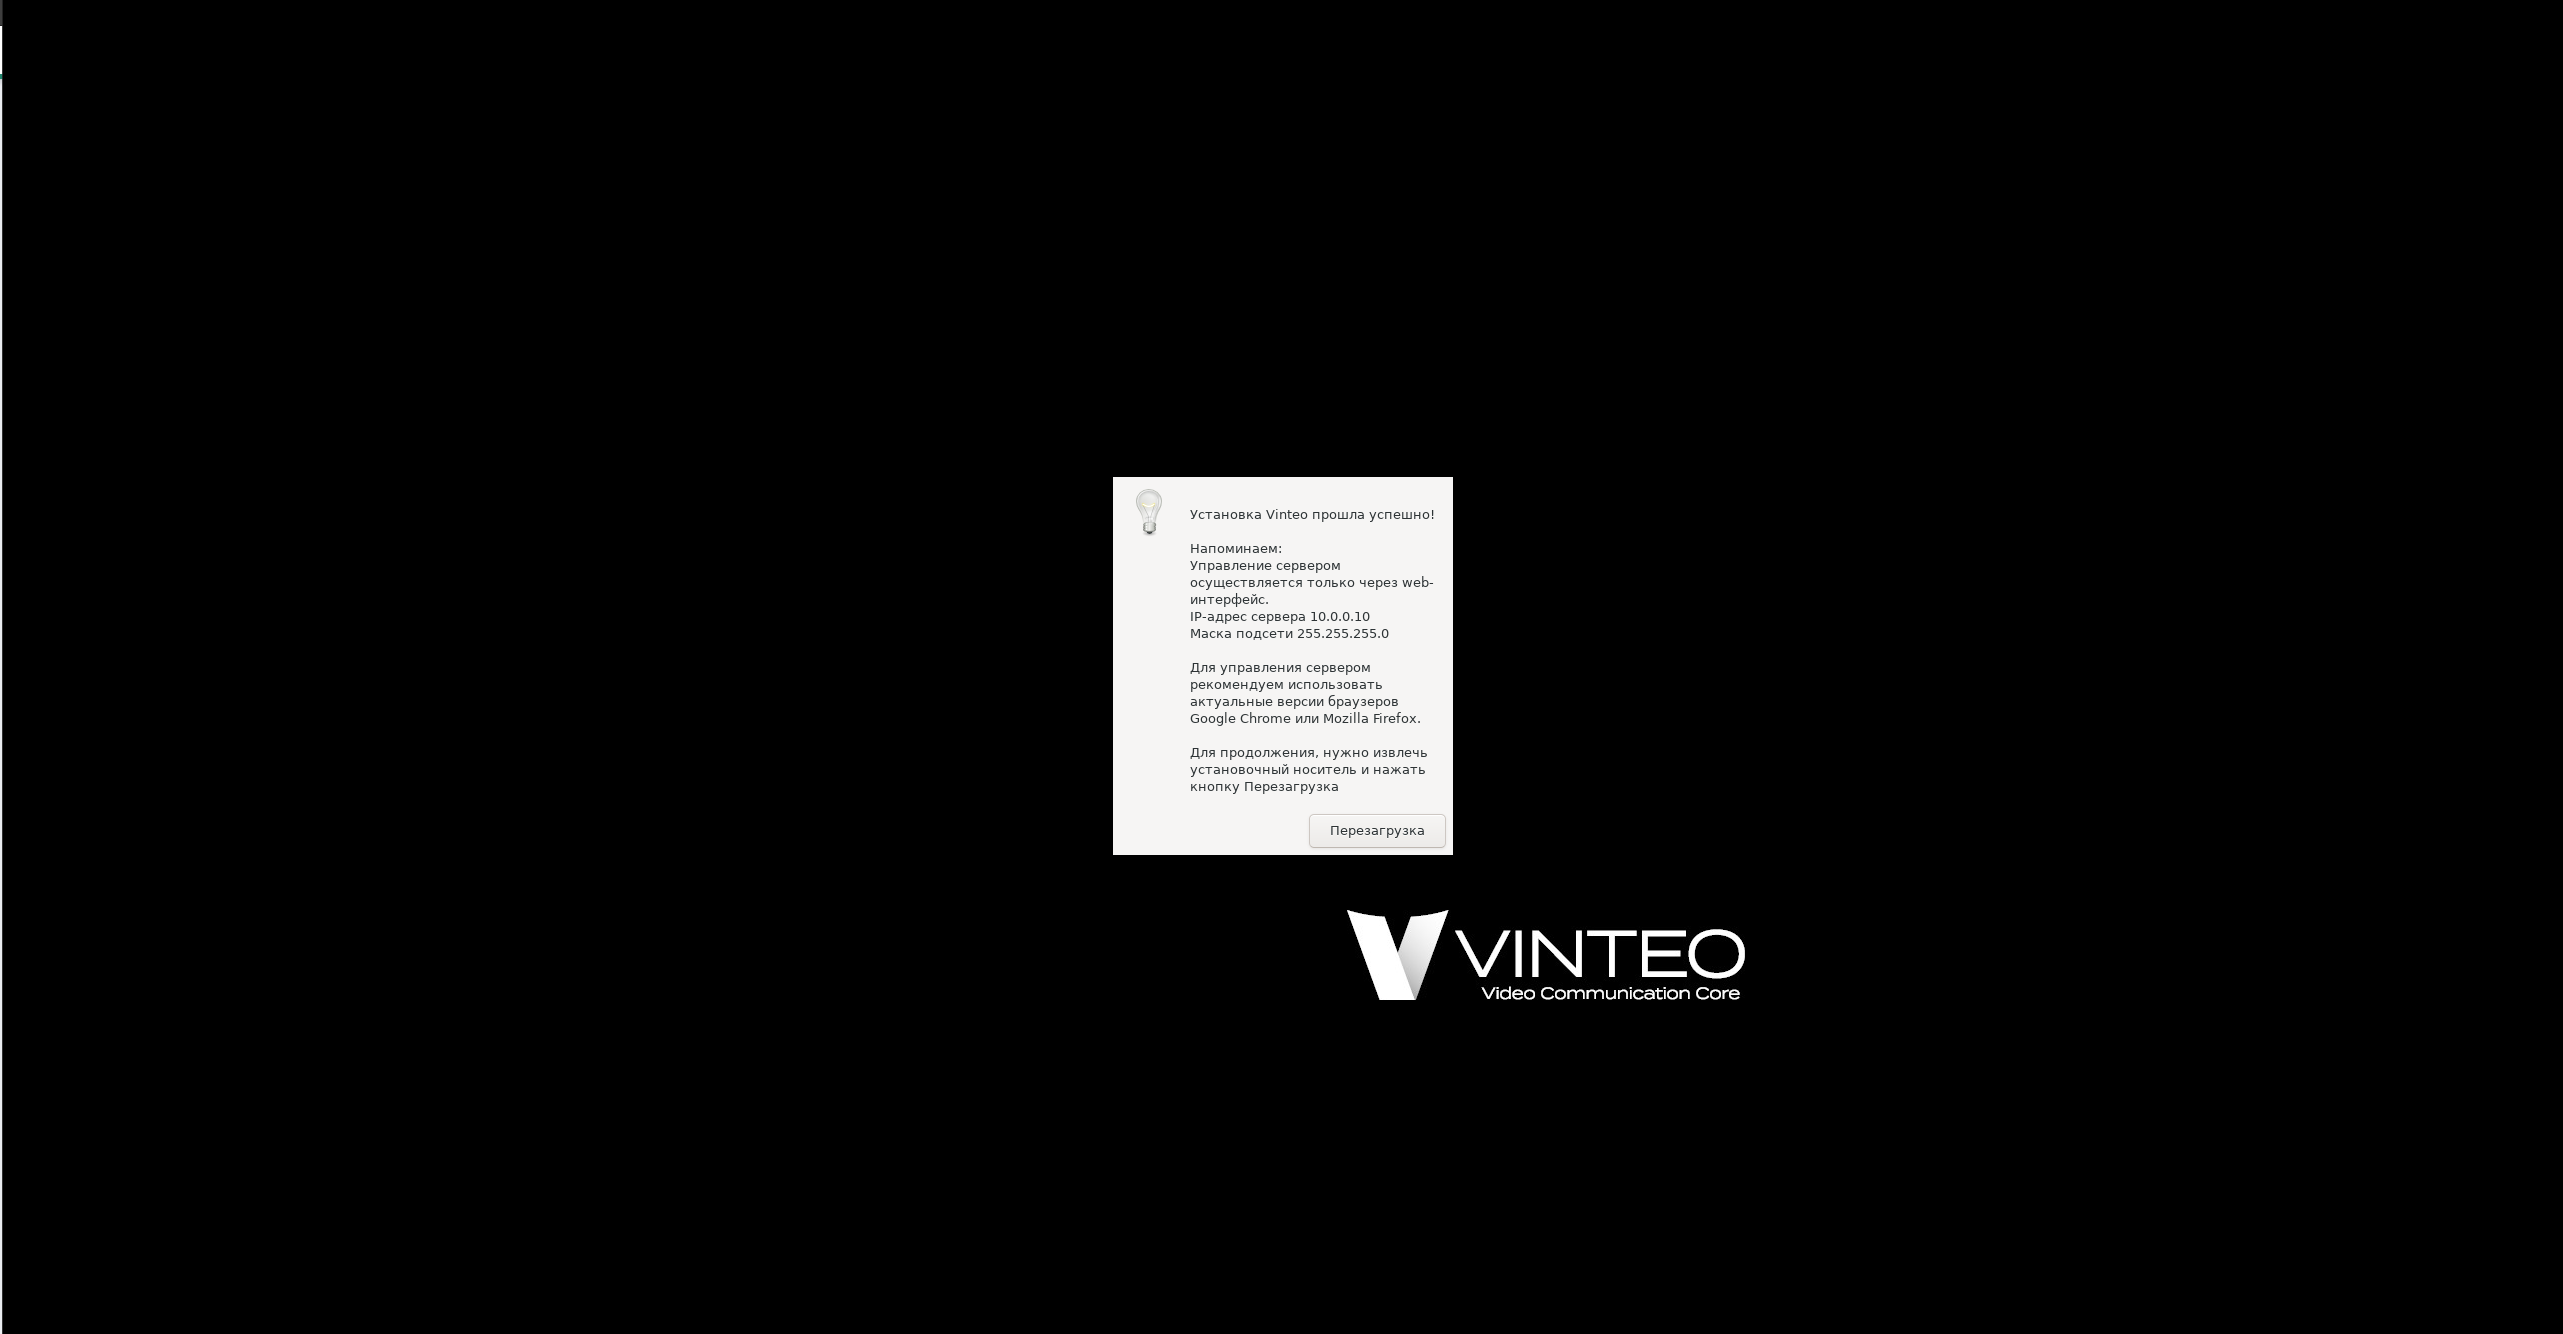
Finish copying the data.
After successful installation, a window will appear with information about the default settings for the network interfaces. Once read, remove the bootable USB-Flash from the USB port and press "Restart". The system will restart.
Initialization of the "Vinteo" server starts.
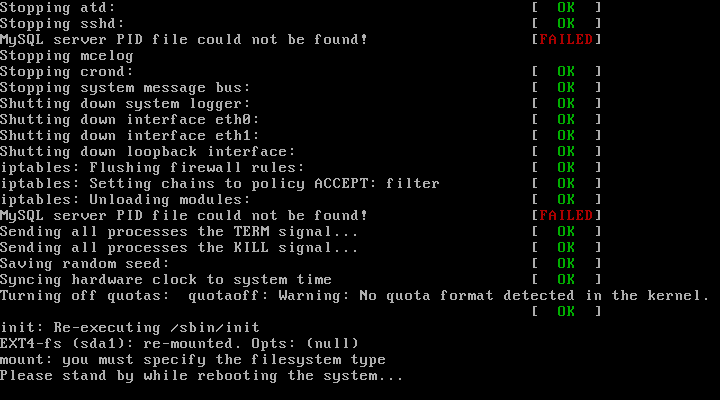
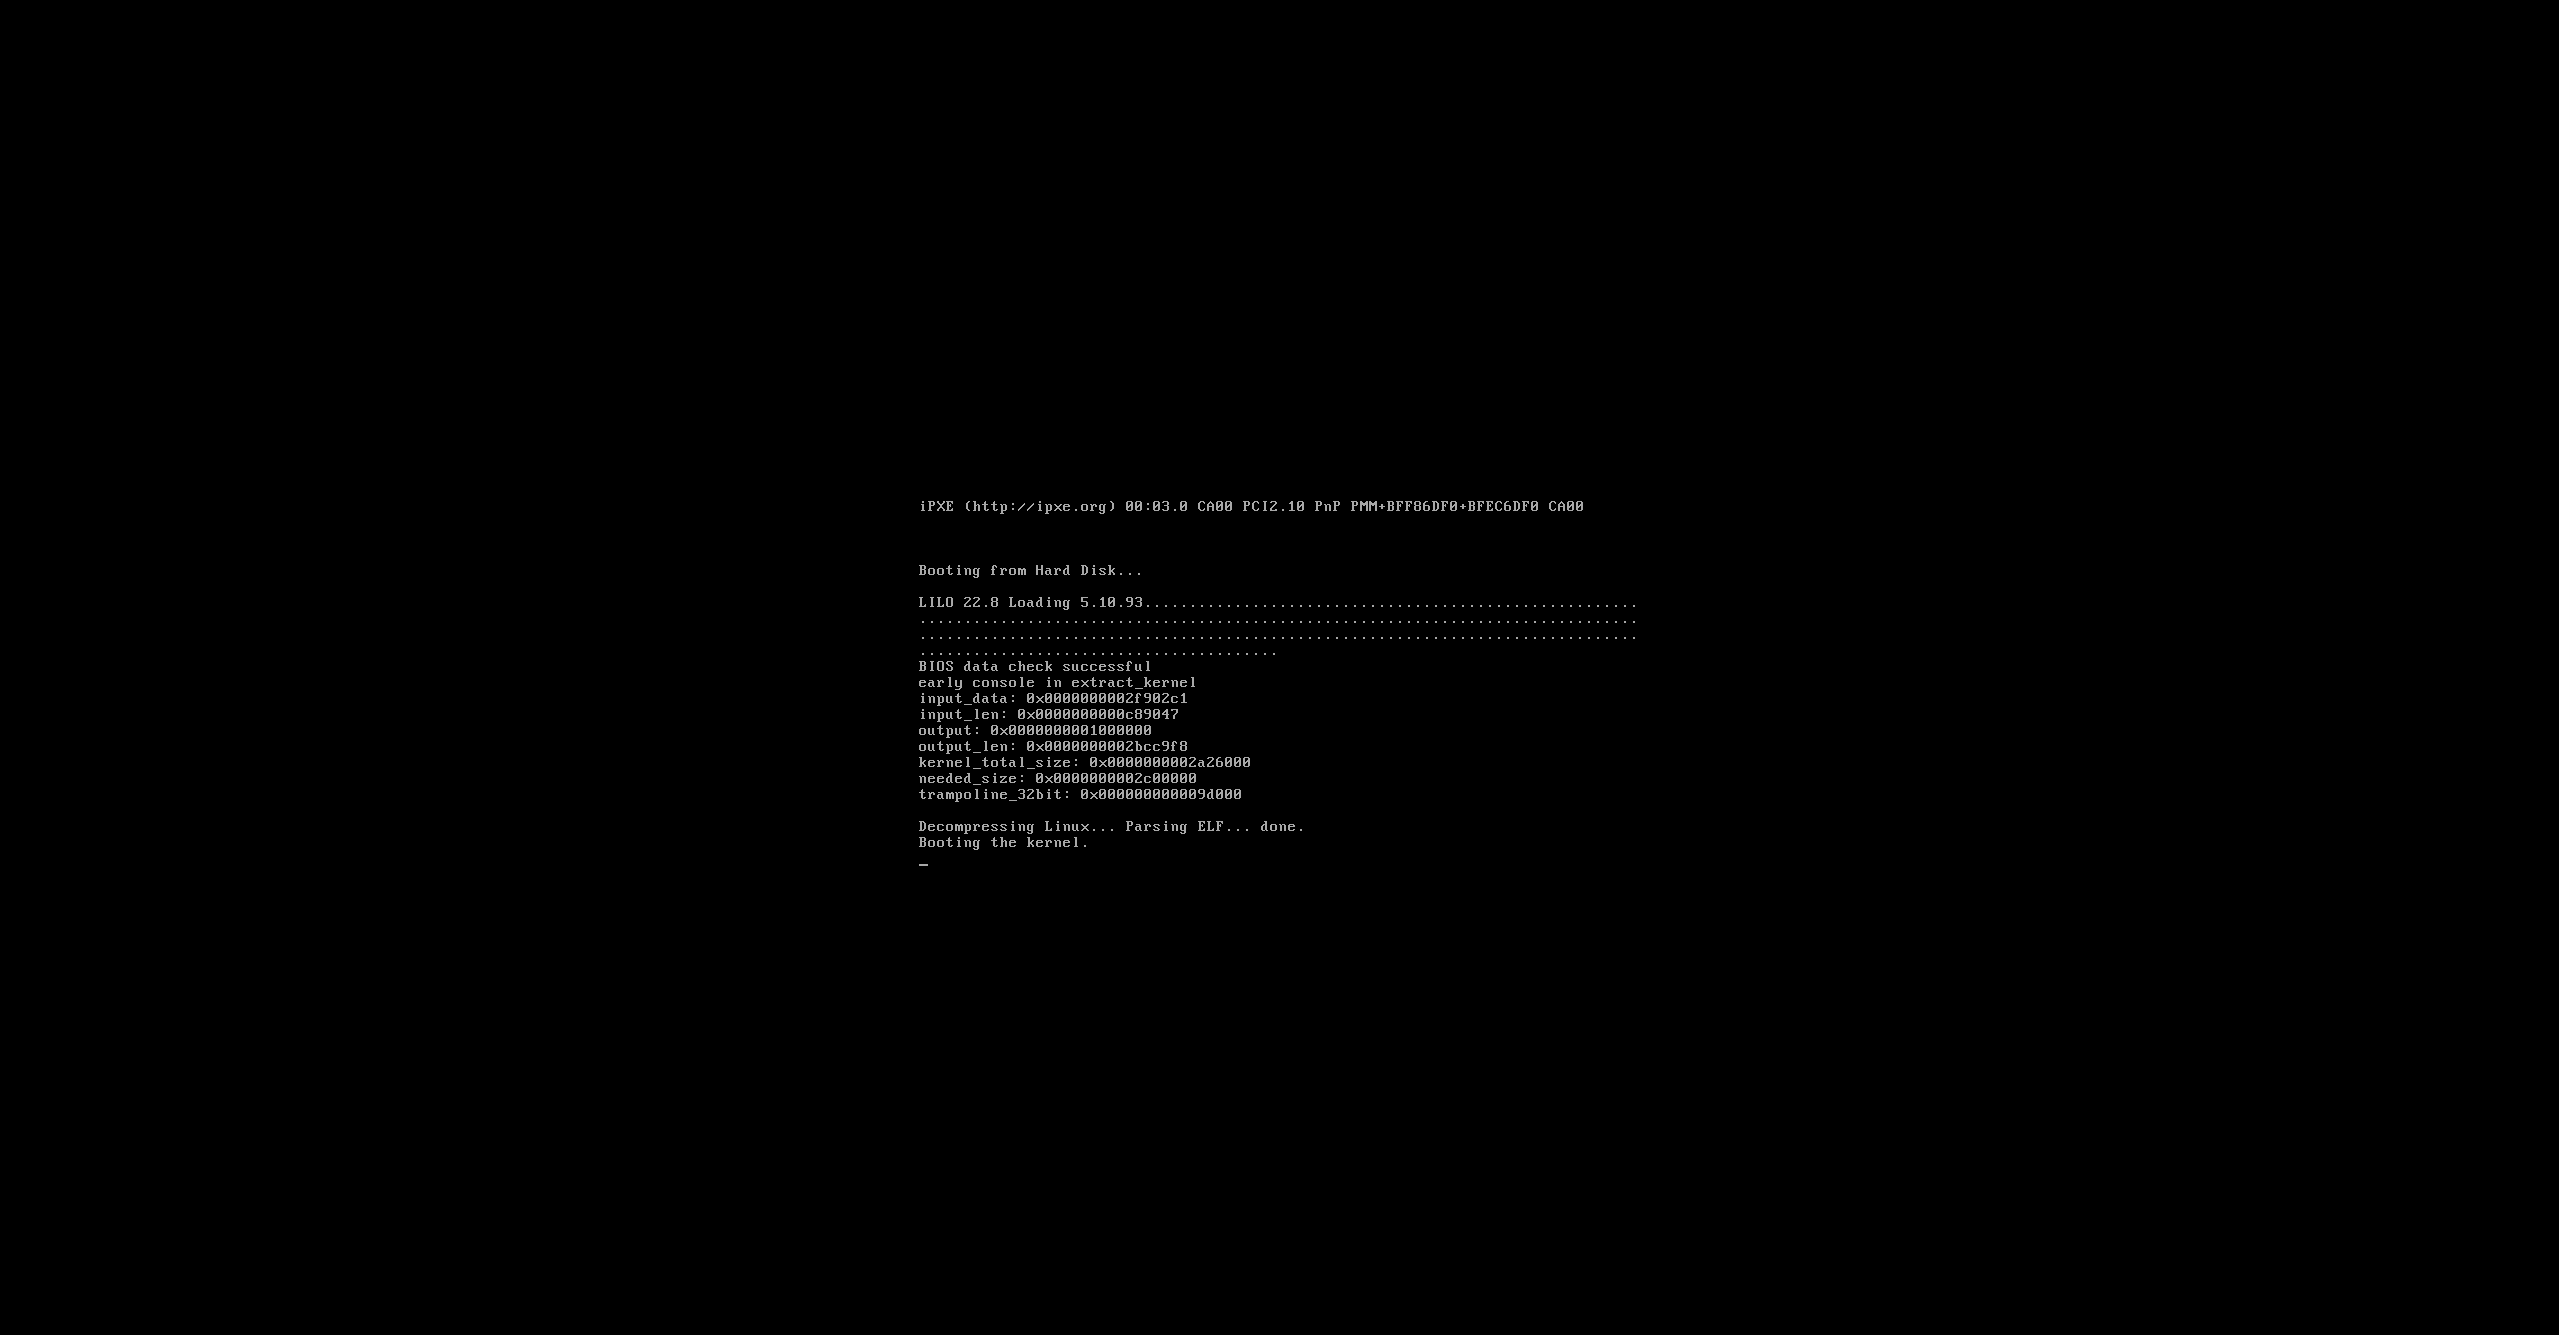
This is how the system window looks like after restarting from HDD/SSD.
Initializing server.
Wait until installation and initialization of the system is completed.
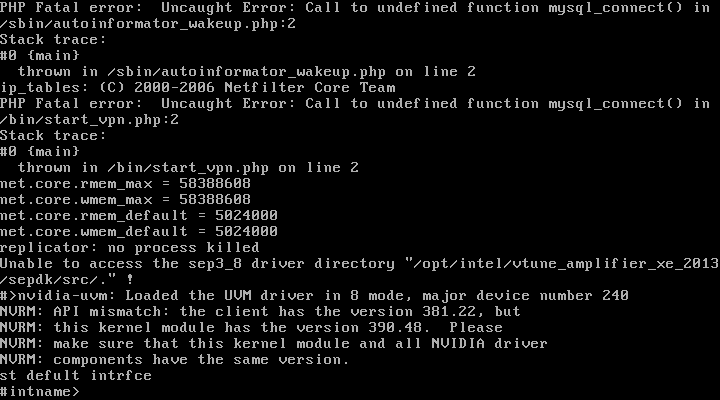
Warning. During this process the server will automatically restart twice.
Server console
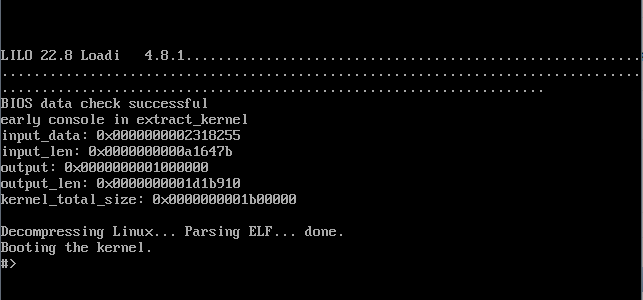
The default state of the system screen in its working state is a command line like this:
#>_
Warning! After the # appears you must wait 3 minutes and then reboot the server. Failure to do so will require a server reinstallation.
This is a normal state of correctly working VINTEO. There is no GUI (graphical interface) in "Vinteo". Here you can make initial configuration settings of the network interfaces for later access to the settings via the Web-interface. The video conferencing server is controlled through the Web-interface.
Console commands:
The list of available commands is displayed by "help" command.
By default, the Vinteo has an IP address of 10.0.0.10 with a mask of 255.255.255.0 on the network interface. To change the ip address, use the command - "set default interface", after entering which a dialog will appear:
 #intname > (enter name - "eth0", press Enter)
 #ipaddr > (enter desired address, press Enter)
 #mask > (enter the mask in the format "ХХХ.ХХХ.ХХ.ХХХ" and press Enter)
 #gw > (enter the ip address of the gateway, press Enter)
A screen will display a summary of the eth0 interface configuration and the current routing table.
Attention: IP address set in this way is not saved after server restart. It is mandatory to log in to the web management interface and configure the interface System -> Settings -> Network Interface Settings.
Initial login to the Web-based server management interface.
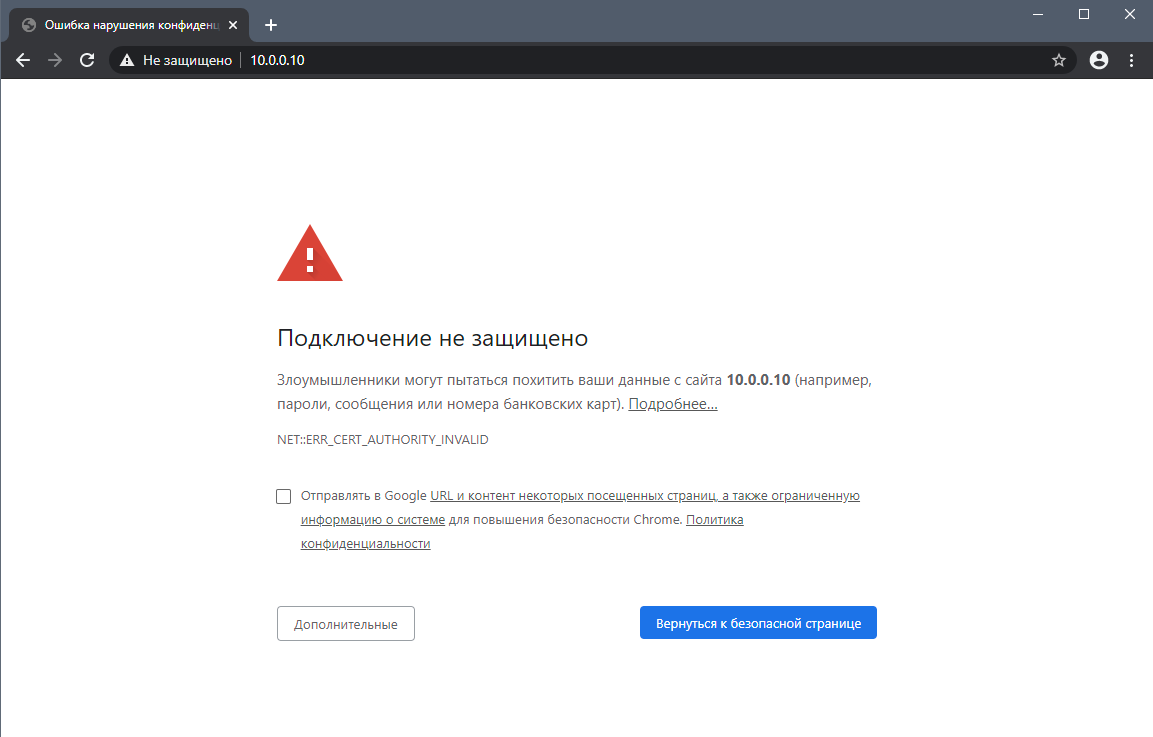
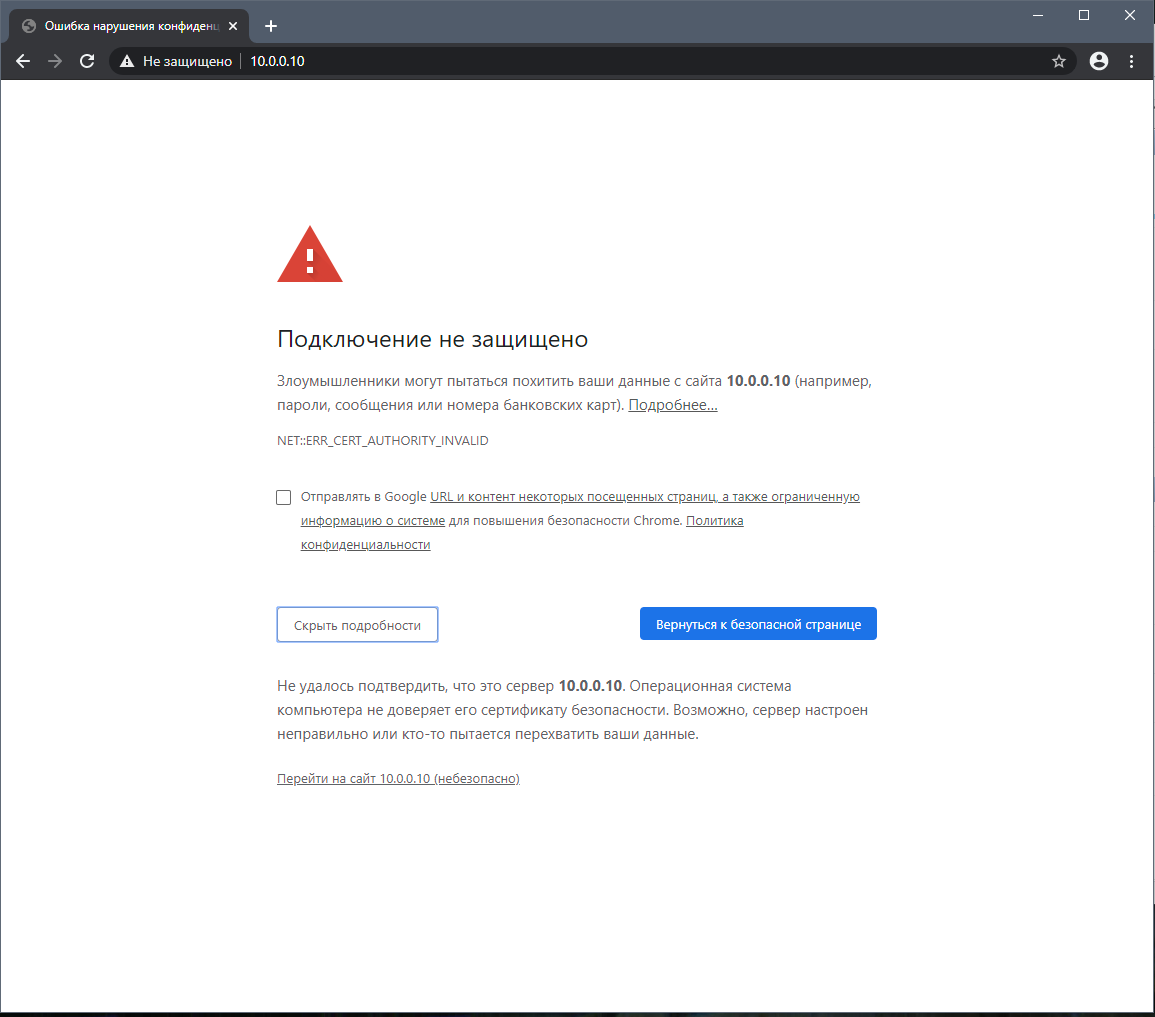
By default the system has a self-signed certificate installed, so when you connect via https to the server address (default or the one assigned in the console) the browser will display a security warning. Use your browser to connect to 10.0.0.10 or the one assigned in the console.
As there is no up-to-date ssl certificate loaded into the system, you should accept it by clicking on "Advanced" and "Go to 10.0.0.10(not secure)" in the Google Chrome browser, for example.
The default administrator credentials
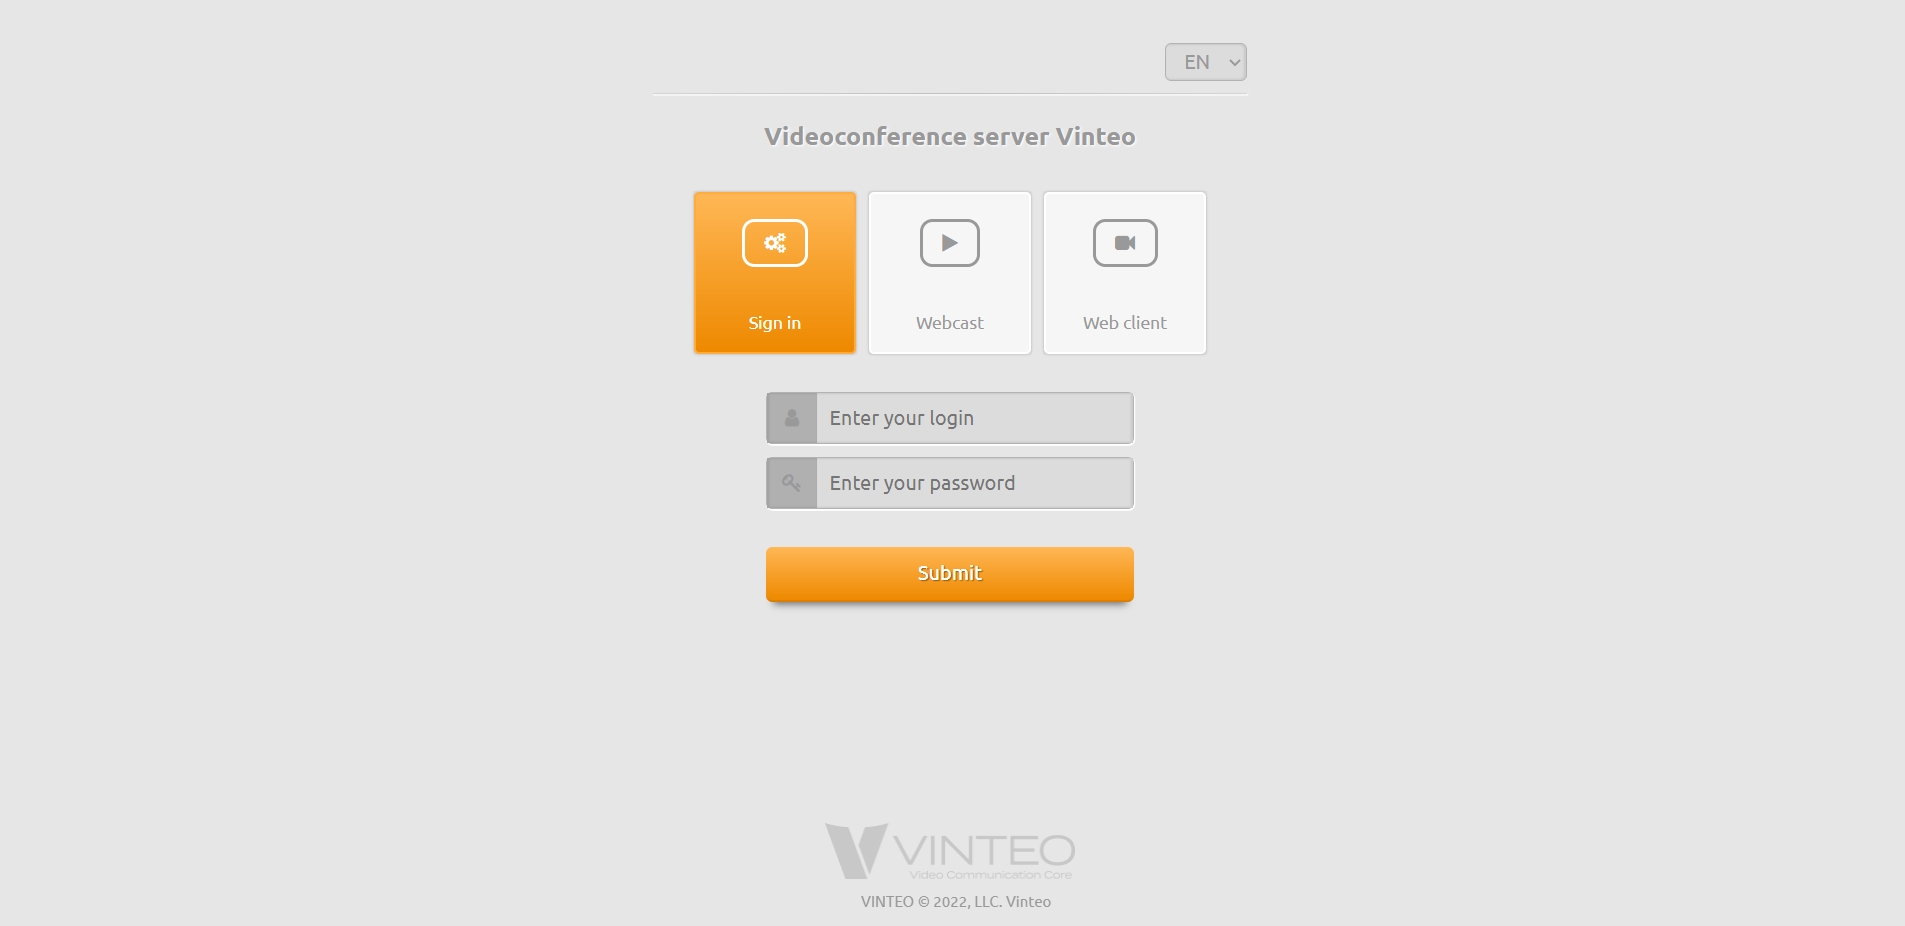
Next you will see the Vinteo login interface.
The default login is admin, the password is 123
It is possible to select the interface language using the graphic switch. Localization is available in Russian, English, Dutch, French, Spanish, German and Vietnamese.
The installation was successful.
Instructions to change the admin password.
