Add new account: различия между версиями
Alina (обсуждение | вклад) |
Alina (обсуждение | вклад) |
||
| Строка 42: | Строка 42: | ||
#Enter the account's IP address if the account connects via SIP protocol in no registration mode or if the account connects via H.323 protocol in no registration with gatekeeper mode. This string defaults has 'dynamic' value in registration mode. | #Enter the account's IP address if the account connects via SIP protocol in no registration mode or if the account connects via H.323 protocol in no registration with gatekeeper mode. This string defaults has 'dynamic' value in registration mode. | ||
| + | |||
| + | #The Port string has port numbers of the connecting account. For the SIP it must be 5060 port. For the H.323 it must be 1720 port. | ||
| + | |||
| + | #The Transport string defines the data transport protocol for SIP accounts and transporting video and audio streams for them. Values are UDP, TCP or TLS. | ||
Версия 14:56, 20 августа 2020
Main settings
To add a new account:
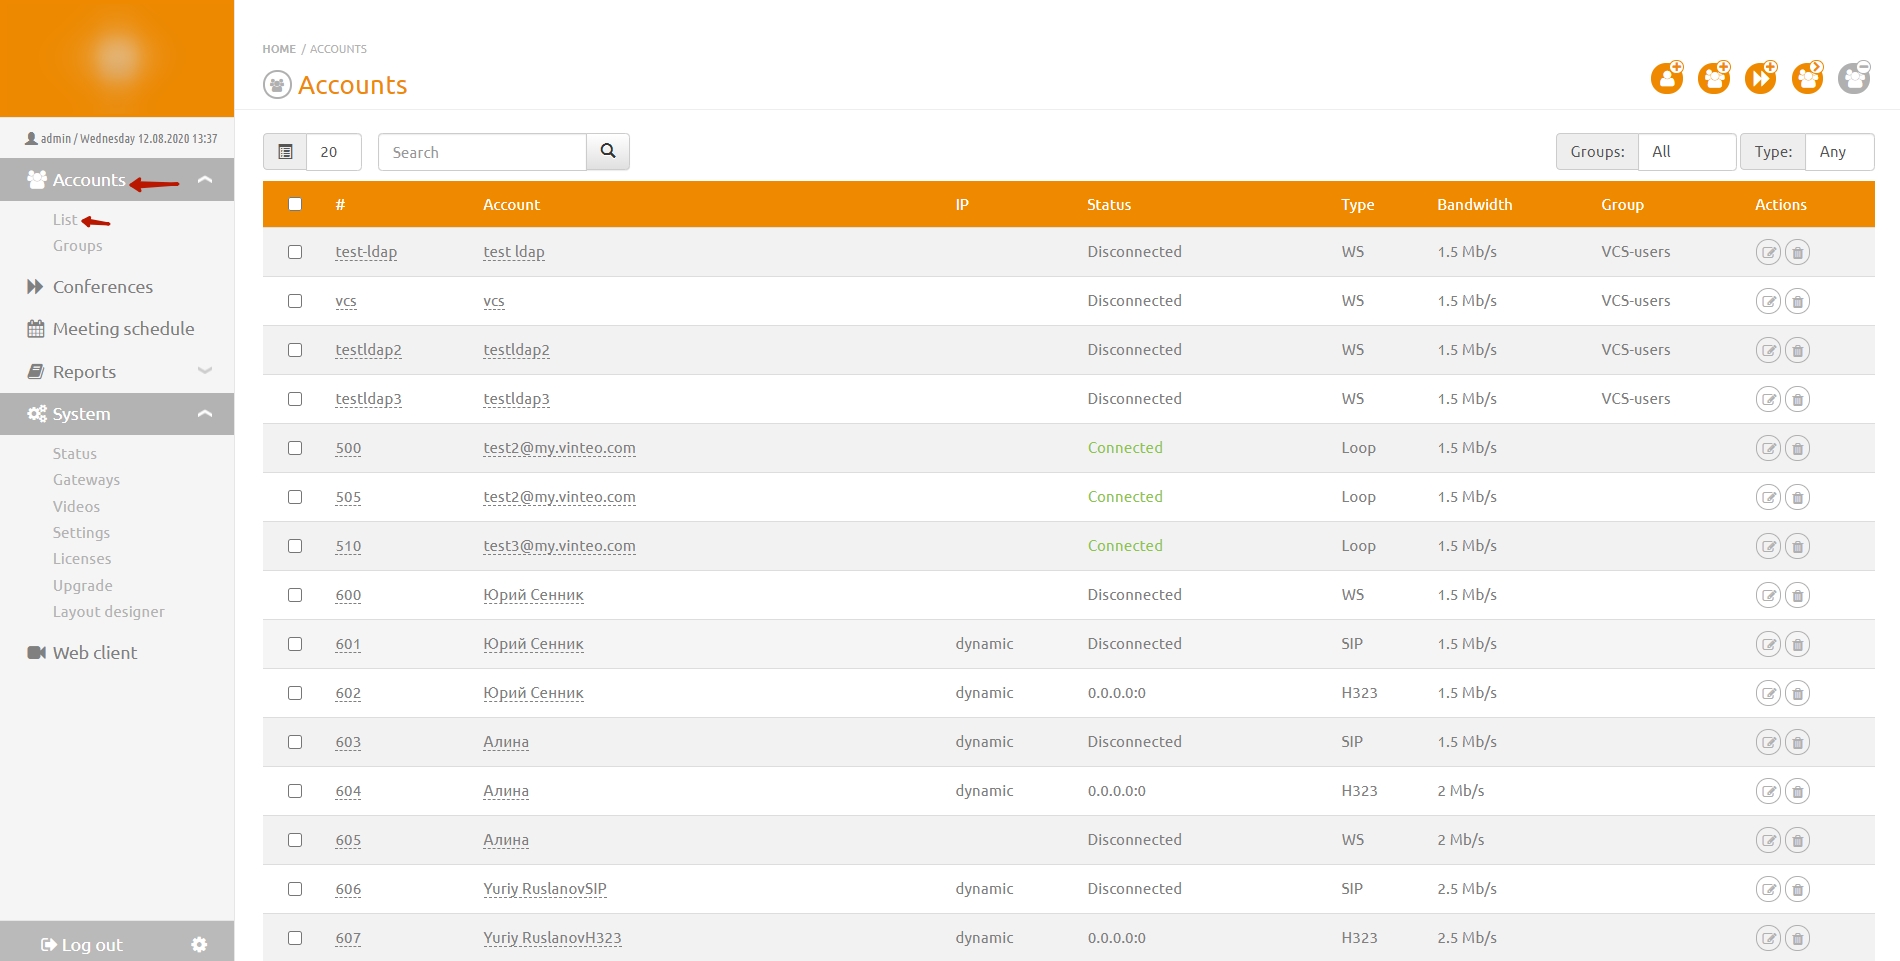
- In the menu on the functional panel, click on the Accounts section and select the List section. The Accounts page will open.
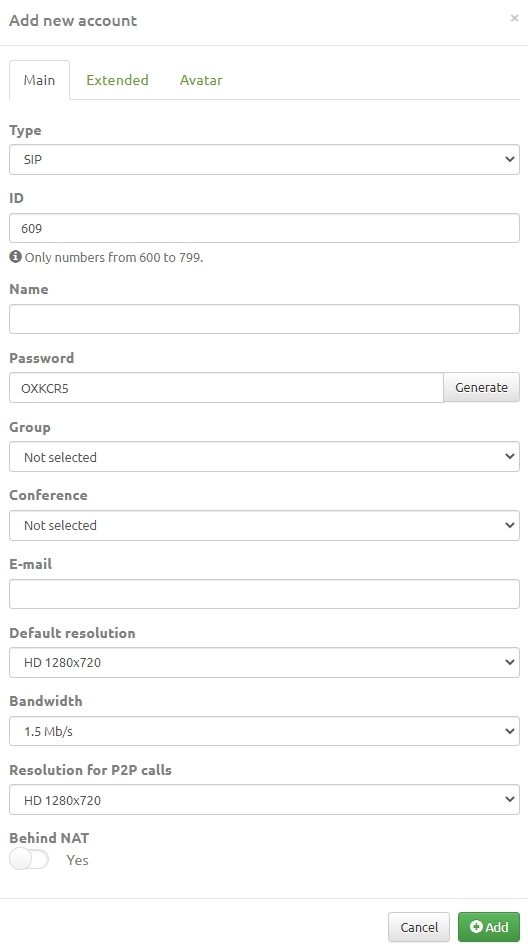
2. Click the Add new account button at the top right of the screen. Откроется модальное окно, в котором находятся 3 вкладки: Main, Extended, Avatar. Enter account data.
3. In the Type string choose the method of connection of accounts equipment.
- Choose SIP if the participant connect using the SIP protocol.
- Choose H.323 if the participant connect using the H.323 protocol.
- Choose WS if the participant connect using the WebRTC technology.
- Choose Loop if the participant connect as remote server account and this server has a connection on the Gateways page. For example, an account of a digital PBX, Lync / Skype for Business, Asterisk.
4. In the ID string enter an account ID. The number can contains digits and letters of the Latin alphabet, by default the server offers numbers from digit 100. Number is a login for registering account's equipment on the server and login of the participant's personal account on the VINTEO server.
5. In the Name string enter an account information.
6. In the Password string enter a password or click Generate button.
7. In the Group string, you can choose one of the previously created groups from the drop-down list.
8. In the Conference string you can choose the previously created conferences rooms to add an account in these automatically.
9. Enter an account's e-mail address in the E-mail string. The server use this string to send notifications to e-mail about scheduled conferences and reminder notifications about starting of the conference, in which account take part.
10. In the Default resolution string you must specify the default account resolution for conferences.
11. In the Bandwidth string you can choose a bandwidth from account equipments to VINTEO server. This parameter affects the default connection speed when connecting to a conference.
12. In the Resolution for P2P calls string you must specify an account resolution in which the connection will do in point-to-point mode.
13. Behind NAT switcher turn on / off the translation technology of network addresses when account connect to the server.
14. Click the Add button to save information to the server.
Extended settings
You can edit the advanced parameters of the account connection if you go to the Extended tab.
- Enter the account's IP address if the account connects via SIP protocol in no registration mode or if the account connects via H.323 protocol in no registration with gatekeeper mode. This string defaults has 'dynamic' value in registration mode.
- The Port string has port numbers of the connecting account. For the SIP it must be 5060 port. For the H.323 it must be 1720 port.
- The Transport string defines the data transport protocol for SIP accounts and transporting video and audio streams for them. Values are UDP, TCP or TLS.

