Quick start: различия между версиями
Alina (обсуждение | вклад) |
Alina (обсуждение | вклад) |
||
| Строка 54: | Строка 54: | ||
For a quick start, the settings on the "Basic" tab, "Anonymous settings" pages and adding test Accounts are required. | For a quick start, the settings on the "Basic" tab, "Anonymous settings" pages and adding test Accounts are required. | ||
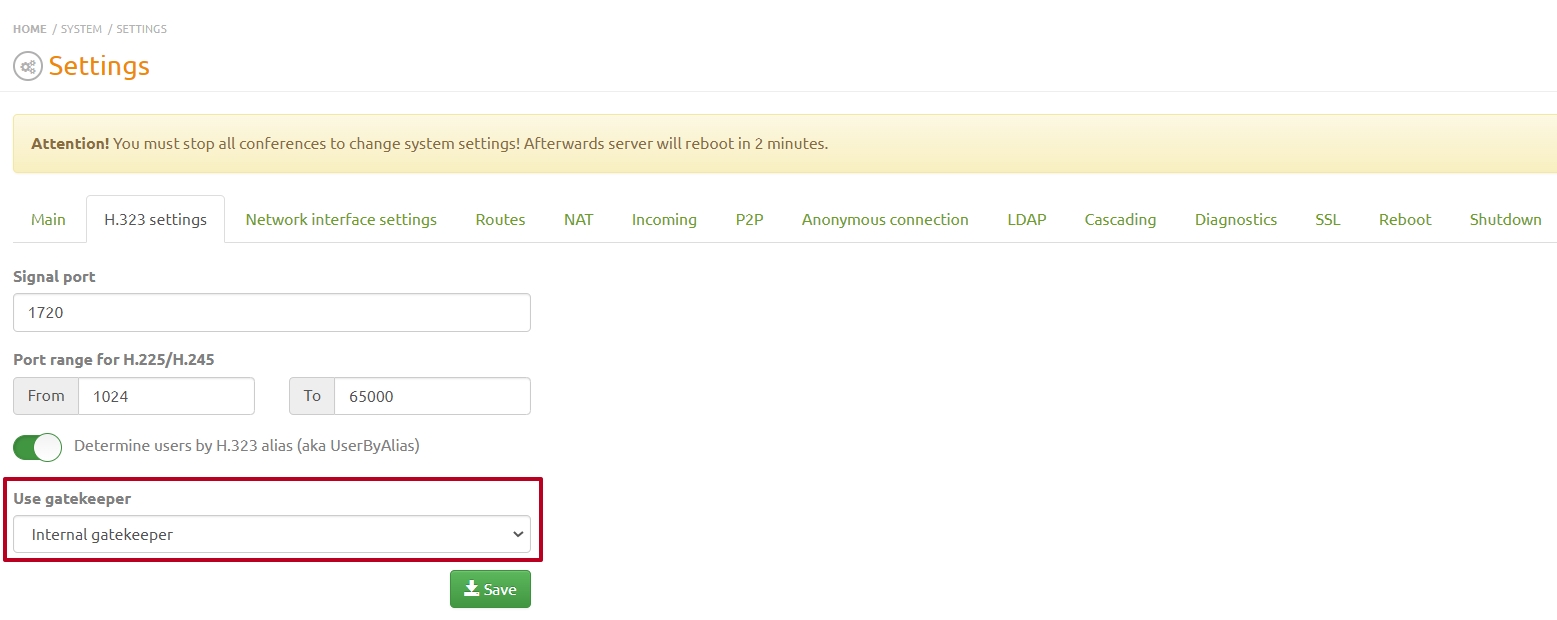
1. To work with registered H.323 subscribers, go to "Settings" => to the "Main" tab and enable the "Internal Gatekeeper" server; | 1. To work with registered H.323 subscribers, go to "Settings" => to the "Main" tab and enable the "Internal Gatekeeper" server; | ||
| − | [[Файл:Settings - H.323.jpg| | + | [[Файл:Settings - H.323.jpg||800px|безрамки|центр|Settings - H.323]] |
Версия 12:47, 24 июня 2022
These instructions are for the quick installation and testing of the Vinteo VCS server.
Содержание
Preparing the network
When deploying a server inside the corporate network behind NAT and FW, the following settings have to be made: Server settings
Basic tab
On the Settings page, under the Basic tab, check and set the ports required for operation:
- H323 - TCP: 1720, TCP: H225/245 change from 1024-65000 to 20000-65000 (the port range can be changed by limiting the number to what you need);
- SIP - 5060;
- save your settings.
Network Interface Settings tab
On this tab, after the first launch and login to the web-interface, enter the settings that were set up through the command line during the installation of the Vinteo VCS server, add the DNS-server address and save the settings. If you use two or more network interfaces, it is recommended to use the first interface eth0 for access to the server from external network, and the second interface for local network clients. Routing of local clients to and from external clients is done on the "Routes" tab. When adding an interface, the server must be restarted after saving the settings. After restarting, the second interface should have Up status.
NAT Tab
On this tab write in "External IP" field external address of server, mark required protocols to work through NAT - H.323 and/or SIP. Write the local networks as given in the example on the page, each on a new line. Set the RTP port range (default is 20000-65000). Save your settings.
FireWall and NAT settings
For the server to work properly through the external network, it is necessary to arrange passing of traffic in both directions on the ports which have been set above in the server settings. The table shows the default values:
| Port | Protocol | Assignment |
|---|---|---|
| 22 | TCP/UDP | SSH for Support Services, if required |
| 443 | TCP/UDP | For Web services |
| 1719 | UDP | H.323 Registration, Logon and Status (RAS) |
| 1720 | TCP | H.323 - Call Signalling (H.225) |
| 3478 | UDP | STUN needed for WebRTC (not effective with symmetric NAT) |
| 5060 | TCP/UDP | SIP |
| 5061 | TCP | SIP TLS signaling |
| 1024-65000 | TCP | H.323 (H.225/245) If not changed as above (20000-65000) |
| 20000-65000 | UDP | Media (RTP/RTCP) |
Server and client preparation
Setting up
For a quick start, the settings on the "Basic" tab, "Anonymous settings" pages and adding test Accounts are required. 1. To work with registered H.323 subscribers, go to "Settings" => to the "Main" tab and enable the "Internal Gatekeeper" server;
